Cable Lying Biceps Curl: Form, Muscles Worked, Sets, Tips & FAQ
Learn how to perform the Cable Lying Biceps Curl with strict form for better biceps isolation and constant tension. Includes muscles worked, setup, execution steps, sets by goal, mistakes, FAQ, and recommended equipment.
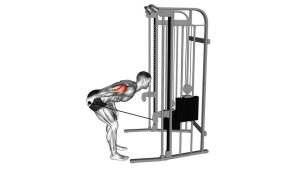
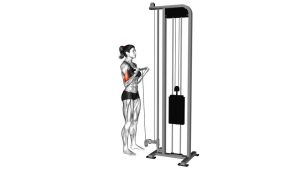
Cable Lying Biceps Curl
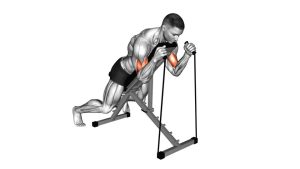
This variation emphasizes controlled elbow flexion with minimal body movement. Because the body is supported, the exercise makes it easier to focus on the biceps brachii instead of using hip drive, torso lean, or shoulder swing to move the load. The cable also helps maintain tension through most of the range of motion, making it a strong option for hypertrophy-focused arm training.
Quick Overview
| Body Part | Biceps |
|---|---|
| Primary Muscle | Biceps brachii |
| Secondary Muscle | Brachialis, brachioradialis, forearm flexors |
| Equipment | Cable machine, straight bar or cable handle attachment, bench or floor space |
| Difficulty | Beginner to Intermediate |
Sets & Reps (By Goal)
- Muscle growth: 3–4 sets × 8–12 reps with controlled tempo and a strong top squeeze
- Technique practice / isolation: 2–3 sets × 10–15 reps using moderate weight and strict form
- Arm finisher: 2–3 sets × 12–20 reps with lighter load and minimal rest
- Strength-focused arm accessory: 3–4 sets × 6–8 reps with full control and no cheating
Progression rule: Add reps before adding weight. Only increase load when you can maintain a full range of motion, steady elbow position, and a slow lowering phase.
Setup / Starting Position
- Set the cable: Attach a straight bar, EZ-style cable bar, or single handle to a low pulley.
- Position yourself: Lie flat on a bench or on the floor facing upward, with your head farther from the weight stack and the cable line aligned so resistance pulls from behind or slightly above your head depending on setup.
- Grip the attachment: Use a supinated grip (palms up) about shoulder-width apart if using a bar, or a secure underhand grip if using handles.
- Set the arms: Begin with the elbows extended and close to a stable path. Keep the upper arms quiet and avoid flaring them out.
- Brace lightly: Keep your head neutral, shoulders down, and core engaged so the torso stays still during the curl.
Tip: Before your first working set, test the cable angle with a light load. The best setup allows smooth resistance without the stack slamming or going slack during the rep.
Execution (Step-by-Step)
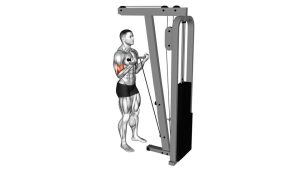
- Start from extension: With the elbows nearly straight, let the biceps stretch without losing shoulder position.
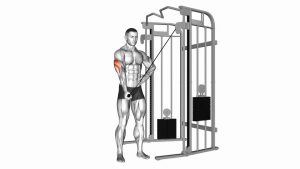
- Initiate the curl: Bend at the elbows and pull the attachment toward your upper chest or forehead path, depending on the cable angle and setup.
- Keep elbows controlled: The upper arms should stay mostly fixed. Avoid letting the shoulders roll forward to help the weight up.
- Squeeze at the top: When the biceps are fully shortened, pause briefly and contract the arms hard without collapsing the wrists.
- Lower slowly: Return the attachment under control until the elbows are nearly straight again, keeping tension on the biceps throughout.
- Repeat smoothly: Maintain the same tempo and range of motion for every rep.
Pro Tips & Common Mistakes
- Use a strict tempo: Lift with control, squeeze briefly, and lower slower than you lift.
- Keep the wrists neutral: Don’t let wrist flexion steal tension from the biceps.
- Don’t chase momentum: The lying position is meant to reduce cheating, so keep the torso quiet.
- Stay in the tension zone: Don’t relax completely at the bottom if that causes slack in the cable.
- Avoid shoulder compensation: Excessive front-delt involvement usually means poor cable angle or too much load.
- Match the attachment to comfort: Some lifters prefer a straight bar, while others feel better with an EZ attachment or single handles.
- Use it after compound pulling work: This exercise works especially well later in an arm or upper-body session when you want strict isolation.
FAQ
What makes the Cable Lying Biceps Curl different from a standing cable curl?
The lying position reduces body English and makes it harder to use momentum. That usually improves biceps isolation and helps lifters keep cleaner reps.
Is this exercise good for building bigger biceps?
Yes. It can be excellent for hypertrophy because it promotes strict form, strong peak contraction, and steady cable tension through much of the movement.
Should I fully lock out my elbows at the bottom?
You can approach full extension, but avoid aggressively snapping into lockout. Keep the movement smooth and tension-focused rather than forcing the joint position.
Which attachment is best for this exercise?
A straight bar is common, but an EZ-style attachment or individual handles may feel better on the wrists and elbows. Use the option that lets you keep the best form.
Where should I feel the exercise most?
You should feel it mainly in the front of the upper arms, especially during the mid-range and top squeeze. If you mainly feel the shoulders or wrists, adjust the setup and reduce the load.
Recommended Equipment
- Straight Cable Bar Attachment — useful for classic two-arm cable curls with a fixed grip
- EZ Curl Cable Attachment — often more comfortable on the wrists during repeated curling sets
- Single D-Handle Cable Attachment — great for unilateral arm work and grip-position adjustments
- Flat Weight Bench — provides a more stable and comfortable setup for lying cable curls
- Lifting Straps — optional support if grip fatigue limits your biceps training volume
Tip: Prioritize a smooth cable setup and comfortable attachment before increasing load. Better setup usually improves arm tension more than simply adding weight.