Suspended Chest Press (TRX/Rings): Form, Sets & Reps, Tips, and FAQ
Learn the Suspended Chest Press using TRX straps or rings to build chest strength, shoulder stability, and core control. Step-by-step form cues, sets by goal, common mistakes, FAQs, and recommended equipment.
Suspended Chest Press (Suspension Trainer / Rings)
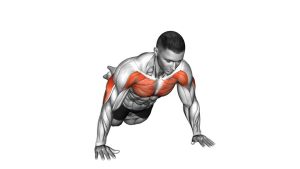
This exercise looks like a push-up variation, but the instability of straps/rings makes it a unique chest-builder and stabilizer drill. You control depth with your body angle: the more you lean forward, the harder it becomes. Prioritize smooth reps, neutral wrists, and a tight ribcage-to-hips position to keep tension in the chest instead of the shoulders.
Quick Overview
| Body Part | Chest |
|---|---|
| Primary Muscle | Pectoralis major |
| Secondary Muscle | Anterior deltoids, triceps, serratus anterior, core stabilizers (anti-extension) |
| Equipment | Suspension trainer (TRX-style) or gymnastic rings + secure anchor point |
| Difficulty | Intermediate (Advanced if you use a steep forward lean or single-leg stance) |
Sets & Reps (By Goal)
- Hypertrophy (muscle building): 3–5 sets × 8–12 reps (60–90 sec rest)
- Strength focus: 4–6 sets × 4–8 reps (90–150 sec rest, harder body angle)
- Stability / control: 2–4 sets × 10–15 reps (slow tempo, 45–75 sec rest)
- Warm-up / activation: 2–3 sets × 8–10 reps (easy angle, crisp technique)
Progression rule: First increase your forward lean (harder angle) while keeping perfect control. Next, increase reps. Only then add tempo (3–4 sec lower) or pauses at the bottom.
Setup / Starting Position
- Set the straps/rings: Adjust so handles sit around mid-chest height when you stand upright.
- Grip: Hold handles with a neutral grip; wrists straight (don’t let them bend back).
- Body angle: Step your feet back to lean forward—more lean = more resistance.
- Brace: Squeeze glutes, brace abs, ribs down. Your body should look like a plank.
- Shoulders “packed”: Keep shoulders down and stable (no shrugging).
Tip: If your shoulders feel cranky, start more upright and keep elbows closer to 30–45° from your torso.
Execution (Step-by-Step)
- Start tall and braced: Arms extended, body in a straight line, eyes forward.
- Lower with control: Bend elbows and let the chest travel between the handles; keep wrists neutral.
- Elbow path: Keep elbows slightly out (about 30–45°), not flared straight sideways.
- Reach depth safely: Stop when you feel a strong chest stretch without shoulder pinch or rib flare.
- Press back: Drive the handles forward until arms are straight; finish with chest + triceps, not a shrug.
Pro Tips & Common Mistakes
- Keep a “plank body”: Glutes tight, abs braced, ribs down—no banana-back.
- Don’t chase depth: Deeper isn’t better if you lose shoulder position or feel pinching.
- Stay symmetrical: Handles should move evenly; don’t let one arm dominate.
- Avoid elbow flare: Too wide shifts stress to shoulders; aim 30–45° elbow angle.
- Control the eccentric: 2–4 seconds down builds chest and improves stability.
- Progress smart: Make the body angle harder before adding reps or tempo tricks.
FAQ
Where should I feel the suspended chest press?
Mostly in the chest, with strong support from the triceps and front delts. You should also feel your core working to keep your body rigid. If you feel shoulder pinching, reduce depth and make the angle easier.
Is this better than push-ups for the chest?
It can be, especially if you want more instability and a bigger demand on stabilizers. Push-ups are still excellent for chest growth—this variation adds a new stimulus and makes progression easy by simply changing your body angle.
How do I make it harder without adding weight?
Walk your feet back to increase the forward lean, slow the lowering phase (3–5 seconds), add a pause at the bottom, or use a staggered/single-leg stance for more stability challenge.
What’s the most common mistake?
Losing body alignment—hips sagging, ribs flaring, or shoulders collapsing forward. Keep the movement controlled and scale the angle so you can stay rigid like a plank.
Can beginners do this exercise?
Yes—start very upright and use a small range of motion. Treat it as a technique drill first, then gradually increase the forward lean as control improves.
Recommended Equipment (Optional)
- Suspension Trainer (TRX-style) — the classic tool for suspended presses and full-body training
- Gymnastic Rings (with straps) — great for presses, dips, rows, and progressing calisthenics
- Door Anchor for Suspension Trainers — lets you set up safely at home without drilling
- Wall/Ceiling Mount Anchor (Heavy-Duty) — more permanent setup for consistent strap height and stability
- Thick Exercise Mat — improves grip and comfort for your stance and knee-supported regressions
Tip: Always test your anchor point before training. If the setup shifts, slips, or feels unstable, stop and secure it properly.