Lever Incline Chest Press: Upper Chest Machine Press Form, Sets & Tips
Learn the Lever Incline Chest Press (plate-loaded machine) to target the upper chest with a stable pressing path. Step-by-step form, sets by goal, common mistakes, FAQs, and recommended equipment.
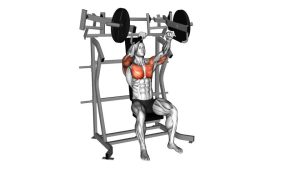
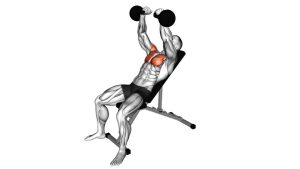
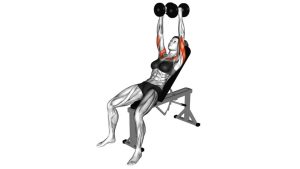
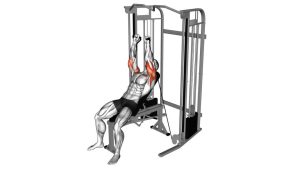
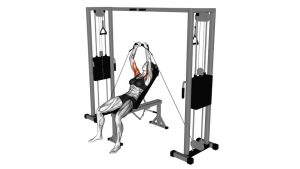
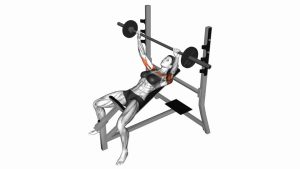
Lever Incline Chest Press
This machine is ideal when you want to train the upper chest hard while keeping the movement consistent. Because the path is fixed, focus on tight setup (scapula retracted, wrists stacked, feet planted) and a controlled eccentric to keep tension on the pecs instead of the shoulders.
Quick Overview
| Body Part | Chest |
|---|---|
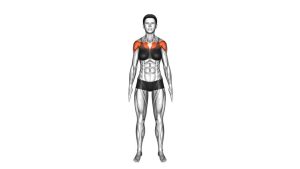
| Primary Muscle | Upper chest (Pectoralis major — clavicular head) |
| Secondary Muscle | Anterior deltoids, triceps, serratus anterior (stabilization) |
| Equipment | Plate-loaded incline chest press machine + weight plates |
| Difficulty | Beginner–Intermediate (easy to learn; can be loaded heavy safely) |
Sets & Reps (By Goal)
- Hypertrophy (upper chest size): 3–5 sets × 8–12 reps (60–90 sec rest, controlled lowering)
- Strength focus: 3–6 sets × 4–8 reps (2–3 min rest, crisp reps, no bouncing)
- Strength + hypertrophy: 3–4 sets × 6–10 reps (90–120 sec rest)
- Chest finisher / pump: 2–3 sets × 12–20 reps (45–75 sec rest, constant tension)
Progression rule: Add reps first (same clean form), then add small plate jumps. Keep 1–2 reps in reserve on most sets and push closer to failure on your final set if recovery allows.
Setup / Starting Position
- Adjust seat height: At the start, handles should align around upper-chest / clavicle level, not the neck or low chest.
- Set your back: Upper back and head against the pad. Keep a natural chest-up posture (no excessive arching).
- Feet planted: Firm stance for stability—think “drive feet into the floor” to stay tight.
- Grip & wrists: Neutral wrists stacked over elbows; grip the handles evenly.
- Shoulders packed: Pull shoulder blades down and back to keep the shoulders from rolling forward.
Tip: If you feel it mostly in the front delts, slightly lower the seat and tuck elbows a bit more.
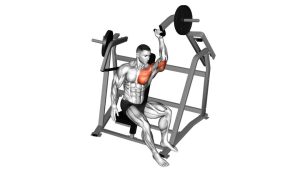
Execution (Step-by-Step)
- Brace & breathe: Inhale, keep ribs controlled, and maintain shoulder blades pinned to the pad.
- Press smoothly: Drive the handles up and forward in the machine’s arc while keeping wrists neutral.
- Stay in your lane: Elbows track slightly under the wrists—avoid flaring straight out to 90°.
- Finish strong: Stop just short of an aggressive lockout; keep tension on the chest.
- Control the descent: Lower slowly (about 2–3 seconds) until you reach a deep but comfortable stretch.
Pro Tips & Common Mistakes
Pro Tips
- Use a “chest to handles” cue: Keep chest proud and press from a stable upper back.
- Pause reps: Light 0.5–1 sec pause near the bottom improves control and chest tension.
- Match seat to your shoulders: Small seat adjustments can massively change chest vs. delt emphasis.
- Use full ROM you can own: Deep stretch is great, but only if shoulders stay packed.
Common Mistakes
- Elbows flared too wide: Can increase shoulder stress and shift work to delts.
- Shoulders rolling forward: Loses chest tension and irritates the front of the shoulder.
- Bouncing at the bottom: Reduces muscle tension and can stress joints.
- Half reps with heavy load: Better to reduce plates and own the full range.
- Over-locking out: Resting on joints at the top reduces chest time-under-tension.
FAQ
Where should I feel the Lever Incline Chest Press?
Primarily in the upper chest (near the collarbone). You’ll also feel the triceps and front delts. If it feels mostly like shoulders, lower the seat slightly and keep elbows a bit more tucked.
Is a plate-loaded incline press machine better than dumbbells?
It’s not “better,” just different. The machine offers a stable path and easy loading, which is great for hypertrophy and safe progression. Dumbbells demand more stability and can allow a more customized path. Use both if you can.
How low should I bring the handles?
Lower until you feel a strong chest stretch while keeping the shoulders down and back. If you feel shoulder pinching, shorten range slightly or adjust the seat and elbow angle.
What grip should I use?
Start with the machine’s neutral/standard grip. A slightly narrower grip often feels more triceps-heavy, while a wider grip can increase chest stretch but may stress shoulders if you flare elbows.
Who should be cautious with this exercise?
Anyone with significant shoulder pain or impingement symptoms should be cautious. Reduce ROM, adjust seat height, tuck elbows, and consult a professional if symptoms persist.
Recommended Equipment
- Olympic Weight Plates (2-inch) — essential for plate-loaded machines; choose rubber or iron based on your gym setup
- Lifting Straps — helpful if grip fatigue limits heavy sets
- Training Gloves (Optional) — improves comfort on aggressive machine handles
- Resistance Bands Set — great for warm-ups (band pull-aparts) to prep shoulders and upper back
- Foam Roller — supports thoracic mobility work to improve incline pressing comfort
Tip: Pair this press with an upper-back pull (rows/face pulls) to keep shoulder mechanics balanced.