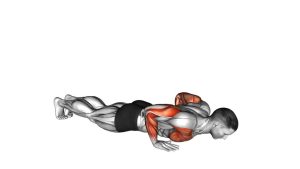
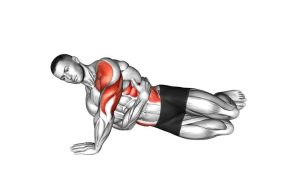
Modified Hindu Push-Up (Plyometric): Explosive Chest & Shoulder Power + Full-Body Flow
Build explosive upper-body power with the Modified Plyometric Hindu Push-Up. Learn perfect form, sets & reps by goal, common mistakes, FAQs, and the best optional equipment for safer, stronger reps.
Modified Hindu Push-Up (Plyometric)
This variation is “modified” because the body angle and range can be adjusted to match your strength and shoulder mobility. Use an intensity you can control—plyometrics should still look clean. If reps get sloppy, reduce speed, shorten range, or elevate your hands.
Quick Overview
| Body Part | Chest |
|---|---|
| Primary Muscle | Chest (Pectoralis major) |
| Secondary Muscle | Anterior deltoids, triceps, serratus anterior, core stabilizers |
| Equipment | None (optional: mat, push-up handles/parallettes, wrist wraps, incline surface) |
| Difficulty | Intermediate (advanced if performed highly explosive and deep) |
Sets & Reps (By Goal)
- Power (plyometric focus): 4–6 sets × 3–6 reps (60–120 sec rest, crisp reps only)
- Muscle & athletic strength: 3–5 sets × 6–10 reps (60–90 sec rest, controlled landings)
- Conditioning / fat loss circuits: 2–4 sets × 10–15 reps (30–60 sec rest, moderate speed)
- Skill / mobility patterning: 2–3 sets × 5–8 reps (slow dive, smooth drive, perfect form)
Progression rule: First improve shape (smooth dive + stable shoulders), then add speed. Increase reps by 1–2 or add a set. Only progress depth/explosiveness when you can land quietly and keep ribs down.
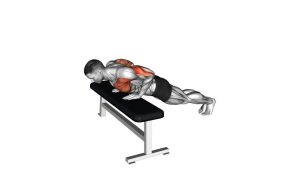
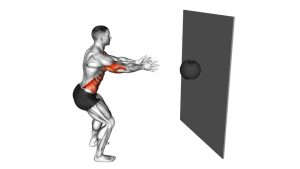
Setup / Starting Position
- Hands: Place hands slightly wider than shoulder width, fingers spread, grip the floor.
- Body angle (modified): Start with hips slightly higher than a standard push-up (a mild pike). For an easier version, place hands on a bench/box/wall.
- Brace: Squeeze glutes lightly and keep ribs down to avoid arching your lower back.
- Shoulders: Pull shoulders “down and away from ears.” Keep the neck long.
- Surface: Use a non-slip mat or stable floor. If wrists complain, use handles/parallettes.
Tip: If you’re new to the pattern, begin with a slow tempo (no plyo) until you can keep the dive path consistent.
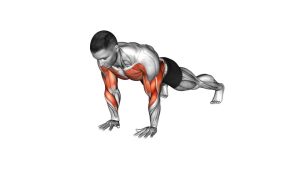
Execution (Step-by-Step)
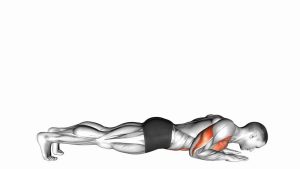
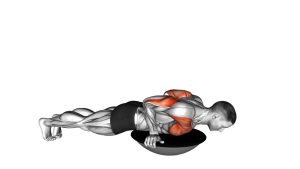
- Dive in: Bend elbows and let the chest glide forward and down in a smooth arc (don’t crash).
- Load the bottom: Chest comes close to the floor, elbows naturally bent, shoulders stable (no shrugging).
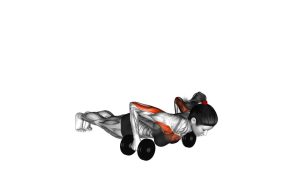
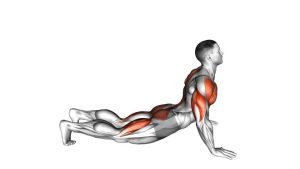
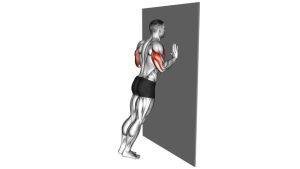
- Explosive press: Drive the floor away powerfully to return toward your start position. Think “push fast.”
- Soft landing: Abs stay braced; hands stay planted; land quietly through the palms.
- Reset rhythm: Return to the modified start position and flow into the next rep without losing shape.
Pro Tips & Common Mistakes
- Keep reps “snappy”: Plyo reps should be powerful and precise—stop 1–2 reps before form breaks.
- Don’t flare aggressively: Mild elbow flare is fine, but keep shoulder control and avoid dumping into the joint.
- Ribs down: Over-arching turns this into a low-back move. Brace like a plank.
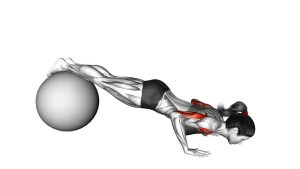
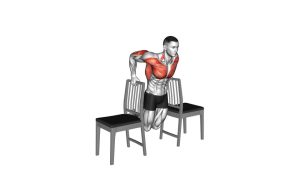
- Use an incline to scale: Hands on a bench/box makes it easier and wrist-friendlier.
- Wrists first: If wrists get cranky, switch to handles/parallettes or do it on fists (only if comfortable).
- Don’t “face-plant”: The dive is a glide. Control the eccentric so the press stays explosive.
FAQ
What makes this “plyometric”?
The press phase is performed with explosive intent. You move quickly from the loaded bottom position into a powerful drive, training the stretch–shortening cycle of the chest/shoulders/triceps.
Is this more chest or shoulders?
It’s both. The chest drives the press, while the forward dive and arm angle increase demand on the front delts and shoulder stabilizers. Keep shoulders “down” to avoid shrug-dominant reps.
How do I make it easier without losing the pattern?
Use an incline (hands on a bench/box/wall), reduce depth, and slow the dive. Then re-introduce speed gradually.
What if my wrists hurt?
Try push-up handles/parallettes, a neutral wrist position, and a longer warm-up. You can also scale to an incline to reduce load. Avoid forcing range if pain persists.
How should I program it with other push-ups/pressing?
Use it early in the session for power (low reps, longer rest), then follow with slower pressing (push-ups, dips, or presses) for strength/hypertrophy.
Recommended Equipment (Optional)
- Push-Up Handles / Parallettes — reduces wrist extension and improves stability for faster reps
- Non-Slip Exercise Mat — improves traction and comfort on dives and landings
- Wrist Wraps (Training Support) — optional support if wrists fatigue during high-speed sets
- Resistance Bands Set — great for warm-ups (pull-aparts) and balancing push volume with upper-back work
- Incline Push-Up Board / Stable Box Alternative — helps scale difficulty while keeping the dive-and-drive pattern
Tip: Keep optional gear simple. The best upgrades are usually a stable grip (handles) and a non-slip surface (mat).