Standing Arm Circles (Arm Flinging): Shoulder Warm-Up, Form, Sets & Tips
Learn Standing Arm Circles (Arm Flinging) to warm up shoulders, improve mobility, and prep for pressing. Step-by-step form, sets by goal, mistakes to avoid, FAQs, and recommended gear.
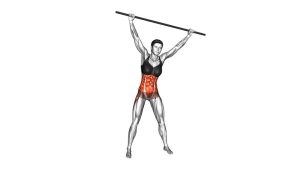
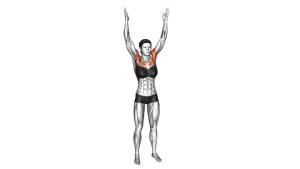
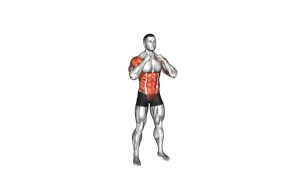
Standing Arm Circles (Arm Flinging)
This movement should feel like your shoulders are “waking up”—light heat, easy rhythm, and improved mobility after 30–90 seconds. The best reps are controlled and pain-free. Use momentum, but avoid snapping the arms or shrugging up into your neck.
Quick Overview
| Body Part | Shoulders |
|---|---|
| Primary Muscle | Deltoids (anterior / lateral emphasis depending on circle direction & arm path) |
| Secondary Muscle | Rotator cuff (stabilizers), scapular stabilizers (serratus anterior, mid/lower traps) |
| Equipment | None (optional: light dumbbells or mini bands for progression) |
| Difficulty | Beginner (ideal warm-up / mobility drill) |
Sets & Reps (By Goal)
- General warm-up (pre-workout): 1–2 sets × 30–60 seconds (forward + backward if possible)
- Mobility & shoulder health (daily): 2–3 sets × 45–90 seconds (easy pace, smooth circles)
- Overhead prep (pressing days): 2–4 sets × 20–40 seconds (small-to-medium circles, controlled)
- Active recovery: 1–3 sets × 60 seconds (very light, focus on comfort)
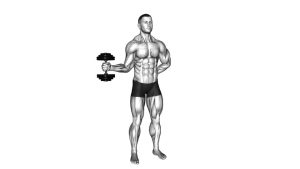
Progression rule: Increase time first, then range, then tempo. Add light load (1–3 lb / 0.5–1.5 kg) only if your shoulders stay relaxed and pain-free.
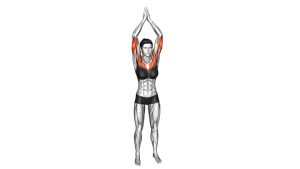
Setup / Starting Position
- Stand tall: Feet hip-width, knees soft, ribs stacked over hips (no excessive arching).
- Relax your shoulders: “Down and wide” — avoid shrugging into the neck.
- Arms long but not locked: Elbows gently soft; wrists neutral.
- Brace lightly: Keep your torso quiet so the shoulders do the work.
- Choose a range: Start with small circles if you’re stiff or warming up cold.
Tip: Think “smooth circles” instead of “fast flailing.” Warmth and control beat speed.
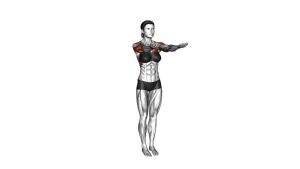
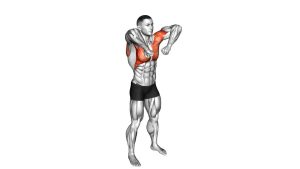
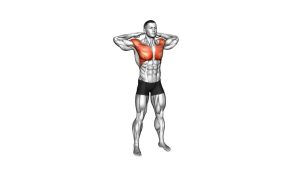
Execution (Step-by-Step)
- Initiate the motion: Begin circling the arms from the shoulders (not the elbows).
- Build rhythm: Move into a steady tempo—smooth, continuous circles.
- Control the torso: Keep ribs down and avoid excessive twisting or bouncing.
- Adjust circle size: Start small → gradually increase range as the shoulders loosen up.
- Switch direction: After 20–45 seconds, reverse the circles (forward ↔ backward).
- Finish relaxed: Let the arms settle and notice improved shoulder comfort and range.
Pro Tips & Common Mistakes
Pro Tips
- Start small: Small circles are often best early in the warm-up.
- Breathe normally: Don’t hold your breath—keep it easy and rhythmic.
- Use both directions: Forward + backward circles prepare the joint more completely.
- Own the scapula: Keep shoulder blades sliding naturally—don’t pin them down hard.
- Pair it well: Great before presses, pull-ups, rows, handstands, and overhead work.
Common Mistakes
- Shrugging: Traps take over—cue “shoulders down, neck long.”
- Locked elbows: Makes the movement harsh—keep elbows softly bent.
- Going too fast: Turns into flailing—smooth control is the goal.
- Forcing range: Don’t chase huge circles if you feel pinching—reduce size.
- Twisting the torso: Keep the core stable and the circles shoulder-driven.
FAQ
Where should I feel standing arm circles?
Mostly in the shoulders (delts) with light stabilizer work around the shoulder blades. You should also feel warmth and improved mobility, not sharp pain or pinching.
How long should I do them for a warm-up?
For most people, 30–60 seconds is enough. If you’re very stiff or training overhead, do 60–90 seconds and include both directions.
Should I use weights for arm circles?
It’s optional. Start with bodyweight. If you add load, use very light dumbbells (typically 0.5–1.5 kg / 1–3 lb) and keep circles controlled.
What if I feel shoulder clicking?
Mild, painless clicking can be normal. If it’s painful or feels like pinching, reduce the circle size, slow the tempo, and avoid end-range positions. Stop if symptoms persist.
Are forward or backward circles better?
Both are useful. Forward often emphasizes the front delts a bit more; backward can feel better for posture and shoulder blade control. For balanced prep, do both.
Recommended Equipment (Optional)
- Light Dumbbells (1–3 lb) — optional progression for more shoulder endurance
- Mini Resistance Bands Set — great for adding gentle shoulder activation (warm-up circuits)
- Shoulder Pulley (Mobility Tool) — helpful for extra shoulder ROM work on recovery days
- Lacrosse Ball / Massage Ball — useful for pec/upper-back release to improve shoulder comfort
- Non-Slip Exercise Mat — comfortable base for warm-up circuits and mobility sessions
Tip: Keep warm-ups easy. Your goal is better movement quality and readiness—not fatigue.