Kneeling Wide-Hand Push-Up: Form, Sets, Tips & Chest-Focused Push-Up Guide
Learn how to do the Kneeling Wide-Hand Push-Up to target your chest with a beginner-friendly push-up variation. Step-by-step form cues, sets & reps by goal, common mistakes, FAQs, and recommended equipment.
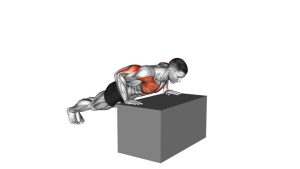
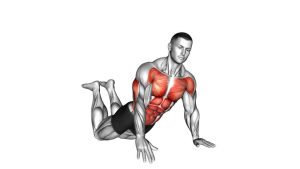
Kneeling Wide-Hand Push-Up
Wide-hand kneeling push-ups are all about tension and alignment. The goal is to keep a straight line from head to knees, maintain a stable shoulder position, and let the chest do the work. If your shoulders feel pinchy or your elbows flare aggressively, narrow your hands slightly and slow the tempo.
Quick Overview
| Body Part | Chest |
|---|---|
| Primary Muscle | Pectoralis major (chest) |
| Secondary Muscle | Anterior deltoids, triceps, serratus anterior, core stabilizers |
| Equipment | None (optional: mat, push-up handles, resistance band) |
| Difficulty | Beginner (scalable by hand width, tempo, and range of motion) |
Sets & Reps (By Goal)
- Strength (controlled reps): 3–5 sets × 5–8 reps (90–150 sec rest)
- Muscle/Hypertrophy: 3–4 sets × 8–15 reps (60–90 sec rest)
- Endurance / Conditioning: 2–4 sets × 12–25 reps (30–60 sec rest)
- Beginner skill & consistency: 2–3 sets × 6–12 reps (45–90 sec rest)
Progression rule: Add reps first, then slow the lowering (3–4 seconds), then increase range of motion. When you can hit the top of your target rep range with perfect form, progress to a harder push-up variation.
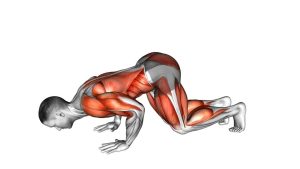
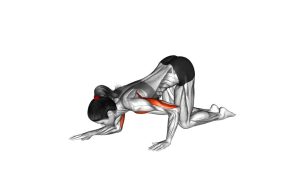
Setup / Starting Position
- Knees down: Kneel on a comfortable surface. Optionally place a mat/towel under the knees.
- Hands wide: Place hands wider than shoulder width (start moderately wide, then adjust).
- Brace posture: Tighten core and glutes lightly; create a straight line from head to knees.
- Shoulders set: Keep shoulders down and stable—avoid shrugging into your neck.
- Neutral head: Eyes slightly forward/down; keep the neck long.
Tip: If wrists are uncomfortable, elevate hands on a bench/box or use push-up handles to keep wrists neutral.
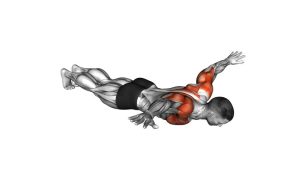
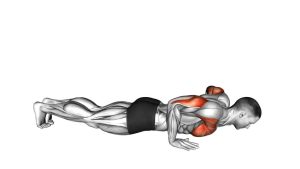
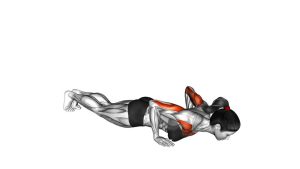
Execution (Step-by-Step)
- Inhale and lower: Bend elbows and lower your chest toward the floor with control.
- Elbow path: Let elbows flare slightly, but keep them controlled (avoid extreme flaring).
- Chest leads: Lower the chest between the hands; keep hips aligned with torso (no sagging).
- Brief pause: Stop just above the floor while maintaining tension—don’t collapse.
- Exhale and press: Push the floor away smoothly until arms are nearly straight.
- Reset: Re-stack shoulders and core at the top before the next rep.
Pro Tips & Common Mistakes
Pro Tips
- Own the eccentric: Lower for 2–4 seconds to increase chest stimulus.
- Find your “best wide”: Too wide can irritate shoulders—use the widest pain-free position.
- Press the floor apart: Lightly “spread” the floor with your hands to stabilize shoulders.
- Keep tension at the bottom: Hover just above the floor instead of resting.
Common Mistakes
- Hips sagging: Causes lower-back stress and reduces chest work.
- Shoulders shrugging: Overloads traps/neck; keep shoulders down.
- Extreme elbow flare: Can stress shoulders—keep a controlled angle.
- Half reps with no control: Reduce reps and slow the tempo for quality.
FAQ
What does a wide-hand kneeling push-up target most?
It primarily targets the chest (pectoralis major), with assistance from the anterior deltoids, triceps, serratus anterior, and core stabilizers. The wider hand position generally increases chest emphasis.
How wide should my hands be?
Start slightly wider than shoulder width and adjust until it feels strong and comfortable. If shoulders feel pinchy, narrow your hands a bit and keep the elbows controlled.
Is this easier than a regular push-up?
Yes. Knees down reduces total load, making it a great push-up regression for beginners or higher-rep chest work.
How can I make it harder without switching exercises?
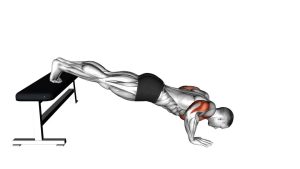
Slow the lowering (3–5 seconds), add a pause at the bottom, increase reps, elevate your knees slightly off a soft surface (advanced), or add a light resistance band across the upper back.
What if my wrists hurt?
Use push-up handles, dumbbells as handles, or elevate your hands on a bench/box. Also check that your wrists are stacked under your palms and you’re distributing pressure evenly through the whole hand.
Recommended Equipment (Optional)
- Push-Up Handles (Neutral Grip) — reduces wrist extension and can improve pressing comfort
- Thick Exercise Mat — protects knees and improves comfort for kneeling variations
- Loop Resistance Bands Set — adds resistance (banded push-ups) or supports assistance/progression work
- Core Sliders / Gliding Discs — useful for push-up variations and shoulder stability progressions
- Foam Roller — helpful for chest/upper-back mobility to support better push-up mechanics
Tip: Keep equipment optional—your best progress comes from consistent reps, controlled tempo, and clean alignment.