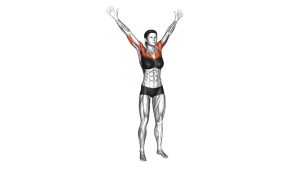
Roll Ball Pectorial Release (Chest): Technique, Sets, Tips & FAQ
Learn how to perform the Roll Ball Pectorial Release to reduce chest tightness and improve shoulder mobility. Includes setup, step-by-step execution, sets by goal, mistakes, FAQ, and recommended tools.
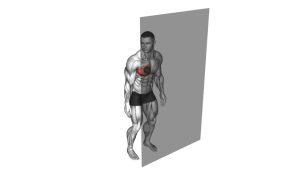
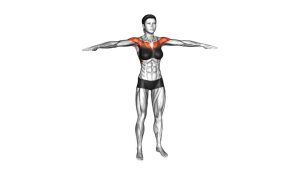
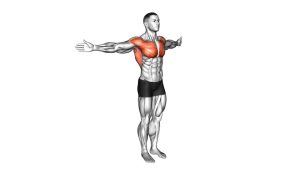
Roll Ball Pectorial Release
This is a tissue-quality drill, not a strength exercise. You’re looking for a “good pressure” sensation—mild tenderness is normal, but sharp pain is not. The best results come from slow rolling, short pauses on tight spots, and steady breathing.
Quick Overview
| Body Part | Chest |
|---|---|
| Primary Muscle | Pectoralis major / Pectoralis minor (soft tissue release) |
| Secondary Muscle | Anterior deltoid fascia (indirect); shoulder capsule area (avoid direct pressure) |
| Equipment | Massage ball (lacrosse ball or therapy ball) + wall (or floor) |
| Difficulty | Beginner (self-paced; intensity is adjustable) |
Sets & Reps (By Goal)
- Warm-up (before training): 1–2 rounds × 30–60 seconds per side (light pressure, steady breathing)
- Mobility & posture (daily/desk reset): 1–2 rounds × 60–90 seconds per side (pause on tight spots 10–20 seconds)
- Recovery (after pressing/upper body): 2 rounds × 60–120 seconds per side (slow roll + longer exhales)
- Trigger-point focus: 3–5 pauses per side × 10–25 seconds each (minimal rolling, more “hold and breathe”)
Progression rule: Increase time and consistency before increasing pressure. If you “brace” your shoulder or hold your breath, you’re going too hard—back off and keep it smooth.
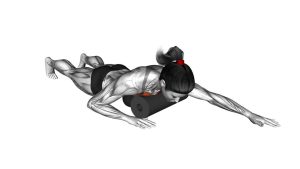
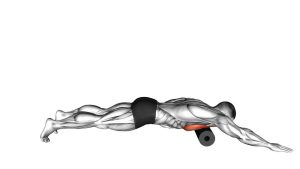
Setup / Starting Position
- Choose your surface: Start with a wall for easier pressure control. The floor is more intense.
- Place the ball: Put the ball on the upper chest, slightly inside the shoulder (avoid the front deltoid “tip” at first).
- Body position: Stand tall with ribs stacked and shoulders relaxed. Keep your neck long (no shrugging).
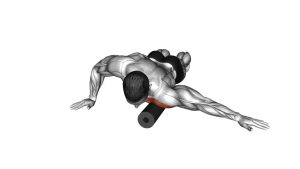
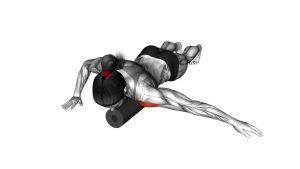
- Arm position (to expose fibers): Let the working arm rest by your side, then try slight abduction (arm out) or a gentle “goalpost” to access different areas.
- Set pressure: Lean in until it feels like a firm, tolerable pressure (not a sharp stab).
Tip: If the ball feels too intense, use a softer therapy ball first or reduce your lean into the wall.
Execution (Step-by-Step)
- Start at the upper-outer chest: Ball between chest and wall; shoulders down and relaxed.
- Roll slowly: Make small body shifts so the ball travels 1–3 inches at a time across the pec.
- Pause on tight spots: When you find a tender point, hold pressure and take 3–6 slow breaths.
- Change angles: Adjust your arm position slightly (arm low, arm out, or goalpost) to reach different muscle fibers.
- Finish gently: Reduce pressure and do a final light roll, then step away and shake the arm out.
Pro Tips & Common Mistakes
- Go slower than you think: Tissue work responds better to slow roll + pauses than fast scrubbing.
- Don’t roll the front shoulder joint: Stay on the pec muscle, not the bony front of the shoulder.
- Use breath to “unlock” tension: Long exhales help the pecs let go.
- Keep the ribcage stacked: Don’t flare ribs to chase range—keep posture neutral.
- Pressure is optional: More pressure isn’t always better; aim for tolerable intensity you can relax into.
- Pair it with strength: Great before rows/face pulls or after pressing to help shoulder position.
FAQ
Where should I feel this release?
Mostly in the front chest near the shoulder and under the collarbone. Mild tenderness is normal, but sharp pain or “electric” sensations are a sign to stop and adjust.
How long should I stay on a trigger point?
A good starting range is 10–25 seconds while breathing calmly. If the area feels more irritated afterward, shorten the hold and reduce pressure next time.
Wall or floor—which is better?
The wall is best for beginners and daily use because pressure is easier to control. The floor increases intensity and can be useful for experienced users—just avoid overdoing it.
Will this help rounded shoulders?
It can help reduce chest tightness that contributes to a rounded posture, but best results come from combining it with upper-back strengthening (rows, face pulls, band pull-aparts) and good desk posture habits.
When should I avoid this drill?
Avoid aggressive pressure if you have an acute shoulder injury, unexplained chest pain, nerve symptoms down the arm, or if this causes numbness/tingling or dizziness. When in doubt, keep it gentle or consult a qualified professional.
Recommended Equipment (Amazon Suggestions)
- Lacrosse Massage Ball Set (Firm) — simple, durable, great for deep pec trigger points (use control)
- Therapy Massage Ball Set (Soft + Firm) — perfect for beginners who want adjustable intensity
- Peanut Massage Ball (Double Ball) — useful for controlled pressure and broader contact (also great for upper back)
- Wall-Mount / Suction Massage Ball — stays in place, excellent for hands-free wall work
- High-Density Foam Roller — optional add-on for upper-back mobility (pairs well with chest release)
Tip: Start with a softer ball if you’re sensitive. The goal is relaxation and improved movement quality—not bruising.