Seated Cable Chest Fly: Proper Form, Sets & Reps, Tips, FAQ + Best Attachments
Learn how to do the Seated Cable Chest Fly with perfect form for chest growth and safer shoulders. Includes setup, step-by-step execution, sets & reps by goal, common mistakes, FAQs, and recommended equipment.
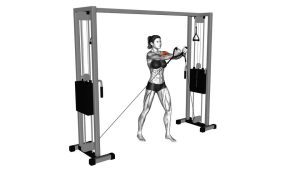
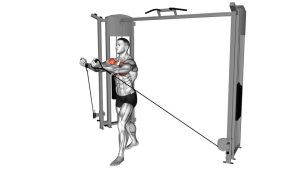
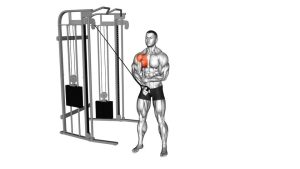
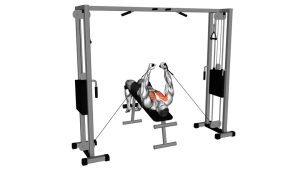
Seated Cable Chest Fly
Think of this as a “hug” for your pecs: your elbows stay softly bent, your shoulders stay down and back, and your hands meet in front of your chest without turning it into a press. Use a load you can control—your best reps should feel steady, quiet, and chest-dominant.
Quick Overview
| Body Part | Chest |
|---|---|
| Primary Muscle | Pectoralis major (sternal + clavicular fibers) |
| Secondary Muscle | Anterior deltoid, serratus anterior, biceps (stabilization), rotator cuff (stability) |
| Equipment | Cable machine (dual pulleys), 2 handles (D-handles), bench |
| Difficulty | Beginner–Intermediate (easy to learn, hard to master tempo + tension) |
Sets & Reps (By Goal)
- Muscle gain (hypertrophy): 3–4 sets × 8–12 reps (60–90 sec rest)
- Chest pump / finisher: 2–4 sets × 12–20 reps (30–60 sec rest, smooth tempo)
- Control + mind–muscle: 2–3 sets × 10–15 reps (2–3 sec eccentric, 1 sec squeeze)
- Shoulder-friendly accessory day: 2–3 sets × 12–16 reps (light–moderate load, no pain)
Progression rule: Add reps first (within the range), then add small weight increases. If your shoulders take over, lower the load and tighten technique.
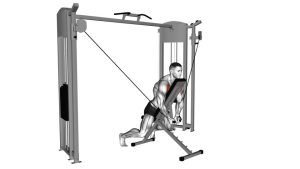
Setup / Starting Position
- Bench placement: Set a bench centered between the pulleys. Sit tall with feet planted.
- Pulley height: Start with pulleys around mid-chest height. Adjust slightly up/down to match your shoulder comfort.
- Handle grip: Hold one handle per hand. Neutral grip is usually the most joint-friendly.
- Posture lock-in: Chest up, ribs down, shoulders down and back (light retraction + depression).
- Arm position: Arms open with a soft elbow bend (roughly 15–30°). Wrists neutral.
- Start stretch (controlled): You should feel a chest stretch without the shoulders rolling forward.
Tip: If you feel front-shoulder pinching at the stretch, reduce range and set pulleys slightly lower or bring elbows a touch forward.
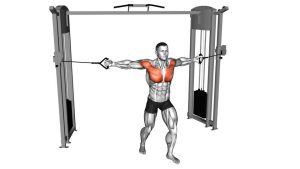
Execution (Step-by-Step)
- Brace lightly: Keep your torso still—no rocking. Eyes forward, neck neutral.
- Arc the handles inward: Bring elbows and hands forward in a wide hugging motion.
- Keep elbow angle stable: Don’t turn it into a press by bending too much.
- Meet at midline: Bring handles together in front of the sternum (or slightly below) without clanking or losing control.
- Squeeze the chest: Hold 0.5–1 second while keeping shoulders down (avoid shrugging).
- Slow return: Open back out for 2–3 seconds until you feel a comfortable stretch—stay in control.
Pro Tips & Common Mistakes
Pro Tips
- Lead with elbows: Think “elbows toward each other,” hands simply follow.
- Own the stretch: Stop where your shoulders stay stable—more range isn’t always better.
- Pause to feel it: A short squeeze at the front boosts mind–muscle connection.
- Match your fiber angle: Slightly higher pulleys bias upper pec; slightly lower can bias mid/lower pec.
- Stay seated tall: If you lean back, you’ll turn it into a press and lose isolation.
Common Mistakes
- Turning it into a press: Excessive elbow bend shifts stress away from pecs.
- Shoulders rolling forward: Reduces pec tension and irritates the front of the shoulder.
- Using momentum: Swinging the torso to move heavier weight defeats the purpose.
- Overstretching: Going too deep can strain the shoulder—keep it comfortable.
- Wrist collapse: Keep wrists neutral so force goes into the pecs, not the joints.
FAQ
Where should I feel the seated cable chest fly?
Mostly across the pecs, especially near the inner portion as you bring the handles together. You may feel mild front-deltoid support, but the chest should dominate. If shoulders take over, lower the weight and shorten the stretch.
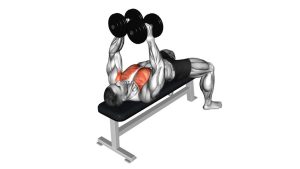
Is this better than dumbbell flyes?
Not “better,” just different. Cables keep more consistent tension, especially at the squeeze, while dumbbells often feel heavier in the stretched position. Many lifters use cables for safer, more controlled hypertrophy work.
What pulley height should I use?
Start around mid-chest height. Higher can emphasize upper-pec line, lower can feel more mid/lower-pec. Choose the height that gives you the best chest tension with zero shoulder pinching.
How do I avoid shoulder pain or pinching?
Keep your shoulder blades stable (down/back), don’t overstretch, and keep elbows slightly in front of your torso (not far behind). Reduce range and load until the movement feels smooth and chest-dominant.
Recommended Equipment (Optional)
- D-Handle Cable Attachments (Pair) — comfortable, secure grip for flyes and presses
- Home Cable Pulley System — compact option for fly-style work if you don’t have a full cable station
- Adjustable Weight Bench — improves positioning and comfort for seated cable variations
- Cable Machine Attachment Set — handles/straps/bars for variety and better training angles
- Weightlifting Gloves with Wrist Support — helpful if grip or wrist fatigue limits your fly control
Tip: Choose gear that improves comfort and control. If a handle shape or setup causes wrist/shoulder discomfort, switch attachments or adjust pulley height.