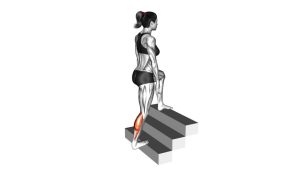
Seated Straight-Leg Calf Stretch: Proper Form, Benefits, Sets & Tips
Learn the Seated Straight-Leg Calf Stretch for flexible calves and ankles. Follow safe setup, form cues, hold times, common mistakes, and practical tips.
Seated Straight-Leg Calf Stretch
This exercise is particularly useful for improving tolerance to calf stretching and practicing controlled ankle dorsiflexion. It requires no exercise machine or additional resistance, making it accessible for home workouts, mobility routines, and post-training cooldowns. Additionally, the seated position removes standing balance demands, allowing greater attention to foot positioning, breathing, and comfortable stretching intensity.
Unlike standing calf stretches, the seated variation allows both ankles to be stretched simultaneously while the hands guide the feet toward the body. However, the extended-knee position also places tension on the hamstrings. Therefore, beginners should prioritize a gentle calf stretch instead of attempting to reach as far forward as possible. Consistent, comfortable practice may gradually improve flexibility and confidence in the movement.
Quick Overview
| Body Part | Calves |
|---|---|
| Primary Muscle | Gastrocnemius, with additional stretching of the soleus |
| Secondary Muscle | Hamstrings, Achilles tendon region, and other posterior lower-leg tissues |
| Equipment | None required; optional exercise mat, stretching strap, or towel |
| Difficulty | Beginner to Intermediate, depending on calf flexibility, hamstring mobility, and ability to reach the feet comfortably |
Sets & Reps (By Goal)
- Beginner flexibility: 2–3 sets × 15–20-second holds, using gentle tension and 15–30 seconds of rest between holds.
- General calf flexibility: 2–4 sets × 20–30-second holds, maintaining a comfortable stretch without bouncing or straining.
- Ankle mobility practice: 2–3 sets × 20–40-second holds, emphasizing gentle forefoot movement toward the shins.
- Post-workout cooldown: 2–3 sets × 30–45-second holds after walking, running, cycling, or lower-body strength training.
- Rehab-style flexibility: 1–3 sets × 10–20-second gentle holds, only when appropriate for the condition and guided by a qualified healthcare professional.
Progression rule: Begin with shorter, comfortable holds and gradually improve stretching tolerance. Then increase hold duration before attempting additional ankle dorsiflexion. For this static exercise, one completed hold counts as one repetition. Never increase the range by pulling harder on the toes or forcing the knees straight.
Setup / Starting Position
- Choose a comfortable floor surface: Sit on a stable, level surface with enough room to extend both legs forward. An exercise mat may provide additional comfort, although it is not required.
- Extend both legs: Place both legs directly in front of your body. Keep the knees comfortably straight and the heels resting on the floor. Avoid deliberately forcing the knees backward into hyperextension.
- Position the feet: Keep the feet approximately parallel, with the toes initially pointing upward. Both ankles should remain relaxed until you begin the stretching movement.
Upper-Body Position and Reach
- Establish a stable seated position: Keep your pelvis supported by the floor and distribute your weight evenly. Sit as tall as your flexibility comfortably allows before leaning forward.
- Prepare the upper body: Relax your shoulders and extend your arms toward the feet. Keep the neck comfortable and avoid unnecessarily tightening the jaw.
- Reach toward the forefeet: Hinge forward gently from the hips and hold the toes or forefeet with both hands. If you cannot reach without excessive strain, place a stretching strap around the balls of the feet.
- Check your alignment: Ensure both heels remain supported and the knees face upward. Your posture should feel stable enough to maintain the position without jerking.
Setup tip: If tight hamstrings prevent you from reaching your feet comfortably, sit on a folded towel or use a longer stretching strap. A small knee bend is acceptable when necessary for comfort, although it reduces the gastrocnemius stretch.
Execution (Step-by-Step)
- Begin from the seated position: Extend both legs forward and keep the heels on the floor. Maintain a stable pelvis with the knees comfortably straight.
- Lean forward with control: Move the torso toward the legs by hinging gently at the hips. Reach both arms forward without bouncing or forcing your chest toward the thighs.
- Hold the feet securely: Place your hands around the forefeet or toes, as demonstrated in the movement. Keep the grip comfortable and avoid concentrating excessive force on individual toes.
- Draw the forefeet toward the shins: Gently pull the balls of the feet toward your body. This movement creates ankle dorsiflexion, increasing the stretch along the posterior lower legs.
Holding and Completing the Stretch
- Maintain the straight-leg position: Keep both knees comfortably extended and the heels supported. Because the gastrocnemius crosses the knee joint, this position helps lengthen the muscle while the ankles are dorsiflexed.
- Hold the stretching position: Maintain gentle, even tension for the selected duration. Breathe normally, relax your shoulders, and avoid increasing the stretch through sudden pulling.
- Release the stretch gradually: Reduce the pulling pressure on the forefeet before letting go. Then slowly return the torso toward an upright seated position.
- Reset and repeat: Pause briefly before the next hold. Ensure both ankles feel comfortable and repeat according to your flexibility goal.
Movement observation: In the demonstrated exercise, both legs remain extended while the hands hold the forefeet. The torso stays inclined forward, and the stretching position is maintained with small adjustments rather than large repeated movements.
Pro Tips & Common Mistakes
- Focus on ankle dorsiflexion: The main stretching action comes from bringing the forefeet toward the shins. Simply bending forward without moving the ankles may emphasize the hamstrings instead.
- Keep both knees comfortably straight: Extended knees help maintain tension in the gastrocnemius. However, avoid forcing the knees into an uncomfortable locked position.
- Do not pull aggressively on the toes: Excessive pulling can irritate the toes, feet, or Achilles tendon region. Instead, apply gentle pressure through a secure hold around the forefeet.
- Avoid bouncing: Repeatedly jerking the torso forward can create unnecessary strain. Maintain steady tension and allow the muscles to relax gradually.
- Control your spinal position: A slight forward curve may occur naturally during the reach. Nevertheless, avoid forcing excessive spinal rounding just to touch the feet.
Comfort, Support, and Progression
- Keep the shoulders relaxed: Pulling strongly with the arms can create unnecessary neck and shoulder tension. Instead, let the hands provide light assistance while breathing normally.
- Use a stretching strap when necessary: If your hands cannot comfortably reach the forefeet, loop a strap around them. This modification allows ankle dorsiflexion without requiring excessive forward bending.
- Do not confuse discomfort with progress: A mild to moderate stretching sensation is appropriate. Sharp pain, pins and needles, or strong pressure behind the knees indicates that you should stop.
- Stretch both legs evenly: Avoid pulling harder on one foot or allowing one knee to bend substantially more than the other. If one side is noticeably tighter, consider practicing a gentle single-leg variation separately.
- Choose the appropriate training time: Longer static holds generally fit well after exercise or during dedicated flexibility sessions. Before explosive training, prioritize an active warm-up and controlled ankle movements.
Professional tip: For better overall calf flexibility, combine this straight-knee variation with a separate bent-knee calf stretch. Straight-knee stretching places greater emphasis on the gastrocnemius, whereas bending the knee reduces its tension and can help emphasize the soleus. Neither variation requires painful stretching intensity.
FAQ
What muscles does the Seated Straight-Leg Calf Stretch target?
The exercise primarily stretches the gastrocnemius, one of the major muscles forming the calf. The soleus also contributes to the calf stretching sensation. Additionally, the extended knees and forward torso position place tension on the hamstrings. Therefore, some individuals may feel stretching behind both the thighs and lower legs. The exact sensation depends on ankle mobility, knee position, and individual flexibility.
Is the Seated Straight-Leg Calf Stretch suitable for beginners?
Yes, this exercise can be suitable for beginners because it requires no balance challenge or external resistance. However, people with tight hamstrings may struggle to reach their feet comfortably. In that situation, a stretching strap or towel provides useful assistance. Begin with shorter holds and gentle tension. As your flexibility improves, you can gradually increase the hold duration without forcing your knees or ankles.
Why do I feel the stretch more in my hamstrings than my calves?
The forward-bending position and extended knees also stretch the hamstrings. Consequently, limited hamstring flexibility may become noticeable before the calf muscles experience substantial tension. To shift attention toward the calves, reduce the forward reach slightly and gently draw the forefeet toward the shins. Using a strap can also help you control the ankle position independently of your torso. Avoid forcing the stretch if you experience discomfort behind the knees.
Stretch Duration and Mobility Benefits
How long should I hold the Seated Straight-Leg Calf Stretch?
Most beginners can start with 15–20-second holds and gradually progress toward 20–30 seconds as tolerated. For general flexibility, two to four comfortable holds may be appropriate. Longer holds are not automatically more effective if your technique deteriorates. Therefore, focus on relaxed breathing, steady ankle positioning, and consistent practice. Stop earlier if you experience sharp pain or unusual symptoms.
Can this stretch improve ankle mobility and calf flexibility?
Regular stretching may help improve calf flexibility and tolerance to ankle dorsiflexion. However, results depend on consistency, individual anatomy, and the reasons for any movement restriction. The exercise also stretches the hamstrings, so it is not an isolated calf movement. For a more complete routine, combine comfortable calf stretching with active ankle mobility exercises and appropriate calf strengthening. Persistent or painful ankle restrictions should be evaluated by a qualified professional.
Recommended Equipment
- Stretching Strap with Loops — helps you reach the forefeet comfortably and control ankle dorsiflexion without excessive forward bending
- Non-Slip Exercise Mat — provides a comfortable floor surface for seated calf stretching, mobility routines, and other flexibility exercises
- Cork Yoga Blocks — can provide stable support or slight elevation during modified seated stretching positions
- Foam Roller for Calves — useful for optional, gentle self-massage of the calf muscles before or after a flexibility routine
- Muscle Massage Ball — allows targeted, adjustable self-massage of the lower-leg muscles as a complementary recovery tool
Equipment tip: The Seated Straight-Leg Calf Stretch requires no equipment when you can reach your feet comfortably. A stretching strap is usually the most practical modification for limited flexibility. Other accessories are optional and should not replace controlled stretching technique. Avoid painful pressure during self-massage or stretching.