Single-Arm Wall Push-Up (Supported): Form, Sets & Progressions
Master the supported single-arm wall push-up to build unilateral chest strength and core anti-rotation control. Learn setup, step-by-step form, sets by goal, common mistakes, FAQs, and recommended gear.
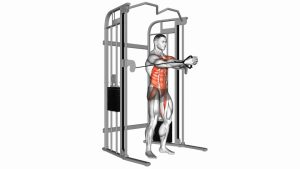
Single-Arm Wall Push-Up (Supported)
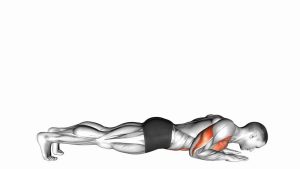
This variation is all about control. You’re resisting rotation while pressing with one arm, so the goal is a strong “plank line” from head to heels. Use a comfortable range, keep the shoulder packed, and stop the rep if you feel the shoulder drifting forward or the torso twisting.
Quick Overview
| Body Part | Chest |
|---|---|
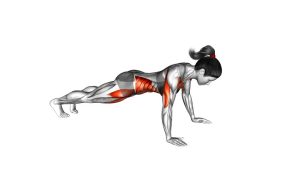
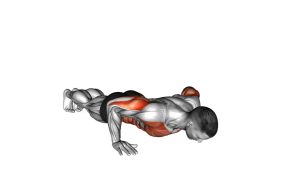
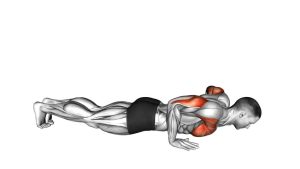
| Primary Muscle | Pectoralis major (working side) |
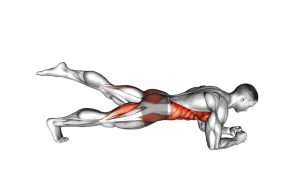
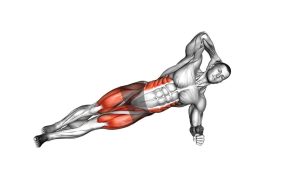
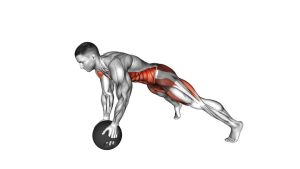
| Secondary Muscle | Triceps, anterior deltoid, serratus anterior; core stabilizers (obliques / transverse abdominis) |
| Equipment | Wall (optional: push-up handles, mini band, towel for grip/comfort) |
| Difficulty | Beginner (excellent unilateral regression and shoulder-stability builder) |
Sets & Reps (By Goal)
- Technique / rehab-style control: 2–3 sets × 6–10 reps/side (2–3 sec down, 1 sec pause, 1–2 sec up; 45–75 sec rest)
- Strength (unilateral pressing base): 3–5 sets × 5–8 reps/side (controlled tempo; 60–120 sec rest)
- Hypertrophy / chest pump: 3–4 sets × 10–15 reps/side (smooth reps; 45–90 sec rest)
- Warm-up / activation: 1–2 sets × 8–12 reps/side (easy effort; 30–45 sec rest)
Progression rule: First add reps or slow the eccentric. Then increase difficulty by stepping your feet farther from the wall (more lean), lowering the hand position slightly, or moving from wall → incline → floor progressions.
Setup / Starting Position
- Choose your distance: Stand facing a wall and step your feet back until your body forms a slight diagonal line (more lean = harder).
- Hand placement: Place the working palm on the wall at about mid-chest height. Wrist stacked, fingers spread, palm flat.
- Body line: Brace your core and glutes. Keep ribs down and hips square—avoid twisting toward the wall.
- Support option: Keep the non-working hand lightly on the wall or on your hip for balance if needed (don’t let it “push”).
- Shoulder position: “Pack” the shoulder—think shoulder blade slightly down and forward around the ribcage (not shrugged up).
Tip: If your wrist feels cranky, use push-up handles against the wall or form a fist (knuckle push) for a neutral wrist.
Execution (Step-by-Step)
- Inhale and brace: Lock in your plank line—head neutral, ribs down, glutes tight.
- Lower under control: Bend the working elbow and bring your chest toward the wall. Keep the elbow at a 45–70° angle (not flared straight out).
- Stay square: Resist rotation—hips and shoulders face the wall the whole time. No twisting to “cheat” the rep.
- Brief pause: Stop just before the shoulder rolls forward. Hold 0.5–1 second with control.
- Press away: Exhale and drive the wall away until the elbow extends. Finish with the shoulder stable (no shrugging).
Pro Tips & Common Mistakes
- Think “anti-rotation”: Keep belt-buckle and sternum pointing straight ahead—don’t spin toward the working arm.
- Elbow path matters: Too wide can irritate shoulders; too tucked can shift load to triceps. Aim for a comfortable mid-angle.
- Don’t let the shoulder dump forward: Stop the rep if the shoulder rolls toward your ear or collapses inward.
- Control the negative: A 2–3 second eccentric builds stability faster than rushing reps.
- Adjust difficulty instantly: Step closer (easier) or farther (harder). Keep perfect reps.
- Symmetry check: Match reps and tempo on both sides to reduce imbalances.
FAQ
Where should I feel this exercise?
Mostly in the chest of the working side, with support from the triceps and front shoulder. You should also feel your core working to prevent your body from twisting. If you feel pinching in the shoulder, reduce the lean and keep the shoulder packed.
How do I make it harder without going to the floor?
Step your feet farther from the wall (more forward lean), slow the lowering phase, add a brief pause at the bottom, or switch to an incline (hands on a sturdy bench/table). You can also use a light resistance band around your back for extra tension.
Can I keep my free hand on the wall?
Yes—light fingertip support can improve balance and keep your torso square. Just avoid using it to push. As you get stronger, reduce that support to challenge stability.
Is this safe for shoulders?
For many people, yes—because the wall reduces load. Keep the elbow in a comfortable angle and don’t let the shoulder roll forward. If you have pain, start closer to the wall and use partial range until it’s smooth and symptom-free.
What’s the next progression after wall?
Try a single-arm incline push-up (hands on a bench or table), then gradually lower the incline. From there you can explore assisted floor variations before full single-arm push-ups.
Recommended Equipment (Optional)
- Push-Up Handles — keep wrists neutral and improve comfort against the wall
- Resistance Bands Set — add light resistance for progression or pair with rows/pull-aparts
- Mini Bands (Loop Bands) — useful for shoulder warm-ups and serratus-friendly stability drills
- Non-Slip Exercise Mat — better footing for bracing and consistent body alignment
- Doorway Pull-Up Bar — optional pairing tool for posture balance (pulling work complements pressing)
Tip: Equipment is optional—your main “tool” is a stable wall and clean technique. Progress slowly and keep reps smooth.