Kneeling Staggered Push-Up (Knee Staggered Push-Up): Form, Sets, Tips & FAQ
Learn the Kneeling Staggered Push-Up to build chest strength with a joint-friendly knee setup and a staggered hand position for unilateral emphasis. Includes step-by-step form, sets by goal, common mistakes, FAQs, and recommended equipment.
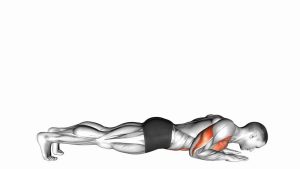
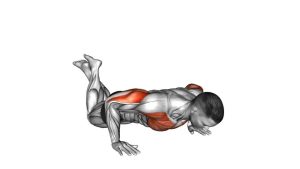
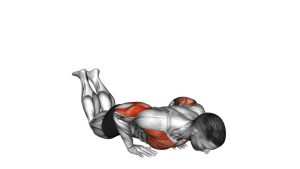
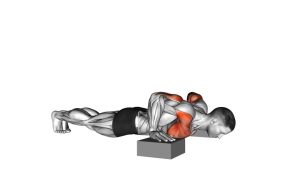
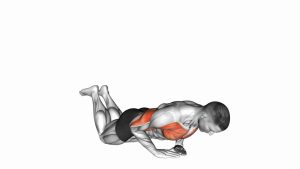
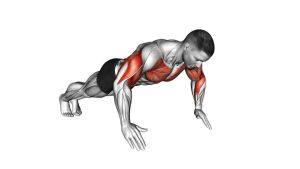
Kneeling Staggered Push-Up
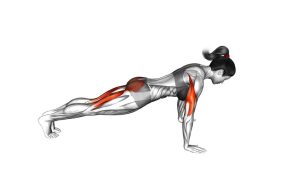
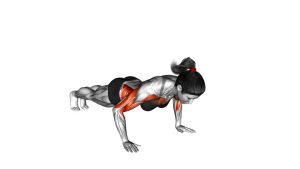
This exercise is ideal when you want a chest-focused push-up progression that’s easier on the wrists, shoulders, and lower back than full push-ups. The key is staying square through the hips and shoulders while the staggered hands create a controlled load shift.
Quick Overview
| Body Part | Chest |
|---|---|
| Primary Muscle | Pectoralis major (chest) |
| Secondary Muscle | Triceps, anterior deltoids, serratus anterior, core stabilizers (anti-rotation) |
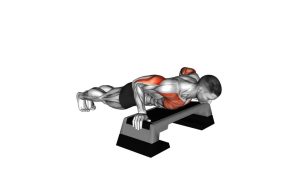
| Equipment | None (optional: exercise mat, push-up handles, wrist support) |
| Difficulty | Beginner–Intermediate (great push-up progression with unilateral emphasis) |
Sets & Reps (By Goal)
- Chest hypertrophy: 3–5 sets × 8–15 reps/side (60–90 sec rest)
- Strength & control: 4–6 sets × 5–8 reps/side (90–120 sec rest, slow tempo)
- Beginner progression: 2–4 sets × 6–12 reps/side (60–90 sec rest)
- Warm-up activation: 1–3 sets × 6–10 reps/side (easy effort, perfect form)
Progression rule: Add reps first, then slow the tempo (3 seconds down), then increase range of motion. When you can do 12–15 clean reps per side with stable hips, progress toward a full staggered push-up (on toes).
Setup / Starting Position
- Knees down: Kneel on a mat. Keep knees comfortably spaced and feet relaxed behind you.
- Hands staggered: Place one hand slightly forward and the other slightly back (about 4–8 inches offset).
- Brace the trunk: Squeeze glutes lightly, ribs down, core tight—avoid arching the lower back.
- Shoulders set: Hands under control, shoulders away from ears, neck neutral.
- Square position: Hips and shoulders face the floor—don’t rotate toward the forward hand.
Tip: Start with a small offset. As stability improves, you can stagger slightly more—but only if your torso stays quiet.
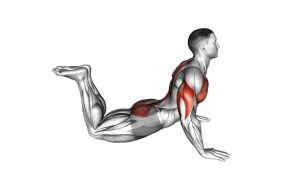
Execution (Step-by-Step)
- Inhale & lower: Bend elbows and lower your chest toward the floor with control.
- Elbow angle: Keep elbows at a comfortable path (slightly tucked, not flared hard).
- Stay square: Keep hips level—avoid twisting or shifting weight dramatically.
- Pause softly: Brief pause near the bottom (optional) while staying braced.
- Exhale & press: Drive through both palms and return to the top as one unit.
- Switch sides: Swap the stagger (other hand forward) and repeat for balanced training.
Pro Tips & Common Mistakes
Pro Tips
- Press the floor away: Think “push the ground” and keep shoulders stable at the top.
- Control the descent: A 2–3 second lowering phase boosts chest tension and improves mechanics.
- Even pressure: Don’t collapse onto the back hand—both hands work, but the front side feels more.
- Use a mat: Knee comfort improves consistency and effort quality.
Common Mistakes
- Twisting the torso: Rotation reduces chest loading and can irritate shoulders.
- Hips sagging or piking: Keep a straight line from head to knees.
- Elbows flaring hard: Too wide can stress shoulders—find a tucked-but-natural path.
- Short, rushed reps: Slow down and use a consistent range of motion.
- Over-staggering too soon: A huge offset often causes instability and poor form.
FAQ
Which hand should be forward?
Train both sides. Do one set with the right hand forward, then switch so the left hand is forward. This keeps chest and shoulder development balanced.
Where should I feel this exercise?
You should feel it mainly in the chest and triceps, with extra effort from your core to prevent twisting. If you feel sharp shoulder pain, reduce depth and keep elbows in a safer path.
Is this easier than a normal push-up?
Yes—being on your knees reduces load. The staggered hands add a stability challenge, but overall it’s a great progression step toward full staggered push-ups.
How do I progress this exercise?
Increase reps first, then slow the lowering phase, then increase depth. When you can do 12–15 clean reps per side with stable hips, progress to a toe-supported staggered push-up.
What if my wrists bother me?
Try push-up handles, do the movement on parallettes, or place hands on a slightly elevated surface. Keep wrists stacked under hands and avoid collapsing into the heel of the palm.
Recommended Equipment (Optional)
- Thick Exercise / Yoga Mat — improves knee comfort and grip for smoother reps
- Push-Up Handles — reduces wrist extension and can make pressing feel more comfortable
- Wrist Wraps (Training Support) — optional support if wrists feel irritated during floor pressing
- Mini Resistance Bands — great for warm-up (band pull-aparts) and shoulder stability pairing
- Foam Knee Pads — extra cushioning if you train on hard floors frequently
Tip: Keep accessories “supportive,” not limiting—your best long-term progress comes from clean reps and steady overload.