Roll Front Shoulder & Chest on Floor: Form, Stretch Tips, Sets & FAQ
Learn the Roll Front Shoulder & Chest Lying on Floor to open the chest, improve front-shoulder mobility, and counter rounded posture. Step-by-step setup, execution, sets by goal, common mistakes, FAQs, and recommended gear.
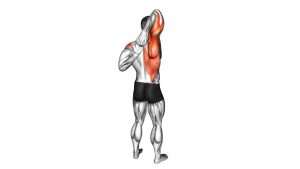
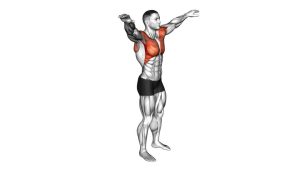
Roll Front Shoulder & Chest on Floor
This drill is best performed with light intensity and excellent control. You should feel a smooth stretch across the chest/front shoulder—not joint pinching in the front of the shoulder, not numbness/tingling, and not aggressive discomfort. Adjust the stretch by changing how far you roll and how long you hold.
Quick Overview
| Body Part | Chest / Shoulders |
|---|---|
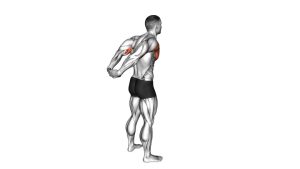
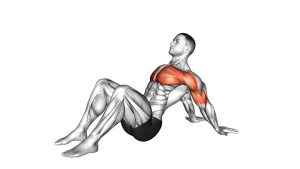
| Primary Muscle | Pectorals (pec major / pec minor) — stretch & opening focus |
| Secondary Muscle | Anterior deltoid; biceps (long head) region; thoracic rotators (control) |
| Equipment | None (optional: yoga mat / towel for comfort) |
| Difficulty | Beginner (easy to scale by range and hold time) |
Sets & Reps (By Goal)
- Warm-up mobility (before upper body): 1–2 sets × 4–6 slow rolls/side (1–2 sec pause), 30–45 sec rest
- Posture / chest opening: 2–3 sets × 20–40 sec hold/side or 6–10 slow rolls/side, 30–60 sec rest
- Recovery (after pressing workouts): 2–4 sets × 30–60 sec hold/side at easy intensity, 45–75 sec rest
- Daily “desk reset”: 1–2 rounds × 20–30 sec/side, gentle breathing
Progression rule: Increase time-under-stretch or add 1–2 slow reps first. Only increase range if the shoulder feels smooth (no pinching) and you can keep the arm relaxed on the floor.
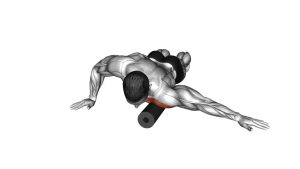
Setup / Starting Position
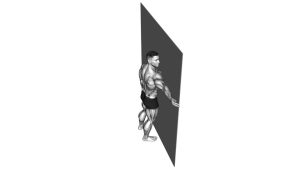
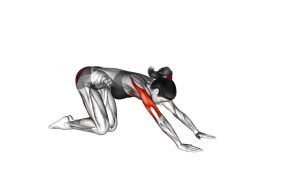
- Lie face down (prone): Place your chest and hips on the floor (use a mat if needed).
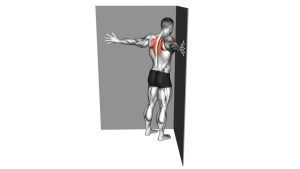
- Set the working arm: Extend one arm out to the side around shoulder height (about a “T” position). Palm down.
- Support with the other arm: Bend the opposite elbow and place that hand near your chest to help you roll.
- Neck neutral: Keep your head comfortable (turn slightly away from the working side if that feels better).
- Relax the shoulder: The working shoulder stays heavy on the floor—no shrugging.
Tip: If your shoulder feels sensitive, lower the arm angle slightly (a bit below shoulder height) and reduce range.
Execution (Step-by-Step)
- Brace gently: Take a calm breath and keep ribs and pelvis stacked (avoid excessive low-back arching).
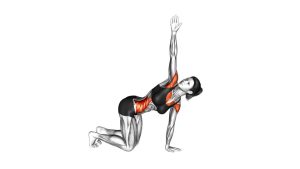
- Begin the roll: Press lightly with the support hand to rotate your torso away from the working arm.
- Open the chest: Let the shoulder/chest stretch develop gradually—keep the working arm “glued” to the floor.
- Pause & breathe: Hold 1–3 seconds (or longer if doing holds). Keep the jaw and neck relaxed.
- Return with control: Slowly rotate back to the starting position—no bouncing.
- Repeat & switch sides: Match time and reps on both sides.
Pro Tips & Common Mistakes
- Move slow, not deep: Don’t chase the biggest rotation—chase the smoothest stretch.
- Keep the arm heavy: If the hand/shoulder lifts, you’re rotating too far.
- Don’t crank the shoulder: Rotation comes from the torso, not from yanking the arm.
- Watch the ribs: Avoid excessive rib flare and low-back arching—keep the trunk stacked.
- Use breathing to relax: Long exhales often allow a better stretch without forcing.
- Best pairing: Great with rows/face pulls and thoracic mobility for posture-focused training days.
FAQ
Where should I feel this stretch?
Most people feel it across the pecs and the front shoulder. It should feel like a stretch—not sharp pinching. If you feel pinching in the front of the shoulder joint, reduce range and slow down.
Is this a warm-up or a recovery drill?
Both. Use short, gentle sets as a warm-up (4–6 slow reps/side), or longer holds after training for recovery and posture work.
How often can I do it?
Many people tolerate it 3–6 days/week at low intensity. If you feel lingering soreness or irritation, reduce frequency and range.
What if my shoulder feels tight or sensitive?
Lower the arm angle slightly, keep the roll small, and prioritize breathing. If symptoms are sharp or nerve-like (tingling/numbness), stop and consider professional guidance.
Does this help rounded shoulders?
It can help by improving chest flexibility and front-shoulder comfort. For best results, combine it with upper-back strengthening (rows, face pulls) and better daily posture habits.
Recommended Equipment (Optional)
- Thick Yoga Mat — adds comfort for shoulders, ribs, and hips during floor mobility
- Foam Roller — helpful for additional chest/thoracic mobility and warm-up prep
- Massage Ball (Lacrosse Ball) — useful for pec minor/front-shoulder soft-tissue work (gentle pressure)
- Yoga Blocks — can assist other shoulder-opening drills and support positioning
- Stretch Strap — complements chest/shoulder mobility routines with controlled range
Tip: Keep mobility tools comfortable. If any tool increases pain or nerve-like symptoms, stop and reassess.