Band Incline Chest Press: Upper Chest Form, Sets & Reps, Tips + FAQ
Learn the Band Incline Chest Press to target the upper chest with a low-anchored resistance band. Step-by-step form, setup cues, sets by goal, common mistakes, FAQs, and recommended gear.
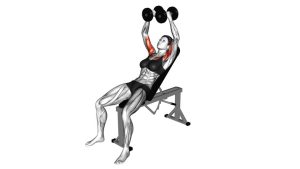
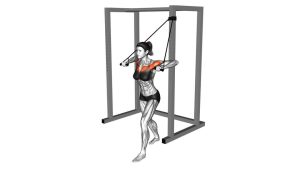
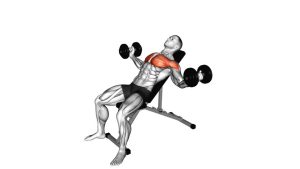
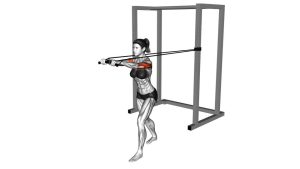
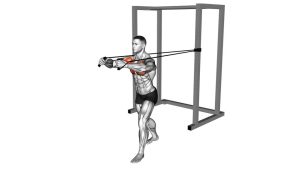
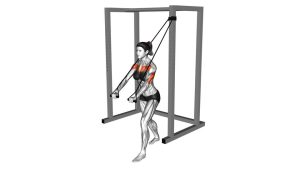
Band Incline Chest Press
Bands are great here because resistance increases as you press, making the top range more challenging and helping you learn strong finishing mechanics. You should feel the most work across the upper chest and triceps, with the shoulders staying controlled and down—not creeping toward your ears.
Quick Overview
| Body Part | Chest |
|---|---|
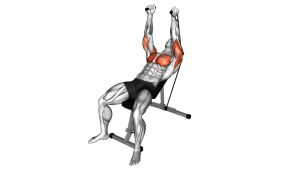
| Primary Muscle | Upper chest (clavicular head of pectoralis major) |
| Secondary Muscle | Triceps, anterior deltoids, serratus anterior (top-range reach/control) |
| Equipment | Resistance band + secure low anchor (door anchor, rack, post) |
| Difficulty | Beginner–Intermediate (scale by band thickness, stance, and range) |
Sets & Reps (By Goal)
- Muscle gain (hypertrophy): 3–5 sets × 8–15 reps (60–90 sec rest, controlled tempo)
- Strength focus: 4–6 sets × 5–10 reps (90–150 sec rest, heavier band)
- Endurance / pump: 2–4 sets × 15–25 reps (30–60 sec rest, steady rhythm)
- Warm-up / activation: 2–3 sets × 10–15 reps (light band, perfect form)
Progression rule: First increase reps or slow the tempo (2–3 sec down). When you can hit the top of the rep range with clean control, move to a thicker band or step slightly farther from the anchor.
Setup / Starting Position
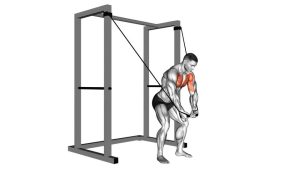
- Anchor low behind you: Set the band at a low point (around hip-to-knee height) so the press travels upward like an incline press.
- Choose your stance: Use a staggered stance (one foot forward) for stability and to resist band pull.
- Set your ribs and core: Brace lightly, keep ribs “down,” and avoid leaning back into a big arch.
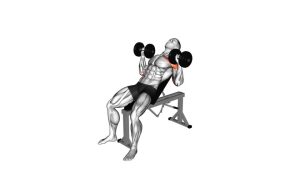
- Hand position: Start with hands near the upper chest/shoulder line, wrists neutral, elbows slightly down and in (not flared).
- Shoulders set: Pull shoulders gently “down and back,” then keep them quiet—don’t shrug.
Tip: If your shoulders feel cranky, lower the elbow angle (keep elbows closer to your ribs) and reduce band tension. Comfort + control beats forcing the range.
Execution (Step-by-Step)
- Start tall and stable: Eyes forward, chest proud, core braced. Maintain tension in the band without being pulled backward.
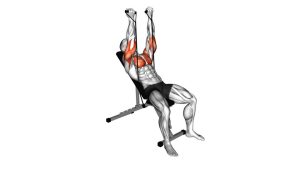
- Press forward and up: Drive hands in a diagonal path (like a 30–45° incline press). Keep elbows slightly tucked.
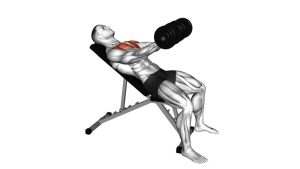
- Finish with control: Near full extension is fine, but don’t slam into a hard lockout. Add a gentle “reach” without shrugging.
- Pause briefly: Hold 0.5–1 sec at the top while breathing normally and keeping shoulders down.
- Return smoothly: Bring hands back to upper chest level with a 2–3 sec controlled eccentric. Don’t let the band snap you back.
Pro Tips & Common Mistakes
- Press on an incline line: Think “up and out,” not straight forward (flat) or straight up (overhead).
- Elbows don’t flare: Keep elbows slightly in front of your body line and not wide at shoulder height.
- Stay stacked: Avoid rib flare and excessive back arch. A small lean is okay; a big arch turns it into a compensation.
- No band snap: Control the return. If the band pulls you back, step closer to the anchor or reduce tension.
- Shoulders stay down: Shrugging steals tension from the chest. Keep neck long and traps relaxed.
- Make it more “upper chest”: Use a lower anchor and a slightly higher press finish (upper chest to eye level).
FAQ
Where should I feel the Band Incline Chest Press?
Mostly in the upper chest, with help from the triceps and front delts. If you only feel shoulders, reduce band tension, tuck elbows slightly, and press on a cleaner upward path.
What’s the best anchor height?
For an incline emphasis, anchor the band low behind you (around knee to hip height). A higher anchor tends to shift the press into a flatter path or more shoulder-heavy angle.
Can I do this at home without a rack?
Yes—use a door anchor or wrap the band around a sturdy post. Make sure the anchor is secure and won’t slip before you load it.
How do I make it harder without heavier bands?
Step farther from the anchor, slow the eccentric (3–4 seconds down), add a 1–2 second pause near the top, or perform 1.5 reps (press up, half down, up again, then full down).
Is this a good substitute for incline dumbbell press?
It can be a great alternative, especially for home workouts. Bands provide increasing resistance at the top, so combine this with another movement that challenges the stretched position (like push-ups or fly variations) for a complete stimulus.
Recommended Equipment
- Resistance Bands Set (with Handles) — versatile tension options for pressing and pulling
- Door Anchor for Resistance Bands — secure low anchor for incline press angles
- Band Handles / Grip Attachments — improves comfort and wrist neutrality during presses
- Carabiner Clips (Band Accessories) — makes swapping bands and attachments faster
- Non-Slip Exercise Mat — improves footing and stability during standing presses
Tip: Prioritize a safe anchor first. If the band or anchor shifts, reduce tension and re-secure before continuing.