Side Kneeling Push-Up : Form, Sets & Tips for Stronger Pec Activation
Learn the Side Kneeling Push-Up (Chest Focus) to target one side of the chest with better control. Step-by-step form, sets by goal, common mistakes, FAQs, and optional gear.
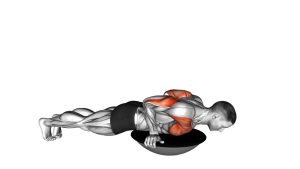
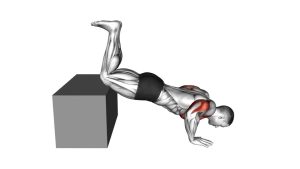
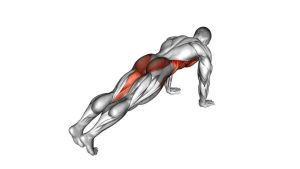
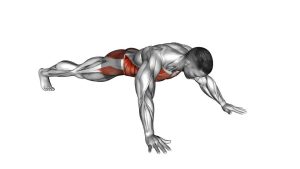
Side Kneeling Push-Up
This variation rewards control more than speed. Use a steady lowering phase, pause briefly near the bottom, then press up smoothly. You should feel the working-side pectorals doing most of the work, with help from the triceps and front delts, while your core resists rotation.
Quick Overview
| Body Part | Chest |
|---|---|
| Primary Muscle | Pectoralis major (working-side emphasis) |
| Secondary Muscle | Triceps, anterior deltoid, serratus anterior, core (anti-rotation) |
| Equipment | None (optional: exercise mat, push-up handles) |
| Difficulty | Beginner → Intermediate |
Sets & Reps (By Goal)
- Hypertrophy (chest growth): 3–5 sets × 8–15 reps/side (60–90 sec rest)
- Strength focus: 4–6 sets × 4–8 reps/side (90–150 sec rest, slower tempo)
- Endurance / conditioning: 2–4 sets × 12–20 reps/side (30–60 sec rest)
- Beginner skill building: 2–3 sets × 6–10 reps/side (perfect form, controlled depth)
Progression rule: Add reps or slow the tempo first. Then increase range of motion. Only progress to harder variations when you can keep the shoulder stable and the torso controlled.
Setup / Starting Position
- Knees down: Kneel on a mat; keep hips gently extended (don’t sit back).
- Working hand: Place the working hand slightly outside shoulder width; fingers spread.
- Body line: Head–shoulders–hips–knees in a long line; brace the core.
- Load shift: Lean the chest slightly toward the working arm to increase pec demand.
- Shoulder packed: Keep the working shoulder down and stable—no shrugging.
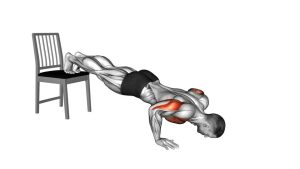
Tip: If wrists bother you, use push-up handles for a neutral grip.
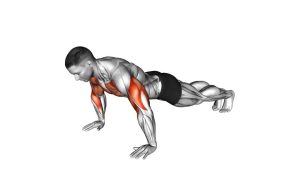
Execution (Step-by-Step)
- Inhale and brace: Ribs down, glutes lightly on, neck neutral.
- Controlled lower: Bend the working elbow and lower diagonally toward the working hand (2–3 sec down).
- Elbow angle: Keep the elbow around 30–60° from the torso (avoid hard flaring).
- Pause: Briefly pause just above the floor (or at your deepest clean depth).
- Press up: Exhale and push the floor away, returning to the start without twisting.
Pro Tips & Common Mistakes
Pro Tips
- Use tempo: 2–3 sec down, brief pause, smooth press up.
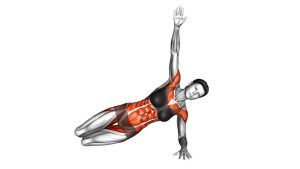
- Stay stacked: Keep ribs down and pelvis steady—resist rotation.
- Drive through the palm: Spread pressure across the whole hand.
- Own the bottom: Stop where the shoulder stays stable.
- Balance the week: Pair with rows/pull-aparts to keep shoulders healthy.
Common Mistakes
- Shrugging: Shoulder creeping toward the ear.
- Hip twist: Opening the pelvis to cheat.
- Elbow flare: Excessively wide elbow path causing shoulder stress.
- Fast drop: Losing control in the eccentric phase.
- Head jutting: Chin reaching forward instead of staying neutral.
FAQ
Where should I feel the Side Kneeling Push-Up?
Mostly in the working-side chest, with help from the triceps and front delts. You’ll also feel your core resisting rotation. If you feel shoulder pinching, reduce depth and slow down.
Is this good for chest imbalances?
Yes. It trains each side more independently. Keep reps equal on both sides and maintain the same tempo and depth.
How do I make it harder?
Add reps, slow the tempo, increase the pause, shift more load onto the working side, or progress toward archer push-ups.
What if my wrists hurt?
Use push-up handles for a neutral grip, reduce range, or change your hand angle. Wrist pain shouldn’t be ignored.
How often should I train this exercise?
Most people do well with 2–4 sessions per week. Focus on clean form and progressive overload over time.
Recommended Equipment (Optional)
- Push-Up Handles (Neutral Grip) — reduces wrist stress and can improve pressing mechanics
- Thick Exercise Mat — protects knees and improves comfort
- Resistance Bands Set — great for rows, pull-aparts, and warm-ups
- Weighted Vest — progressive overload once reps become easy
- Parallettes — neutral wrists and a bigger range of motion option
Tip: Pick the simplest tool that improves comfort and consistency—better form always wins.