Cable Single-Arm Crossover (High-to-Low): Form, Sets & Reps, Tips & FAQ
Learn the Cable Single-Arm Crossover (high-to-low) for chest isolation and better mind-muscle connection. Step-by-step form, sets & reps by goal, common mistakes, FAQs, and recommended equipment.
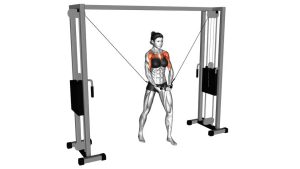
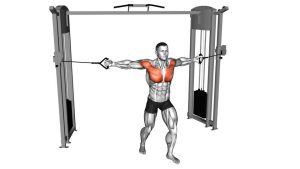
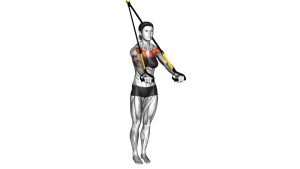
Cable Single-Arm Crossover (High-to-Low)
This movement is all about control and tension, not max load. You’ll get the best chest stimulus when you keep the shoulder packed, maintain a consistent elbow bend, and use a smooth arc that matches your natural shoulder path. If your shoulder pinches or your torso rotates, lower the weight and shorten the range.
Quick Overview
| Body Part | Chest |
|---|---|
| Primary Muscle | Pectoralis major (sternal/lower emphasis in a high-to-low path) |
| Secondary Muscle | Anterior deltoid, serratus anterior, core stabilizers (anti-rotation) |
| Equipment | Dual cable machine (D-handles). Optional: ankle strap/handle alternative, lifting straps |
| Difficulty | Intermediate (beginner-friendly with light loads and strict form) |
Sets & Reps (By Goal)
- Hypertrophy (main work): 3–5 sets × 10–15 reps/side (60–90 sec rest)
- Strength-focused accessory: 3–4 sets × 6–10 reps/side (90–120 sec rest)
- Pump / finisher: 2–4 sets × 15–25 reps/side (30–60 sec rest)
- Control + mind-muscle: 2–3 sets × 8–12 reps/side (2-sec squeeze + slow lowering)
Progression rule: Add reps first, then small weight increases. If you lose trunk stability (twisting) or shoulder position (shrugging/rolling forward), reduce load and keep the arc cleaner.
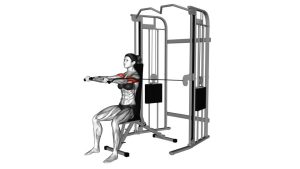
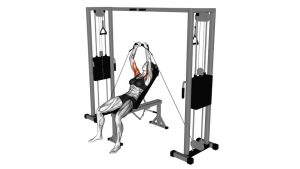
Setup / Starting Position
- Set the pulley high: Position the cable slightly above shoulder height (or higher) to create a high-to-low line.
- Grab a single handle: Stand side-on to the stack, handle in the inside hand (the arm closer to the cable).
- Stagger your stance: One foot forward, one back for balance. Keep knees soft and ribs down.
- Set the shoulder: Shoulder blade “down and back” lightly—no aggressive retraction. Keep the neck long.
- Soft elbow bend: Maintain ~15–25° elbow bend and keep it consistent throughout the rep.
- Start with tension: Let the arm open to a comfortable chest stretch, without yanking the shoulder forward.
Tip: If you tend to rotate, step a bit farther from the stack and brace your core like a plank—your torso should stay quiet.
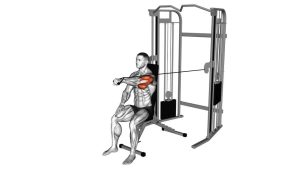
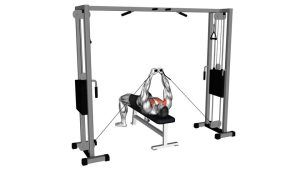
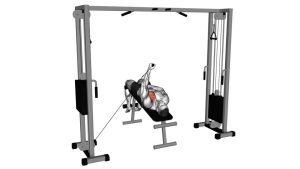
Execution (Step-by-Step)
- Brace and align: Exhale slightly, brace your abs, keep ribs stacked over hips.
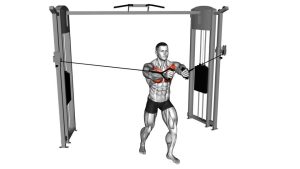
- Sweep down and across: Bring the handle in a smooth arc down toward your midline (high → low) as if hugging across your body.
- Keep the elbow “frozen”: Don’t turn it into a press. The elbow bend stays almost the same the whole time.
- Peak squeeze: Pause 1–2 seconds when your hand reaches your midline/opposite-hip line. Feel the chest contract—no shoulder shrug.
- Controlled return: Slowly open back to the start (2–3 seconds), keeping tension and shoulder position.
Pro Tips & Common Mistakes
Pro Tips
- Match your fiber line: Adjust pulley height until the arc feels best on your chest (not your shoulder).
- Use a slight forward lean: A small hinge can improve chest tension and reduce shoulder strain.
- Control the eccentric: A 2–4 second lowering phase keeps tension where you want it.
- Lead with the biceps line: Think “bring the upper arm across” instead of “hand to hand.”
- Finish at your midline: Don’t over-cross if it pulls the shoulder forward—stop where the chest squeezes hardest.
Common Mistakes
- Turning it into a press: Excessive elbow bend shifts work to triceps/shoulders.
- Torso rotation: Twisting turns this into a whole-body pull and reduces chest isolation.
- Shrugging at the top: Upper traps take over and shoulder comfort drops.
- Too much stretch: Overreaching can stress the front shoulder—use a controlled, pain-free range.
- Letting tension disappear: If the stack slams or cable goes slack, you’re losing the stimulus.
FAQ
Where should I feel the Cable Single-Arm Crossover?
You should feel it mainly in the working-side chest, especially as you sweep the arm down and across to the midline. If you mostly feel the front shoulder, lower the load, reduce range, and adjust the pulley height slightly.
Is high-to-low better for lower chest?
The high-to-low line often emphasizes the sternal/lower chest fibers, but “best” depends on your shoulder mechanics and where you feel the strongest contraction. Adjust pulley height and finishing point to find your best chest line.
Should I cross my hand past the centerline?
A small cross can increase the squeeze, but don’t force it. Over-crossing can pull the shoulder forward. Stop where you get the strongest chest contraction with a stable shoulder and quiet torso.
How do I prevent torso rotation?
Use a staggered stance, brace your abs, and lower the weight. You can also stand a bit farther from the stack and think “anti-rotate” like a plank while your arm moves.
What’s a good alternative if cables aren’t available?
Try a single-arm band crossover (anchor high) or a dumbbell fly variation. Cables are best for constant tension, but bands can mimic the diagonal path well.
Recommended Equipment (Optional)
- Cable Machine D-Handles (Single-Grip Attachments) — comfortable grip for single-arm fly/crossover work
- Ankle Strap / Multi-Purpose Strap Attachment — versatile strap option for cable work and unique angles
- Home Cable Pulley System (Adjustable) — home-friendly alternative for crossover/fly patterns
- Resistance Bands Set (With Handles) — great substitute for high-to-low crossovers when traveling
- Lifting Straps / Grip Pads — helps keep grip from limiting your chest sets
Tip: Prioritize smooth cable motion and a comfortable handle. If grip fatigue ends your set early, use straps so the chest stays the limiter.