Rotational Push-Up Knee Tap: Form, Sets, Tips & FAQ
Learn the Rotational Push-Up Knee Tap to build chest strength and core control. Step-by-step form, sets by goal, common mistakes, FAQs, and recommended equipment.
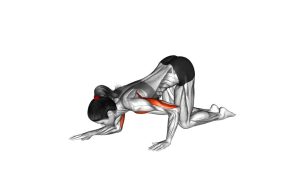
Rotational Push-Up Knee Tap
This is a great progression if standard push-ups feel tough or you want more core control without adding equipment. The push-up portion should feel like a normal chest press, and the knee tap should feel like a controlled rotation—not a swing. Move slower than you think you need to.
Quick Overview
| Body Part | Chest |
|---|---|
| Primary Muscle | Pectoralis major (chest) |
| Secondary Muscle | Triceps, anterior deltoids, serratus anterior, obliques (rotation control) |
| Equipment | None (optional: mat, push-up handles) |
| Difficulty | Beginner → Intermediate (knee push-up load + balance/rotation challenge) |
Sets & Reps (By Goal)
- Strength base (controlled reps): 3–5 sets × 5–8 reps/side (60–120 sec rest)
- Muscle & control (hypertrophy + stability): 3–4 sets × 8–12 reps/side (45–90 sec rest)
- Endurance / conditioning: 2–4 sets × 12–20 reps total (alternate sides, 30–60 sec rest)
- Warm-up activation: 2–3 sets × 6–10 reps total (slow tempo, perfect form)
Progression rule: First slow the tempo and reduce “wobble.” Then add reps. Only progress to a full plank version (no knees) when you can rotate and tap without hips swinging or shoulders collapsing.
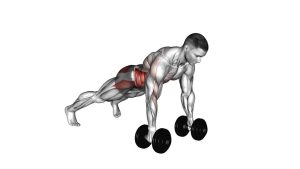
Setup / Starting Position
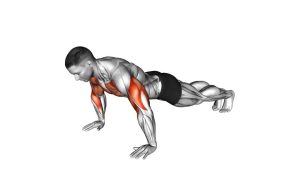
- Knee plank: Knees on the floor, toes relaxed, body in a straight line from head to knees.
- Hands position: Hands slightly wider than shoulder-width, fingers spread, press the floor evenly.
- Shoulders stacked: Keep shoulders over hands; “screw” palms into the floor to stabilize.
- Core set: Brace lightly (ribs down), squeeze glutes gently, keep the neck long.
- Space check: Ensure you can rotate and tap the opposite knee without reaching too far or losing balance.
Tip: If your wrists get cranky, use push-up handles or do the move on fists (only if comfortable). A mat under knees improves comfort and consistency.
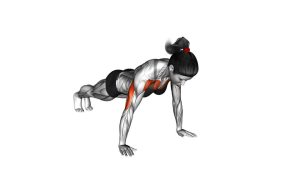
Execution (Step-by-Step)
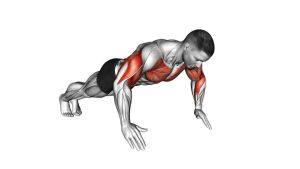
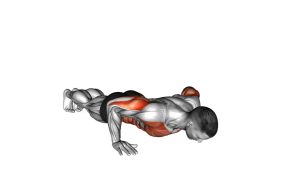
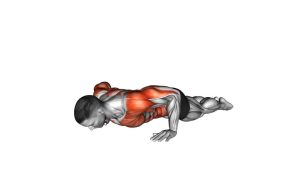
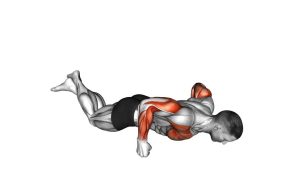
- Lower into a push-up: Bend elbows and lower your chest with control. Keep ribs down and hips aligned.
- Press back up: Drive the floor away to return to the top. Avoid shrugging—keep shoulder blades stable.
- Shift slightly (small): Shift weight gently into one hand to prepare for the rotation (don’t over-shift).
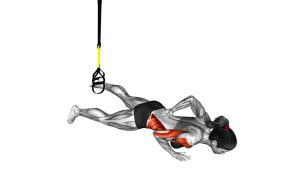
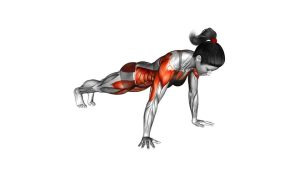
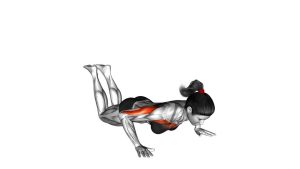
- Rotate + knee tap: Rotate your torso and tap the opposite knee with the free hand.
- Return to plank: Place the hand back under the shoulder, re-stack, and reset your brace.
- Repeat/alternate: Perform the next rep and rotate to the other side (or complete all reps one side first).
Pro Tips & Common Mistakes
- Go slower than you want: Control beats speed—especially during the rotation and tap.
- Hands under shoulders on reset: Don’t land the hand too far forward; it stresses the shoulder.
- Keep ribs down: Avoid arching your low back during the press or the rotation.
- Don’t “swing” to the knee: If you’re swinging, reduce range—tap higher on the thigh if needed.
- Elbow angle matters: Avoid flaring elbows straight out; aim ~30–60° from the torso.
- Make it easier: Widen your knee base, do a smaller tap, or pause between phases.
- Make it harder: Move to a full plank push-up, add a pause at the bottom, or add tempo (3-sec down).
FAQ
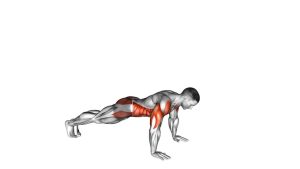
Where should I feel the Rotational Push-Up Knee Tap?
You should feel the chest during the push-up press and the core/obliques during the rotation and knee tap. Mild shoulder and triceps involvement is normal, but you shouldn’t feel sharp pain.
Should I alternate sides every rep or finish one side first?
Both work. Alternating keeps the set balanced and more “flow-based.” Doing all reps per side can help you focus on one side’s control if stability is challenging.
What if I can’t reach my knee without losing balance?
Reduce the range and tap your thigh instead of the knee, or widen your knees slightly for a larger base. Slow down and focus on keeping hips steady.
Is this more chest or core?
It’s a chest-dominant push-up with a strong core stability demand. If you rush or swing, it becomes sloppy core work; if you slow down, you get both chest stimulus and real stability training.
How do I protect my wrists during this exercise?
Warm up wrists, spread fingers, and press evenly through the palm. If needed, use push-up handles to keep wrists neutral, or perform on a soft mat to reduce pressure.
Recommended Equipment (Optional)
- Push-Up Handles (Ergonomic) — keeps wrists more neutral and can improve pressing comfort
- Thick Non-Slip Exercise Mat — better grip and cushioning for knees and hands
- Yoga Knee Pads / Knee Cushion — extra comfort for knee-supported variations
- Wrist Wraps — supportive option if you’re sensitive to wrist extension under load
- Core Sliders (Optional Progression Tool) — useful later for harder push-up/core progressions (not required for this move)
Tip: Keep equipment optional. The best results come from clean reps, steady breathing, and consistent practice.