Weighted Seated Neck Extension (Head Harness): How to Do It Safely (Sets, Tips & FAQ)
Learn the weighted seated neck extension with a head harness to build stronger, thicker neck extensors. Step-by-step form, sets & reps by goal, common mistakes, FAQs, and optional equipment.
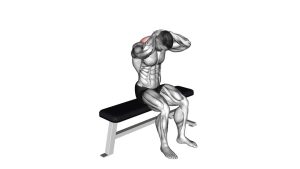
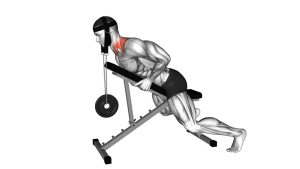
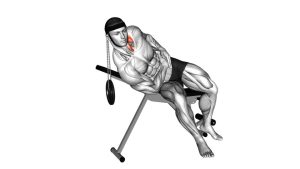
Weighted Seated Neck Extension (with Head Harness)
The weighted seated neck extension is a simple, highly targeted way to train the back of your neck. You sit tall, attach a head harness to external load, and extend your neck against resistance. The key is control: smooth reps, a slow lowering phase, and no forced range.
Quick Overview
| Body Part | Neck |
|---|---|
| Primary Muscles | Cervical extensors (splenius, semispinalis, cervical erectors) |
| Secondary Muscles | Upper traps (stabilization), levator scapulae, deep neck stabilizers |
| Equipment | Head harness + weight plate(s) + bench/chair |
| Difficulty | Intermediate (beginner-friendly with very light load) |
Sets & Reps (By Goal)
- Neck thickness (hypertrophy): 2–4 sets × 10–20 reps
- Strength / sport support: 3–5 sets × 6–12 controlled reps
- Beginner / conditioning: 1–3 sets × 12–20 easy reps (light load)
Tempo rule: 2 seconds up, 3–4 seconds down. The slow eccentric does most of the work.
Setup / Starting Position
- Sit on a bench or sturdy chair with your feet flat and torso tall.
- Put on the head harness so it’s snug and doesn’t slide.
- Attach a light weight (start lighter than you think) so it hangs freely.
- Brace gently—your torso should stay still (no rocking).
- Start with your head in a neutral position (not forced into flexion).
Execution (Step-by-Step)
- Inhale and set a light brace through your torso so you don’t lean back.
- Extend your neck smoothly (think: “lift the back of the head” rather than “crank the chin up”).
- Pause briefly near the top while staying controlled—no jerking.
- Lower slowly back toward neutral for 3–4 seconds.
- Repeat for reps, keeping every rep identical.
Pro Tips & Common Mistakes
- Don’t chase heavy weight: the neck grows best with control + consistency.
- Avoid hyperextension: stop just past neutral (or at your controlled end-range).
- No torso lean: keep the movement in the neck, not a full back bend.
- Slow eccentric: if you “drop” the weight, you’re asking for trouble.
- Stop before pain: challenge is good; sharp pain, tingling, dizziness, or headache is not.
FAQ
How often should I do weighted neck training?
Most people do well with 1–3 sessions per week with moderate volume. If your neck stays sore for days or your recovery drops, reduce sets or frequency.
Should I train neck with high reps or low reps?
Both can work, but neck training usually feels best with 10–20 controlled reps. For strength, use 6–12 reps—still slow and smooth.
What if I feel it more in my traps than the back of my neck?
That’s often shrugging, torso lean, or using too much load. Keep shoulders down, sit tall, lighten the weight, and slow the lowering phase.
Should I also train neck flexion and side flexion?
Yes. For balance and long-term comfort, most routines work best when you train extension + flexion + lateral flexion across the week (with conservative volume).
Is this safe for beginners?
It can be, if you start very light and keep strict control. Beginners may want to start with gentle bodyweight neck work first, then add the harness later.
Recommended Equipment (Optional)
- Head harness (neck trainer)
- Weight plates (standard/olympic)
- Flat exercise bench
- Lacrosse massage ball
Tip: If the harness feels rough, use a small towel/foam pad under the straps for comfort.