Standing Neck Side Stretch: Technique, Benefits, Sets & Reps, FAQs
Learn how to do the Standing Neck Side Stretch with perfect form, plus sets & reps by goal, pro tips, FAQs, and recommended tools for neck relief and mobility.
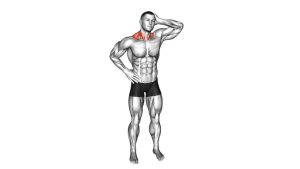
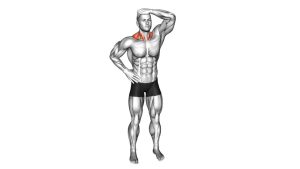
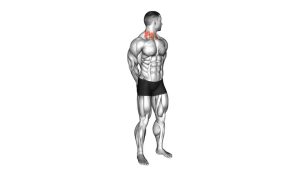
Standing Neck Side Stretch
This stretch works best when you keep the shoulder of the stretching side heavy and relaxed. You can increase the quality of the stretch by clasping your hands behind your back (or holding your wrist) to help prevent shrugging. Think: tilt the head—don’t twist it.
Quick Overview
| Body Part | Neck |
|---|---|
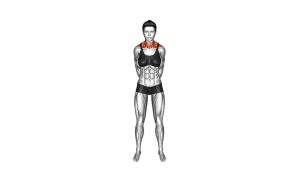
| Primary Muscles | Upper trapezius, levator scapulae |
| Secondary Muscles | Sternocleidomastoid (SCM), scalenes (often), deep neck stabilizers |
| Equipment | None (optional: towel, massage ball, cervical pillow) |
| Difficulty | Beginner (easy to scale by reducing range and hold time) |
Sets & Reps (By Goal)
- Quick posture reset (desk break): 2–3 rounds × 20–30 sec/side
- Warm-up mobility: 1–2 rounds × 15–25 sec/side (gentle)
- Cooldown / recovery: 2–4 rounds × 25–45 sec/side
- Stiff neck (very gentle): 2–3 rounds × 10–20 sec/side (easy range only)
Intensity rule: Aim for ~3–5/10 stretch sensation. The goal is relief and range—not max depth.
Setup / Starting Position
- Stand tall with ribs stacked over hips (avoid leaning or slouching).
- Relax your shoulders down and back (no shrugging).
- Option A: clasp hands behind your back to keep the shoulder depressed.
- Keep the chin neutral (avoid “chin jut” forward).
Tip: If one side is significantly tighter, start there—but don’t force range. Consistency wins.
Execution (Step-by-Step)
- Exhale and let the shoulder on the stretching side feel “heavy.”
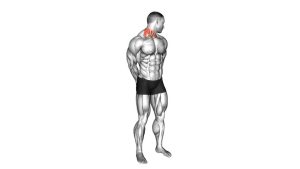
- Slowly tilt your head so your ear moves toward your shoulder.
- Do not rotate—keep the nose facing forward.
- Stop at the first strong-but-comfortable stretch along the side of the neck/top of shoulder.
- Breathe slowly through the hold (each exhale helps the muscle relax).
- Return to center with control and repeat on the other side.
Pro Tips & Common Mistakes
- Keep the shoulder down: shrugging reduces the stretch and irritates tight tissues.
- Tilt, don’t twist: rotation changes the target and can feel “pinchy.”
- No yanking: avoid pulling aggressively with your hand—gentle holds work best.
- Breathe slowly: long exhales reduce tension and let you sink into the stretch naturally.
- Don’t chase pain: sharp pain, tingling, or dizziness = stop.
FAQ
Where should I feel the stretch?
Most people feel it along the side of the neck and the top of the shoulder (upper trap / levator area). It should be a clean stretch—never sharp.
Can I do this every day?
Yes. For desk posture relief, daily light stretching is common—keep intensity low and focus on posture + breathing.
Should I use my hand to pull my head down?
Optional, but keep it minimal. An active stretch (you tilt yourself) is often safer and more repeatable. If you assist with your hand, use gentle pressure only.
Why does one side feel tighter?
It’s very common due to posture, dominant-side habits, and desk ergonomics. Do one extra short hold on the tighter side and avoid forcing range.
What if I feel tingling, numbness, or pain down my arm?
Stop and seek professional guidance. Those symptoms can indicate nerve involvement and shouldn’t be pushed through.
Recommended Equipment (Optional)
- The Original Neck Hammock (Cervical Traction Device) — optional decompression tool for relaxation/recovery
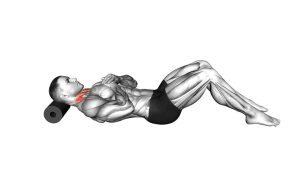
- Massage Lacrosse Balls (Trigger Point / Myofascial Release) — helpful for upper trap/shoulder knots that drive neck tension
- Peanut Massage Ball Roller (Double Lacrosse Style) — great for upper back work (often improves neck comfort)
- Ergonomic Contour Cervical Pillow (Memory Foam) — supports neutral neck positioning during sleep
- Fit Geno Posture Corrector (Upper Back Support) — optional cueing tool (best used briefly, not all day)
Tip: If any tool causes discomfort or increases symptoms, stop using it and reassess. Gentle + consistent always wins for the neck.