Lever Neutral-Grip Seated Row: Form, Muscles Worked, Sets, Tips & FAQ
Learn how to perform the Lever Neutral-Grip Seated Row with proper form. Discover muscles worked, setup, execution, sets and reps by goal, common mistakes, FAQs, and recommended equipment.
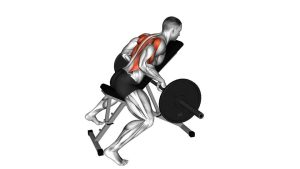
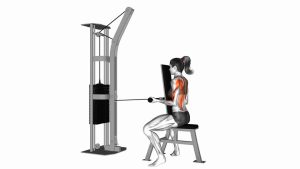
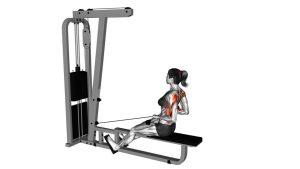
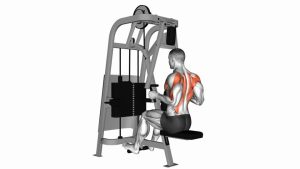
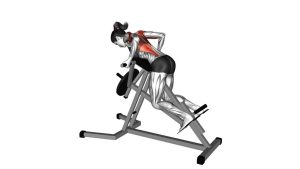
Lever Neutral-Grip Seated Row
This exercise works best when you let the back initiate the row instead of yanking the handles with the arms. Start each rep by setting the chest tall against the pad, then drive the elbows back while keeping the shoulders down and controlled. The goal is to create a strong contraction through the mid-back and lats without shrugging, twisting, or bouncing the weight.
Quick Overview
| Body Part | Upper Back |
|---|---|
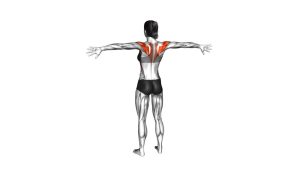
| Primary Muscle | Latissimus dorsi, rhomboids, middle trapezius |
| Secondary Muscle | Rear deltoids, biceps, brachialis, teres major, lower traps |
| Equipment | Plate-loaded seated row machine with neutral-grip handles |
| Difficulty | Beginner to Intermediate |
Sets & Reps (By Goal)
- Muscle growth: 3–4 sets × 8–12 reps, resting 60–90 seconds
- Strength focus: 4–5 sets × 5–8 reps, resting 90–150 seconds
- Technique and control: 2–3 sets × 10–15 reps, using a smooth tempo
- Back finisher / pump work: 2–3 sets × 12–20 reps with strict form
Progression rule: Add reps first, then increase load once you can keep the chest planted, control the eccentric, and hit a clear squeeze at the back of each rep.
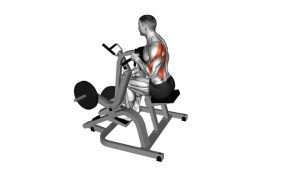
Setup / Starting Position
- Load the machine: Add a weight you can row without jerking or shortening the range of motion.
- Sit firmly on the seat: Place your feet securely on the foot platform and set your chest against the pad.
- Grab the neutral handles: Your palms should face each other with wrists straight and relaxed.
- Set posture: Keep the chest tall, core lightly braced, and spine neutral.
- Start in a stretched position: Let the arms extend forward while keeping the shoulders controlled rather than collapsing through the torso.
Tip: Before the first rep, pull your shoulders gently down and back so the movement starts from the upper back, not from a shrug.
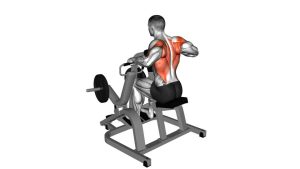
Execution (Step-by-Step)
- Begin the pull with the back: Initiate by drawing the shoulder blades slightly back and down.
- Drive the elbows back: Pull the handles toward your lower ribs or upper abdomen while keeping elbows close to the body.
- Keep the chest planted: Do not lean away from the pad or swing the torso for momentum.
- Squeeze at the top: Pause briefly when the handles reach your torso and contract the mid-back hard.
- Lower under control: Extend the arms slowly and allow the shoulder blades to move forward naturally without losing posture.
- Repeat with the same path: Every rep should look smooth, symmetrical, and controlled.
Pro Tips & Common Mistakes
- Lead with the elbows: Think about pulling the elbows behind you instead of curling the handles with your hands.
- Use full, controlled range: Stretch forward without collapsing, then row back until you reach a strong contraction.
- Keep the neck neutral: Avoid craning the head forward or looking excessively upward during the pull.
- Do not overload too early: Excessive weight often turns the movement into a partial rep with momentum.
- Avoid shrugging: If upper traps dominate, lower the weight and focus on shoulders down as you pull.
- Control the negative: The eccentric phase is where a lot of quality back work happens, so do not let the machine snap forward.
FAQ
What muscles does the Lever Neutral-Grip Seated Row work most?
It primarily targets the lats, rhomboids, and middle traps, while the rear delts and arm flexors assist. Because the torso is supported, it is especially useful for focused upper-back training.
Is a neutral grip better for shoulder comfort?
For many lifters, yes. A neutral grip often feels more natural at the shoulder joint and helps keep the elbows in a strong, efficient path during the row.
Should I pull to the chest or to the stomach?
On most machines, pulling toward the lower ribs or upper abdomen creates a strong back contraction without forcing the shoulders into an awkward position. The exact endpoint depends on the machine design and your limb length.
Can beginners use this machine?
Absolutely. The chest support and guided path make it a very beginner-friendly rowing option, provided you use a manageable load and maintain control.
What is the biggest mistake on this exercise?
Using too much weight and turning the rep into a short, jerky pull. You will get more from this movement by keeping the range of motion clean, squeezing the back, and lowering the load under control.
Recommended Equipment
- Lifting Straps — useful when grip strength fails before your back does on heavy rowing sets
- Liquid Chalk — helps improve hand traction on machine handles without the mess of loose chalk
- Fractional / Change Plates — great for making smaller, more sustainable jumps on plate-loaded machines
- Grip Pads — a good alternative to straps if you want more traction while keeping setup simple
- Weight Lifting Belt — optional for lifters who like extra trunk bracing support during heavier pulling sessions
Tip: Accessories should support better execution, not replace it. Prioritize strict form, full control, and progressive overload first.