Smith Machine Narrow Row: Proper Form, Muscles Worked, Sets, Tips & FAQ
Learn how to do the Smith Machine Narrow Row with proper form to build lats, rhomboids, and mid-back thickness. Includes setup, execution, sets and reps by goal, mistakes, FAQs, and recommended equipment.
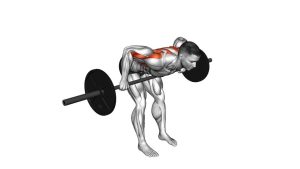
Smith Machine Narrow Row
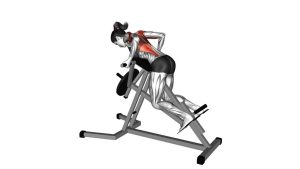
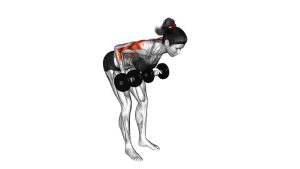
This exercise works best when you treat it like a strict back-builder rather than a heaving full-body movement. The Smith machine gives you a consistent path, which can help you focus on lat engagement, scapular retraction, and a strong contraction through the middle back. Keep your hips hinged, knees softly bent, and chest proud while the elbows travel back close to your sides.
Quick Overview
| Body Part | Back |
|---|---|
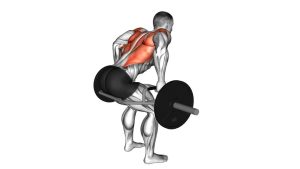
| Primary Muscle | Latissimus dorsi, rhomboids, middle trapezius |
| Secondary Muscle | Posterior deltoids, teres major, biceps, brachialis, forearms, erector spinae |
| Equipment | Smith machine and weight plates |
| Difficulty | Intermediate |
Sets & Reps (By Goal)
- Muscle growth: 3–4 sets × 8–12 reps with controlled tempo and a hard squeeze at the top
- Strength focus: 4–5 sets × 5–8 reps with heavier loads and strict torso positioning
- Technique / back control: 2–3 sets × 10–15 reps with moderate weight and perfect form
- Accessory after pull day compounds: 2–4 sets × 8–12 reps with full stretch and clean elbow drive
Progression rule: First improve bar control, top-end squeeze, and rep quality. Then add small increments of weight while keeping the torso stable and the pull smooth.
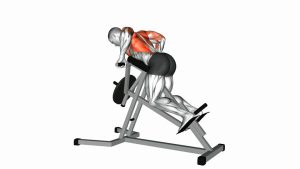
Setup / Starting Position
- Set the bar height: Position the Smith bar around mid-thigh level or slightly above knee height so you can unrack it comfortably before hinging.
- Take a narrow overhand grip: Place your hands slightly inside shoulder width or around shoulder width, depending on comfort and arm length.
- Step into position: Stand with feet about hip- to shoulder-width apart and unlock the bar safely.
- Hinge at the hips: Push the hips back, soften the knees, and lean the torso forward to roughly 30–45 degrees while keeping a neutral spine.
- Brace the core: Lift the chest slightly, keep the neck neutral, and let the arms extend fully so the bar hangs directly under the shoulders.
Tip: Your setup should feel strong and athletic. If you cannot hold the hinge without back discomfort, reduce the weight and shorten the set.
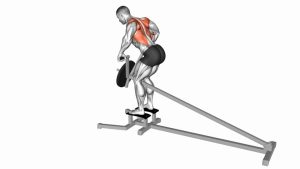
Execution (Step-by-Step)
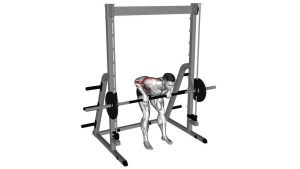
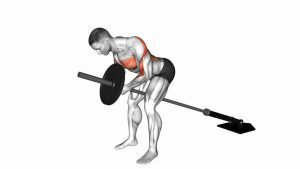
- Start from a dead hang: Let the arms extend fully while maintaining your bent-over position and core tension.
- Initiate with the back: Begin the row by pulling the shoulder blades slightly back and down rather than curling the bar with your arms.
- Drive the elbows back: Pull the elbows close to the torso and row the bar toward the lower abdomen or upper waist.
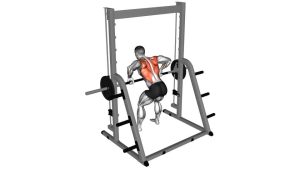
- Squeeze at the top: Pause briefly when the bar reaches the torso and contract the lats, rhomboids, and middle traps.
- Lower under control: Extend the arms slowly and let the shoulder blades move naturally without losing spinal position.
- Repeat smoothly: Maintain the same torso angle and avoid bouncing or standing up as the set gets harder.
Pro Tips & Common Mistakes
- Keep the torso fixed: The row should happen at the shoulders and elbows, not by repeatedly lifting the chest and standing up.
- Pull low for better lat involvement: Rowing into the lower torso usually keeps the elbows tighter and shifts emphasis into the lats and mid-back.
- Do not round the lumbar spine: A strong hip hinge and braced core protect the lower back and improve force transfer.
- Use a full range of motion: Let the arms extend at the bottom, then finish with a deliberate squeeze instead of cutting reps short.
- Avoid excessive shrugging: Let the upper traps assist naturally, but do not turn the row into an upright shoulder movement.
- Control the eccentric: The lowering phase is valuable for back development, so do not let the bar crash downward.
- Straps can help: If grip limits your back training, lifting straps can help you keep tension where you want it.
FAQ
What muscles does the Smith Machine Narrow Row work the most?
It mainly targets the lats, rhomboids, and middle traps. The rear delts, biceps, forearms, and lower back also assist during the movement.
Is this better than a regular barbell row?
Not necessarily better, but different. The Smith machine gives you a fixed path that can make the exercise easier to control, especially for hypertrophy and technique-focused work. Free-weight rows usually demand more stabilization.
Where should I pull the bar?
For this close-grip variation, pulling toward the lower abdomen or upper waist usually creates the best back line and elbow path.
Should I use an overhand or underhand grip?
The version shown here uses a pronated (overhand) grip. An underhand grip can change the feel and involve the biceps more, but the classic narrow Smith row is commonly performed overhand.
Can beginners use this exercise?
Yes, especially because the fixed bar path can make it easier to learn than some free-weight row variations. Beginners should still start light and focus on hinge position, torso control, and smooth pulling mechanics.
What is the biggest mistake to avoid?
The most common mistake is using too much weight and turning the exercise into a body swing. Keep the torso stable and make the back do the work.
Recommended Equipment
- Padded Lifting Straps — helpful when grip becomes the limiting factor on heavy rowing sets
- Weightlifting Belt — useful for extra trunk support during heavier bent-over rowing work
- Wrist Wraps — can improve wrist comfort and stability when gripping the Smith bar hard
- Liquid Chalk — improves grip security and helps reduce bar slippage during high-rep back work
- Resistance Bands Set — great for warm-up drills, scapular activation, and post-row accessory work
Tip: Prioritize straps and a belt only when technique is already solid. Accessories should support good rowing mechanics, not hide poor form.