Lever Row (Plate-Loaded): Proper Form, Muscles Worked, Sets, Tips & FAQ
Learn how to perform the plate-loaded Lever Row with proper form. Discover muscles worked, setup, execution steps, sets and reps by goal, common mistakes, FAQs, and recommended equipment.
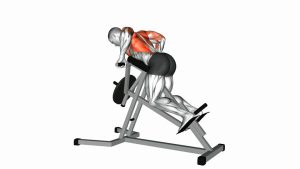
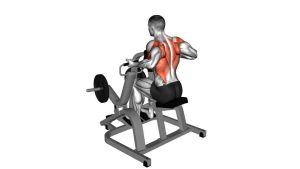
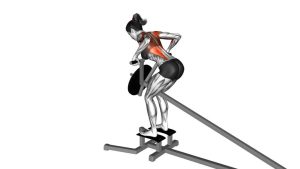
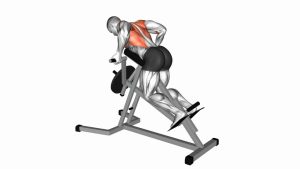
Lever Row (Plate-Loaded Machine Row)
This machine row is ideal for lifters who want a strong back-building movement with a stable setup and clear resistance path. It works well for both muscle growth and strength-focused back sessions because the support pad allows you to train the back hard without relying heavily on momentum or excessive spinal loading.
Quick Overview
| Body Part | Upper Back |
|---|---|
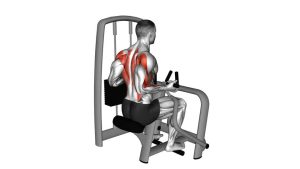
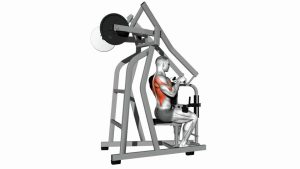
| Primary Muscle | Latissimus dorsi, rhomboids, middle trapezius |
| Secondary Muscle | Rear deltoids, teres major, biceps, brachialis, forearms |
| Equipment | Plate-loaded lever row machine |
| Difficulty | Beginner to Intermediate |
Sets & Reps (By Goal)
- Muscle growth: 3-4 sets × 8-12 reps with controlled tempo and full range of motion
- Strength focus: 4-5 sets × 5-8 reps with heavier weight and strict form
- Technique / general back development: 2-4 sets × 10-15 reps with moderate load
- Finisher / pump work: 2-3 sets × 12-20 reps with shorter rest and smooth control
Progression rule: Add weight only after you can complete all target reps with a full stretch, a firm chest-supported position, and a strong squeeze at the top without swinging.
Setup / Starting Position
- Load the machine: Add an appropriate amount of weight plates evenly on both sides.
- Position your body: Step onto the platform and place your chest firmly against the support pad.
- Set your posture: Keep your spine neutral, chest proud, and core braced without overextending the lower back.
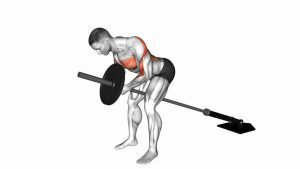
- Grip the handles: Take the machine handles with a secure grip and let the arms extend fully at the bottom.
- Start under control: Shoulders stay down and away from the ears, with a slight stretch through the upper back and lats.
Tip: Before the first rep, make sure the chest pad actually supports you. If you drift away from the pad during the set, the movement usually becomes less efficient.
Execution (Step-by-Step)
- Brace and stay planted: Keep your chest on the pad, feet stable, and torso quiet.
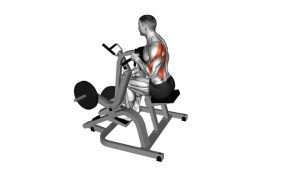
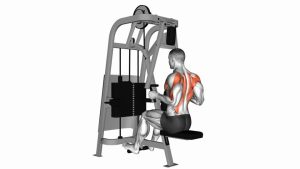
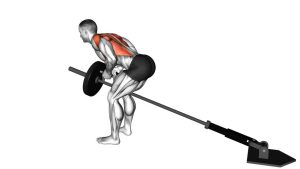
- Initiate the pull: Begin by drawing the shoulder blades back slightly, then pull the handles toward your torso.
- Drive with the elbows: Think about pulling your elbows back rather than curling the handles with the arms.
- Reach the top position: Bring the handles toward the lower ribs or upper waist while squeezing the upper back.
- Pause briefly: Hold the contraction for a moment without shrugging the shoulders.
- Lower with control: Extend the arms slowly and return to the stretched start position without dropping the weight.
- Repeat smoothly: Keep every rep consistent, controlled, and chest-supported from start to finish.
Pro Tips & Common Mistakes
- Keep the chest connected to the pad: This helps isolate the back and limits momentum.
- Pull through the elbows: This improves lat and upper-back recruitment instead of overusing the biceps.
- Use the full range: Let the arms extend fully at the bottom, then finish with a strong squeeze at the top.
- Do not yank the weight: Fast, jerky reps reduce tension on the target muscles.
- Avoid shrugging: Keep the shoulders depressed so the traps do not dominate the movement unnecessarily.
- Do not overload too early: Heavy weight with poor control usually turns the exercise into a partial rep machine swing.
- Control the eccentric: The lowering phase is valuable for hypertrophy, so do not let the plates crash down.
FAQ
What muscles does the lever row work the most?
The lever row mainly targets the lats, rhomboids, and middle traps. It also trains the rear delts, biceps, brachialis, and forearms as supporting muscles.
Is the plate-loaded lever row better than a barbell row?
It depends on your goal. The lever row offers more chest support and stability, which makes it excellent for controlled hypertrophy work. A barbell row demands more full-body stabilization and lower-back involvement.
Where should I pull the handles?
In most setups, pulling toward the lower ribs or upper waist works well for strong lat and mid-back engagement. The exact path can vary slightly depending on the machine design and handle angle.
Can beginners use this machine?
Yes. It is often very beginner-friendly because the chest support makes it easier to learn proper rowing mechanics without worrying as much about balancing the torso.
How heavy should I go?
Choose a weight that lets you maintain full control, a solid chest-supported position, and a clean squeeze at the top. If the plates bounce or your torso moves excessively, reduce the load.
Recommended Equipment
- Weight Lifting Straps — useful when grip fatigue limits your back work before the target muscles are fully trained
- Weight Lifting Gloves — can improve handle comfort, grip feel, and hand protection during rowing sessions
- Fractional Weight Plates — helpful for small, gradual load increases when progressing machine rows over time
- 2.5 LB Weight Plates — ideal for manageable jumps in loading while keeping technique clean
- Foam Roller — useful for upper-back mobility work before or after pulling sessions
Tip: Accessories should improve your training quality, not hide poor technique. Prioritize clean reps, controlled tempo, and progressive loading.