Assisted Chin Tuck: Proper Form, Benefits, Sets & Reps, and Pro Tips for a Stronger Neck
Learn how to do the Assisted Chin Tuck with perfect form to strengthen deep neck flexors, improve posture, and reduce neck strain. Includes setup, step-by-step execution, sets & reps by goal, FAQs, and recommended gear.
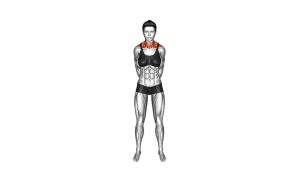
Assisted Chin Tuck
This exercise works best with precision and light effort. You should feel a gentle activation in the front of the neck, not jaw clenching, throat gripping, shoulder shrugging, or headache-like pressure. If you can’t keep it smooth, reduce the range of motion and slow down.
Quick Overview
| Body Part | Neck |
|---|---|
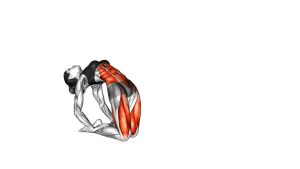
| Primary Muscle | Deep neck flexors (Longus colli / Longus capitis) |
| Secondary Muscle | Cervical stabilizers (light); SCM should stay minimal |
| Equipment | None (optional: wall, towel, pillow; hands provide light assistance) |
| Difficulty | Beginner (excellent for posture practice and rehab-style control) |
Sets & Reps (By Goal)
- Posture practice (daily): 2–3 sets × 8–12 reps (2–5 sec hold, 30–60 sec rest)
- Neck stability (warm-up): 2–4 sets × 10–15 reps (smooth tempo, 30–60 sec rest)
- Rehab-style control: 2–3 sets × 6–10 reps (5–8 sec hold, 45–75 sec rest)
- Desk break “reset”: 1–2 sets × 6–10 reps (easy effort, no strain)
Progression rule: Increase hold time or add 1–2 reps first. Only progress difficulty when your neck stays relaxed and your reps stay small and clean.
Setup / Starting Position
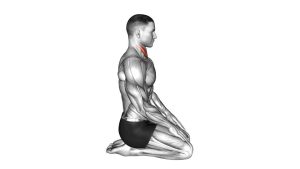
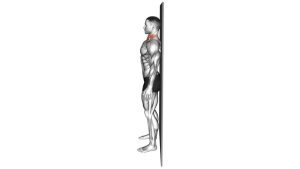
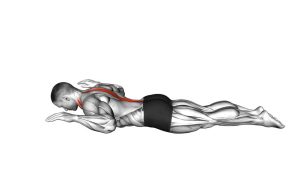
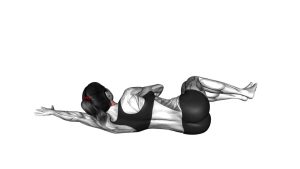
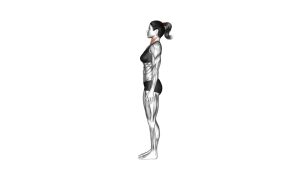
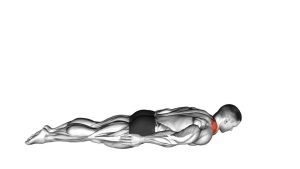
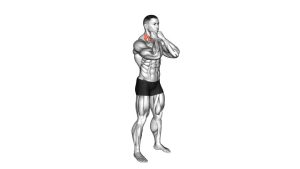
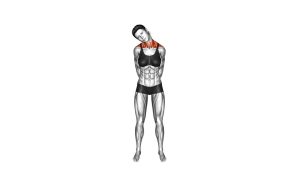
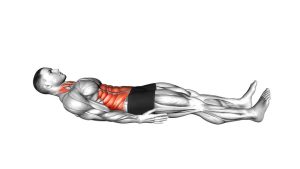
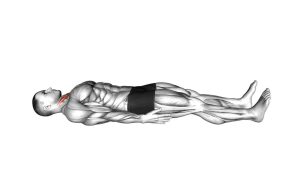
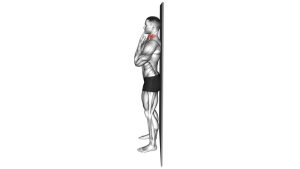
- Choose a position: Seated tall, standing against a wall, or lying on your back (supine) with a thin pillow/towel if needed.
- Stack posture: Ribs down, shoulders relaxed, neck long—avoid “reaching” the head forward.
- Relax the jaw: Teeth not clenched; tongue rests gently on the roof of the mouth.
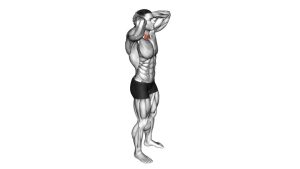
- Hand placement (assist): Place hands gently on the sides/back of the head to guide a straight-back glide—do not push hard.
- Start neutral: Face level. Think “back,” not “down.”
Tip: If you’re learning, the wall makes it easier to keep the chin glide straight back without extra neck flexion. Your hands should act like “training wheels”—less assistance over time.
Execution (Step-by-Step)
- Set your posture: Get tall and relaxed. Keep the face level and eyes forward (or up if supine).
- Glide the chin back: Pull the chin straight backward like making a gentle double-chin.
- Assist lightly: Use your hands to guide the path (straight back) without forcing range or speed.
- Keep the neck long: Don’t crunch the throat or “curl” the neck. The movement is small.
- Brief pause: Hold 2–5 seconds while breathing calmly.
- Return slowly: Ease back to neutral—no popping forward or rushing.
Pro Tips & Common Mistakes
- Keep the chin path straight back: Avoid nodding down or bending the neck forward.
- Use minimal assistance: Hands guide—your neck does the work.
- Use a gentle tempo: 1–2 sec into the tuck, hold, then 2–3 sec back to neutral.
- Don’t chase max range: Small, controlled glides train the target muscles better.
- Don’t force pressure: Avoid hard pushing into the wall or into your hands.
- Shoulders stay relaxed: No shrugging or bracing with traps.
- Pair with upper-back work: Rows/face pulls + chin tucks is a great posture combo.
FAQ
Where should I feel the assisted chin tuck?
You should feel a gentle activation in the front of the neck (deep neck flexors). If the big side-neck muscles (SCM) dominate, reduce range, soften effort, and focus on a straight-back glide.
How much should I use my hands?
Very little. Your hands are there to guide the motion and keep it straight—not to push hard or increase range. Over-assisting usually reduces the training effect and can irritate the neck.
How often should I do assisted chin tucks?
Many people can do them daily at low effort. Start with 2–3 sets and monitor how you feel. If you get lingering soreness or headaches, reduce volume and keep the movement smaller.
Is this good for forward head posture (“tech neck”)?
It can help train the deep neck flexors that support a more stacked head position. For best results, combine it with upper-back strengthening and chest mobility.
Should I tuck hard to “feel it more”?
No. This is a control drill. More tension often means more compensation (jaw/SCM/traps). Keep it at a comfortable 5–7/10 effort.
Recommended Equipment (Optional)
- Cervical Contour Pillow — supports neck alignment during supine practice or sleep
- Cervical Roll / Neck Support Roll — gentle support to maintain a neutral neck position
- Neck Traction Pillow / Neck & Shoulder Relaxer — optional decompression-style support (use lightly)
- Posture Corrector Brace (Light Reminder) — awareness tool to reduce shoulder rounding (not a replacement for training)
- Resistance Bands Set — useful for pairing with upper-back/posture work (rows, pull-aparts)
Tip: If any tool increases symptoms, stop using it and reassess. The neck rewards light-to-moderate loads and consistency.