Elbow Lift (Reverse Push-Up): Form, Muscles Worked, Sets, Tips & FAQ
Learn how to perform the Elbow Lift (Reverse Push-Up) with proper form. Discover muscles worked, setup, step-by-step execution, sets and reps by goal, common mistakes, FAQs, and recommended equipment.
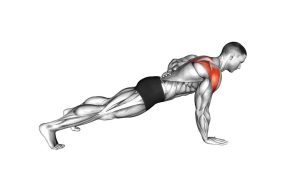
Elbow Lift (Reverse Push-Up)
This exercise works best when you treat it as a control-based bodyweight push rather than a fast dip variation. You should feel the arms and upper back working together while the torso stays firm and the hips remain lifted. Smooth reps, stable shoulders, and a rigid body line matter more than chasing extra height.
Quick Overview
| Body Part | Back |
|---|---|
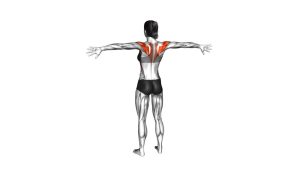
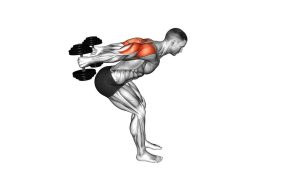
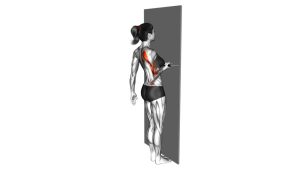
| Primary Muscle | Posterior deltoids, rhomboids, mid traps, triceps |
| Secondary Muscle | Core, glutes, forearms, scapular stabilizers |
| Equipment | Flat bench or sturdy elevated support |
| Difficulty | Intermediate (requires body control, shoulder stability, and trunk tension) |
Sets & Reps (By Goal)
- Technique practice: 2–3 sets × 5–8 reps, slow tempo, 45–75 sec rest
- Upper-body strength endurance: 3–4 sets × 8–12 reps, 60–90 sec rest
- Bodyweight accessory work: 2–4 sets × 6–10 reps after main upper-body training
- Stability emphasis: 2–3 sets × 5–6 reps with a 2–3 second pause at the top
Progression rule: First improve body alignment and control, then add reps. Only increase difficulty when you can keep the hips up, shoulders stable, and tempo smooth from start to finish.
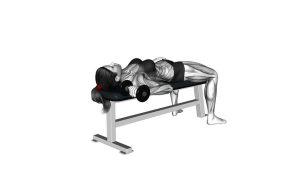
Setup / Starting Position
- Set your bench: Use a stable flat bench or sturdy support that will not slide.
- Position your upper body: Sit in front of the bench and place your upper back and arms so you can support yourself safely in a reverse position.
- Place the hands: Hands should be beside the torso with elbows bent and ready to press.
- Extend the legs: Straighten the legs forward or use a slight bend if you need an easier variation.
- Lift the hips: Raise the hips so the body forms a long line from shoulders through heels.
- Brace everything: Tighten the abs and glutes before starting the first rep.
Tip: If the full version feels too demanding, bend the knees slightly to reduce leverage and make the movement more controllable.
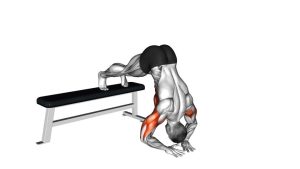
Execution (Step-by-Step)
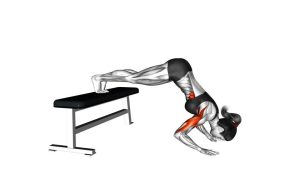
- Start tall in the reverse support: Keep the chest open, hips lifted, and shoulders packed down and back.
- Lower under control: Bend the elbows slightly and let the torso descend only as far as you can stay stable without collapsing.
- Press through the arms: Drive through the hands and elbows to raise the torso back up.
- Keep the body rigid: Maintain glute and core tension so the hips do not sag during the rep.
- Pause briefly at the top: Finish with the elbows more extended and the shoulders still controlled, not shrugged.
- Repeat smoothly: Use a steady tempo and avoid bouncing or dropping into the bottom.
Pro Tips & Common Mistakes
- Keep the hips elevated: Sagging turns the movement into a loose partial dip instead of a full-body control drill.
- Use a small effective range: You do not need a deep drop to make this exercise productive.
- Brace the glutes and abs: This protects body alignment and keeps tension where it belongs.
- Do not shrug the shoulders: Keep the neck long and the shoulder blades under control.
- Avoid rushing: Fast reps usually reduce stability and increase joint stress.
- Watch elbow position: Let them bend naturally, but do not let them flare excessively out of control.
- Regress when needed: Bent knees or a shorter range are smart adjustments, not weaknesses.
FAQ
What muscles does the Elbow Lift (Reverse Push-Up) work most?
It mainly challenges the triceps, posterior deltoids, and upper-back stabilizers, while the core and glutes help maintain body position.
Is this exercise more for back or triceps?
It is a mixed upper-body movement. The triceps drive the pressing action, while the upper back and posterior shoulders help stabilize the position and control the motion.
How can beginners make this exercise easier?
Bend the knees, shorten the range of motion, and focus on smooth reps with the hips lifted. You can also pause at the top to reinforce body position before the next rep.
What is the most common mistake?
The most common issue is letting the hips drop or shoulders collapse forward. That reduces tension, changes the mechanics, and often makes the movement feel awkward on the joints.
Can I use this as a warm-up or accessory exercise?
Yes. It works well as a bodyweight accessory movement for upper-body days or as a control drill before more demanding pushing exercises.
Recommended Equipment
- Flat Weight Bench — the main setup tool for a stable and repeatable reverse push-up position
- Dip Stands / Parallel Bars — useful for related triceps and bodyweight support variations
- Push-Up Stands — helpful for building pressing strength and wrist-friendly support training
- Resistance Bands Set — great for warm-ups, shoulder activation, and upper-back accessory work
- Exercise Mat — adds comfort and grip around the bench setup area
Tip: Choose stable equipment first. For this movement, bench security and body control matter more than adding complexity.