Resistance Band Floor Hyperextension: Form, Sets, Tips & FAQ
Learn how to perform the Resistance Band Floor Hyperextension with proper form. Discover muscles worked, setup, step-by-step execution, sets and reps by goal, common mistakes, FAQs, and recommended equipment.
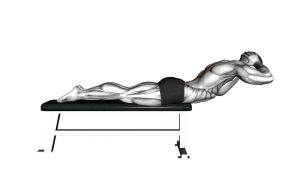
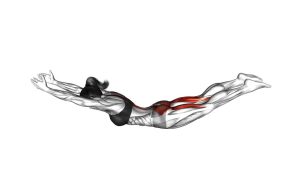
Resistance Band Floor Hyperextension
This exercise works best when you focus on controlled spinal extension rather than trying to lift as high as possible. The band adds resistance through the range of motion, making the top portion of each rep more demanding. You should feel the lower back, glutes, and back side of the body working together. Keep the neck neutral, move smoothly, and avoid jerking into the top position.
Quick Overview
| Body Part | Back |
|---|---|
| Primary Muscle | Erector spinae |
| Secondary Muscle | Glutes, hamstrings, lats, rear delts, traps, rhomboids, spinal stabilizers |
| Equipment | Resistance band, floor mat or padded surface |
| Difficulty | Beginner to Intermediate |
Sets & Reps (By Goal)
- Technique practice: 2–3 sets × 8–10 reps with light band tension
- Muscle endurance: 2–4 sets × 12–20 reps with controlled tempo
- Strength and posterior-chain development: 3–4 sets × 8–12 reps with moderate band tension
- Warm-up activation: 1–2 sets × 10–15 reps with very light resistance
Progression rule: Increase band tension only after you can complete every rep with a neutral neck, smooth lifting tempo, and no lower-back collapse at the bottom.
Setup / Starting Position
- Lie face down: Position yourself prone on the floor or a mat with your body stretched long.
- Secure the band: Loop the resistance band around the feet or ankles and hold the ends firmly with your hands.
- Extend the arms: Reach the arms forward so the band is already under light tension.
- Set the legs: Keep both legs straight behind you with the glutes lightly engaged.
- Align the neck: Keep your head neutral and eyes down so the neck stays in line with the spine.
Tip: Use a mat with enough padding to make the prone position comfortable, especially around the hips and ribs.
Execution (Step-by-Step)
- Brace lightly: Tighten the glutes and midsection before initiating the rep.
- Lift the upper body: Raise the chest and arms off the floor while keeping the arms long and the band tight.
- Lift the legs: At the same time, raise the legs slightly off the floor by squeezing the glutes and hamstrings.
- Create a smooth arc: Reach into a controlled extension position without cranking the lower back.
- Pause briefly: Hold the top for 1–2 seconds while maintaining band tension and body control.
- Lower slowly: Return the chest, arms, and legs to the floor under control without dropping.
- Repeat smoothly: Start the next rep only after regaining a stable neutral position.
Pro Tips & Common Mistakes
- Keep the neck neutral: Look down instead of lifting the chin excessively.
- Lift with the whole posterior chain: Don’t rely only on the lower back.
- Use controlled reps: Momentum reduces tension on the working muscles and increases stress on the spine.
- Choose smart resistance: Too much band tension can force compensation and poor alignment.
- Don’t over-arch: Aim for a smooth extension, not a dramatic snap into the top position.
- Keep the arms active: Reach long through the band to involve the upper back and shoulders.
- Use a pause at the top: A short hold helps reinforce control and muscle engagement.
FAQ
What muscles does the Resistance Band Floor Hyperextension work?
It primarily targets the erector spinae, while also training the glutes, hamstrings, and upper-back stabilizers. The resistance band adds more tension to the lift, especially near the top.
Is this better than a regular floor back extension?
It can be more challenging because the band increases resistance through the movement. That makes it useful for people who want more posterior-chain tension without needing a machine.
Should I lift as high as possible?
No. Focus on a controlled range of motion that keeps the lower back comfortable and the neck neutral. Quality matters more than height.
Can beginners do this exercise?
Yes, if they start with a light band and controlled reps. Beginners should learn the floor extension pattern first, then add resistance gradually.
What if I feel it only in my lower back?
That usually means you need better glute engagement, lighter resistance, or a smaller range of motion. Think about lifting from the entire back side of the body instead of hinging aggressively through the lumbar spine.
Recommended Equipment (Optional)
- Resistance Bands Set — the main tool for adding scalable tension to floor hyperextensions
- Thick Exercise Mat — adds comfort for prone positioning and reduces pressure on the hips and ribs
- Ankle Resistance Bands — a useful variation for lower-body resistance and more secure band positioning
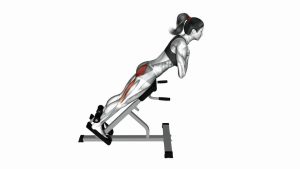
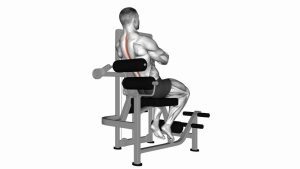
- Hyperextension Bench / Roman Chair — a progression option for people who want more dedicated back-extension training
- Ab Mat / Small Support Pad — can improve comfort and positioning during floor-based extension work
Tip: Start with a lighter band than you think you need. Clean motion, stable posture, and controlled lowering matter more than using maximum resistance.