Kneeling Push-Up to Child’s Pose: Form, Sets, Benefits & Tips
Learn how to do the Kneeling Push-Up to Child’s Pose with proper form. Discover muscles worked, sets and reps by goal, technique tips, common mistakes, FAQs, and recommended equipment.
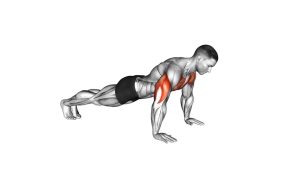
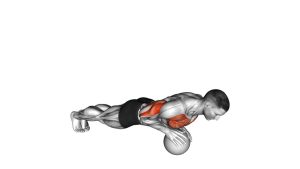
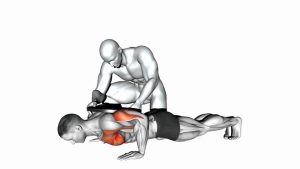
Kneeling Push-Up to Child’s Pose
This exercise works best when each rep stays smooth from start to finish. Lower with control, press up without letting the hips sag, then sit back gently into Child’s Pose before returning forward for the next repetition. It is ideal for beginners, home workouts, movement prep, and anyone who wants to build upper-body pushing strength with less load than a full floor push-up.
Quick Overview
| Body Part | Chest |
|---|---|
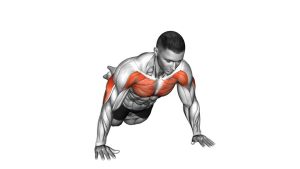
| Primary Muscle | Pectoralis major |
| Secondary Muscle | Triceps, anterior deltoids, serratus anterior, core stabilizers |
| Equipment | None (exercise mat optional) |
| Difficulty | Beginner |
Sets & Reps (By Goal)
- Technique practice: 2–3 sets × 6–8 reps with slow, clean form
- General strength: 3–4 sets × 8–12 reps with 45–75 sec rest
- Warm-up / activation: 1–2 sets × 6–10 reps at easy effort
- Endurance: 2–3 sets × 12–15 reps while keeping each rep controlled
Progression rule: First improve control and rep quality, then add reps. After that, you can slow the lowering phase or reduce the pause in Child’s Pose to make the set harder.
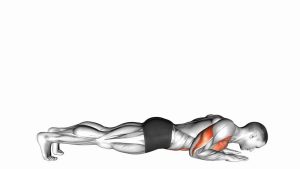
Setup / Starting Position
- Kneel on the floor or mat: Place your knees down comfortably and position your hands slightly wider than shoulder-width.
- Set your upper body: Spread the fingers, press the palms into the floor, and keep the wrists stacked under or slightly outside the shoulders.
- Align the body: Form a straight line from your head to your knees. Brace the core and keep the neck neutral.
- Prepare the push-up: Keep the elbows softly unlocked and avoid shrugging the shoulders toward the ears.
- Start steady: Look slightly ahead of your hands so the head stays in a natural position.
Tip: A folded mat or knee pad can make the setup more comfortable and help you stay relaxed through the set.
Execution (Step-by-Step)
- Lower under control: Bend the elbows and bring the chest toward the floor while keeping the body aligned from head to knees.
- Keep the elbows angled back: Let them travel at a moderate angle instead of flaring straight out to the sides.
- Reach the bottom smoothly: Lower until your chest is close to the floor or as far as you can go without losing posture.
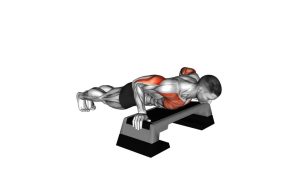
- Press back up: Push through the palms until the arms extend and you return to the kneeling push-up start position.
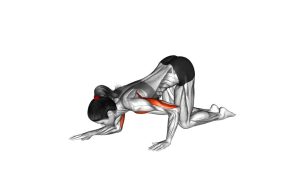
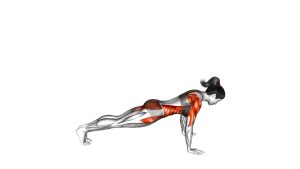
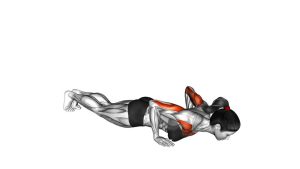
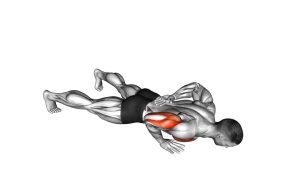
- Shift into Child’s Pose: Send the hips back toward the heels while the arms reach forward and the chest relaxes toward the floor.
- Pause briefly: Hold the stretch for a moment without collapsing through the shoulders.
- Return forward: Glide back into the kneeling push-up setup and begin the next repetition.
Pro Tips & Common Mistakes
- Keep a straight line from head to knees: Do not let the hips sag on the way down.
- Control the eccentric: A slower lowering phase improves chest and triceps involvement.
- Do not flare the elbows too wide: A moderate elbow angle is usually more shoulder-friendly.
- Press the floor away: Think about driving through the palms instead of just lifting the chest.
- Use Child’s Pose as a reset, not a rest collapse: Reach long through the arms and keep the transition active.
- Do not rush the forward return: Rebuild your position before starting the next push-up.
- Reduce range if needed: Quality reps are more valuable than forcing depth.
FAQ
What muscles does the Kneeling Push-Up to Child’s Pose work?
The main target is the chest, with strong assistance from the triceps and front shoulders. The core helps stabilize the body during the push-up, and the Child’s Pose portion adds a light stretch for the shoulders, lats, and upper back.
Is this better than a regular kneeling push-up?
It depends on your goal. A standard kneeling push-up is better for continuous pressing volume, while this version adds a mobility reset between reps. That makes it especially useful for beginners, warm-ups, and movement-focused training.
Can beginners use this to build toward full push-ups?
Yes. It is an excellent stepping stone because it teaches body alignment, controlled lowering, and pressing mechanics without the full load of a standard floor push-up.
How long should I stay in Child’s Pose?
Usually 1–3 seconds is enough between reps. The pause should help you reset posture and breathing without turning the set into a long stretch session.
What if my wrists hurt during this exercise?
Try using push-up handles, parallettes, or a slightly elevated surface to reduce wrist extension. You can also place your hands on a thicker exercise mat for a bit more comfort.
Recommended Equipment (Optional)
- Perfect Fitness Pushup Stands — useful for a more neutral wrist position and a stable push-up setup
- Amazon Basics 1/2-Inch Extra Thick Yoga Mat — adds cushioning under the knees and hands for floor-based training
- Fit Simplify Resistance Loop Exercise Bands — great for pairing with warm-up, shoulder activation, and upper-body accessory work
- Push-Up Bars — a general option if you want more wrist comfort and a slightly deeper pressing range
- Resistance Bands — helpful for extra activation drills, mobility work, and beginner-friendly accessory exercises
Tip: Push-up stands are marketed as ergonomic with non-slip bases, thick mats are described as supportive for floor work, and Fit Simplify loop bands are sold as a set of five for versatile training. :contentReference[oaicite:0]{index=0}