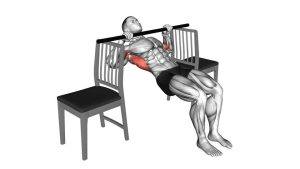
Inverted Row with Bent Knees Between Chairs: Form, Sets, Tips & FAQ
Learn how to perform the inverted row with bent knees between chairs for stronger lats, rhomboids, and biceps. Includes setup, step-by-step form, sets by goal, common mistakes, FAQs, and recommended equipment.
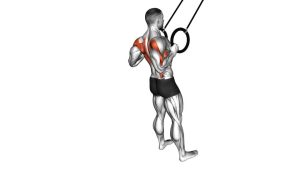
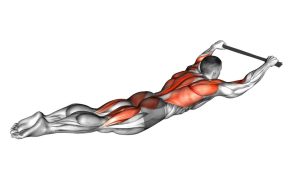
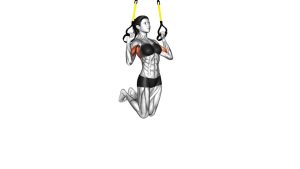
Inverted Row with Bent Knees Between Chairs
This variation is ideal for beginners who want to build pulling strength at home with minimal equipment. Because the feet stay on the ground and the knees remain bent, you can practice proper rowing mechanics without needing the full-body tension of a straight-leg inverted row. The movement should feel smooth and deliberate, with the back doing most of the work while the arms assist.
Quick Overview
| Body Part | Back |
|---|---|
| Primary Muscle | Latissimus dorsi, rhomboids, middle trapezius |
| Secondary Muscle | Biceps, rear deltoids, forearms, core stabilizers |
| Equipment | Two sturdy chairs and a secure bar, broomstick, or similar strong support |
| Difficulty | Beginner |
Sets & Reps (By Goal)
- Technique practice: 2–3 sets × 6–8 reps with slow, controlled tempo
- General strength: 3–4 sets × 8–12 reps with 60–90 sec rest
- Muscle building: 3–5 sets × 10–15 reps with full range and steady control
- Pull-up progression: 3–4 sets × 6–10 reps focusing on chest-to-bar quality
Progression rule: First increase reps while maintaining clean body alignment. After that, make the exercise harder by lowering the bar, straightening the legs, or elevating the feet.
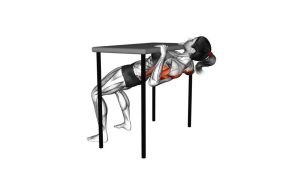
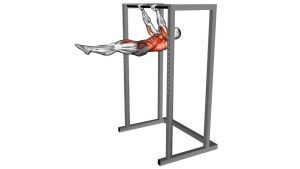
Setup / Starting Position
- Build a stable setup: Place two sturdy chairs facing each other and position a secure bar across them at about waist height.
- Lie under the bar: Slide underneath so your chest lines up below the bar and your arms can fully extend.
- Set the lower body: Plant the feet flat on the floor and bend the knees to roughly 90 degrees.
- Take your grip: Hold the bar around shoulder-width or slightly wider with a comfortable overhand grip.
- Brace the body: Keep the torso firm from shoulders to knees, chest open, and shoulders away from the ears.
Tip: Before doing reps, gently test the setup by applying light pulling force to make sure nothing shifts.
Execution (Step-by-Step)
- Start from a dead hang position: Let the arms fully extend while keeping the body braced and the heels grounded.
- Initiate with the upper back: Pull the shoulder blades back and down before bending the elbows hard.
- Row the chest upward: Drive the elbows back and pull your chest toward the bar in a straight, controlled path.
- Pause near the top: Stop when the chest gets close to the bar and squeeze the mid-back briefly.
- Lower with control: Extend the arms slowly and return to the start without dropping or losing posture.
- Repeat smoothly: Keep every rep controlled, with no bouncing, jerking, or excessive hip movement.
Pro Tips & Common Mistakes
- Lead with the chest: Aim the chest toward the bar instead of reaching the chin forward.
- Keep the torso rigid: Avoid sagging hips or excessive arching through the lower back.
- Use full arm extension: Start each rep from a controlled bottom position to train complete range.
- Do not yank the bar: Momentum reduces back tension and can make an unstable setup unsafe.
- Keep the shoulders down: Shrugging shifts work away from the target back muscles.
- Progress gradually: Bent-knee rows are a progression tool, so master them before moving to harder versions.
FAQ
What muscles does the bent-knee inverted row between chairs work?
It mainly targets the lats, rhomboids, and middle traps, while the biceps, rear delts, forearms, and core assist throughout the movement.
Why bend the knees in this inverted row?
Bending the knees shortens the lever and makes the movement easier than a straight-leg version. That helps beginners build pulling strength with better control and cleaner form.
Is this exercise good for progressing to pull-ups?
Yes. It teaches scapular control, elbow drive, and upper-back engagement, all of which carry over well to pull-ups and other vertical pulling exercises.
How close should my chest get to the bar?
Try to bring the chest as close as you can without breaking body alignment or shrugging the shoulders. Range of motion matters, but control matters more.
What should I do if the setup feels unstable?
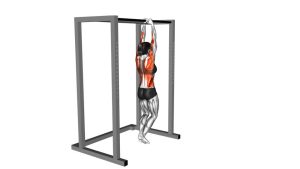
Do not continue. Replace the setup with a safer option such as a squat rack bar, suspension trainer, fixed low bar, or another secure anchor point.
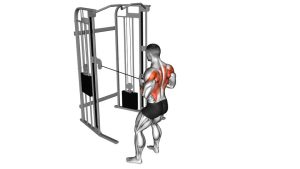
Recommended Equipment (Optional)
- Dip Bars Station — a sturdier alternative for bodyweight rows, support holds, and home pulling variations
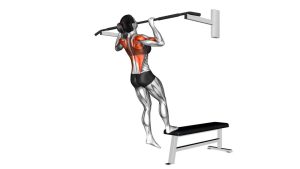
- Doorway Pull-Up Bar — useful for pull-up progressions and additional upper-body bodyweight training
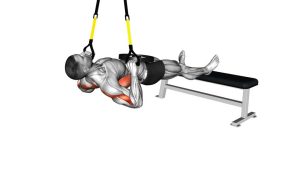
- Suspension Trainer — lets you perform rows safely with easy angle adjustments for progression
- Resistance Bands Set — great for assisted pull-ups, warm-ups, and extra back activation work
- Workout Gloves or Grip Pads — can improve comfort and grip security during repeated pulling sets
Tip: The safest upgrade from chairs is usually a more stable pulling station or suspension setup.