Weighted Plate Bent-Over Row: Proper Form, Sets, Muscles Worked & FAQ
Learn how to perform the Weighted Plate Bent-Over Row with proper form. Discover muscles worked, setup tips, sets and reps by goal, common mistakes, FAQs, and recommended equipment.
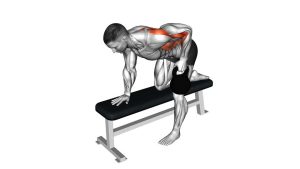
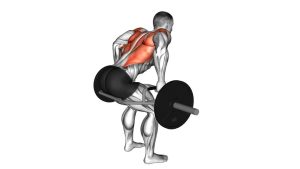
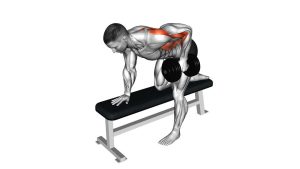
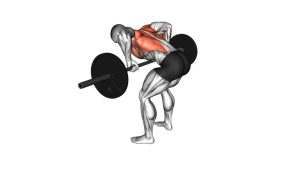
Weighted Plate Bent-Over Row
This movement blends upper-back development with postural control. Because the load is held with both hands on a plate, the exercise encourages a compact pulling path and makes it easy to focus on squeezing the shoulder blades together at the top. It can be used for muscle-building, general strength training, or as a simple row variation in a home workout.
Quick Overview
| Body Part | Back |
|---|---|
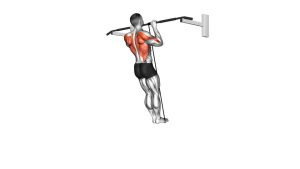
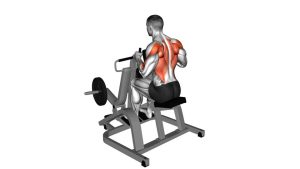
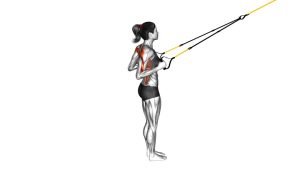
| Primary Muscle | Latissimus dorsi, rhomboids, middle trapezius |
| Secondary Muscle | Rear deltoids, biceps, forearms, spinal erectors, core |
| Equipment | Weight plate |
| Difficulty | Beginner to Intermediate |
Sets & Reps (By Goal)
- Muscle growth: 3–4 sets × 8–12 reps with controlled tempo and 60–90 seconds rest
- General strength: 4–5 sets × 5–8 reps with heavier loading and 90–120 seconds rest
- Technique practice: 2–3 sets × 10–15 reps using a lighter plate and perfect form
- Home workout back finisher: 2–3 sets × 12–20 reps with short rest and a strong squeeze at the top
Progression rule: Increase the plate weight only after you can keep a flat back, consistent elbow path, and full control during both the pull and the lowering phase.
Setup / Starting Position
- Stand tall with your feet about shoulder-width apart: Keep your stance stable and balanced from heel to toe.
- Hold the weight plate securely with both hands: Grip the outer edge or handle holes depending on the plate design.
- Soften the knees slightly: Avoid locking the legs so you can hinge comfortably.
- Hinge at the hips: Push your hips back until your torso is angled forward roughly 30–45 degrees.
- Brace your midsection: Keep your chest open, spine neutral, and neck in line with your torso.
- Let the plate hang below your shoulders: Start with the arms fully extended and shoulders set down and back.
Tip: Think about creating a strong bent-over position before the row even begins. A stable base makes the pull more effective.
Execution (Step-by-Step)
- Initiate the pull with your back: Begin by drawing your shoulder blades slightly together as the elbows start moving back.
- Row the plate toward your torso: Pull it toward the lower chest or upper abdomen instead of lifting it straight upward.
- Keep the elbows close to your sides: This helps emphasize the lats and mid-back while maintaining a clean path.
- Pause briefly at the top: Squeeze your shoulder blades together without shrugging the shoulders upward.
- Lower the plate under control: Extend the arms fully and return to the starting position without losing posture.
- Repeat for smooth, even reps: Every repetition should look nearly identical from start to finish.
Pro Tips & Common Mistakes
- Drive the elbows back: This cue usually improves back engagement more than thinking about pulling with the hands.
- Keep the spine neutral: Avoid rounding through the upper or lower back as fatigue builds.
- Do not yank the plate upward: Momentum reduces tension on the target muscles and can stress the lower back.
- Use a full range of motion: Let the arms extend fully at the bottom, then finish with a strong squeeze at the top.
- Do not shrug at lockout: Lifting the shoulders toward the ears shifts focus away from the lats and mid-back.
- Choose the right torso angle: Standing too upright turns the exercise into a less effective row variation.
- Brace the core throughout: A stable trunk helps you protect the lower back and transfer force efficiently.
FAQ
What muscles does the Weighted Plate Bent-Over Row work?
It mainly targets the lats, rhomboids, and middle traps. The rear delts, biceps, forearms, spinal erectors, and core also assist during the movement.
Is a weight plate row effective without a barbell?
Yes. A weight plate can still provide meaningful resistance for the back, especially when you use controlled reps, a strong squeeze at the top, and enough volume to challenge the muscles.
Where should I pull the plate?
In most cases, pull the plate toward the lower chest or upper abdomen. That path usually keeps the elbows moving back properly and improves back engagement.
Can beginners do this exercise?
Yes. Beginners can start with a lighter plate and focus on learning the hip hinge, bracing the core, and rowing without using momentum.
What is the most common mistake with this exercise?
The most common mistake is using body swing or lower-back movement to lift the plate instead of keeping the torso fixed and letting the upper back do the work.
Recommended Equipment (Optional)
- Olympic Grip Weight Plates — ideal for this exercise because grip holes make the plate easier and safer to hold during rows
- Tri-Grip Weight Plates — a user-friendly option for home workouts and plate-only exercises
- Weight Lifting Straps — helpful if grip fatigue limits your back training before the target muscles are fully challenged
- Workout Gloves — can improve comfort and grip when handling metal or rubber-coated plates
- Home Gym Floor Mat — useful for protecting your floor and creating a more stable training area
Tip: For this exercise, grip-friendly plates are usually the most practical upgrade because they make setup, handling, and controlled rowing much easier.