Band Close-Grip Row: Proper Form, Sets, Tips & FAQ
Learn how to do the Band Close-Grip Row with proper form to build your lats, rhomboids, and mid-back. Includes setup, step-by-step execution, sets by goal, common mistakes, FAQs, and recommended equipment.
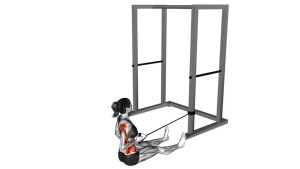
Band Close-Grip Row
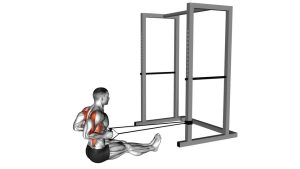
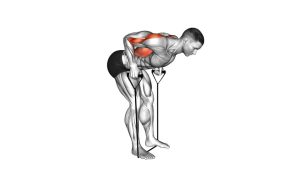
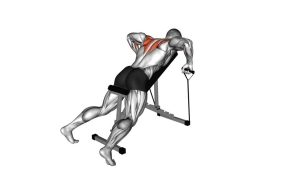
This exercise works best when each rep is controlled from start to finish. At the beginning of the pull, the arms extend forward under light band tension, and the movement begins by drawing the shoulders back before the elbows travel behind the torso. The close-grip path makes it easier to keep the elbows tucked, reduce unnecessary flare, and place more tension through the middle back and lats instead of turning the movement into a loose arm pull.
Quick Overview
| Body Part | Back |
|---|---|
| Primary Muscle | Latissimus dorsi, rhomboids, middle trapezius |
| Secondary Muscle | Rear deltoids, biceps, forearms, lower traps |
| Equipment | Resistance band with a secure anchor point or foot anchor |
| Difficulty | Beginner to Intermediate |
Sets & Reps (By Goal)
- Muscle building: 3–4 sets × 8–15 reps with controlled tempo and 60–90 seconds rest
- General back strength: 3–5 sets × 6–12 reps using a stronger band and clean form
- Posture and activation: 2–3 sets × 12–20 reps with a lighter band and a pause at contraction
- Warm-up or accessory work: 2–3 sets × 10–15 reps at moderate effort
Progression rule: Add reps first, then increase band resistance, then slow the tempo or add a 1–2 second squeeze at the top.
Setup / Starting Position
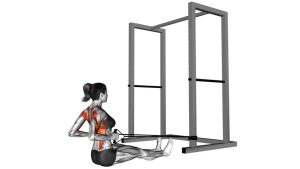
- Anchor the band securely: Attach the band at about mid-torso height, or use a sturdy setup that allows a straight rowing path.
- Take your grip: Hold the handles or ends close together with palms facing each other or in a neutral close-grip position.
- Create starting tension: Step back until the band has light tension with your arms extended.
- Set your torso: Stand tall or sit tall with your chest up, ribs stacked, and core lightly braced.
- Relax the shoulders: Keep them down and away from your ears before beginning the first rep.
Tip: Your starting distance matters. Too close and the band loses tension; too far and you may compensate by leaning back too much.
Execution (Step-by-Step)
- Begin with full control: Start with your arms extended and the band already under light tension.
- Retract first: Initiate the rep by pulling your shoulder blades back gently before bending the elbows hard.
- Drive the elbows back: Pull your hands toward the lower chest or upper abdomen while keeping the elbows close to your sides.
- Squeeze the back: At the top, pause briefly and focus on the lats and mid-back doing the work.
- Lower slowly: Extend the arms back to the starting position under control without letting the band snap forward.
- Repeat smoothly: Maintain the same torso position and rep path on every repetition.
Pro Tips & Common Mistakes
- Keep elbows tucked: A close-grip row works best when the elbows track close to the torso instead of flaring wide.
- Lead with the back, not the hands: Start by setting the shoulder blades rather than yanking with the arms.
- Do not shrug: Rising shoulders shift tension away from the target muscles and overload the upper traps.
- Avoid excessive lean-back: A small natural torso adjustment is fine, but turning the movement into a rocking motion reduces quality.
- Control the eccentric: The return phase is where a lot of muscle-building tension happens, so do not rush it.
- Use the right resistance: Choose a band that lets you finish the set with clean posture and a full squeeze.
FAQ
What muscles does the Band Close-Grip Row work the most?
It mainly targets the lats, rhomboids, and middle traps. The biceps, rear delts, and forearms also assist during the pull.
Where should I feel this exercise?
You should feel the strongest contraction in the mid-back and along the sides of the back near the lats. If you feel mostly biceps or upper traps, improve your posture and reduce the band resistance.
Is a close-grip row different from a wide-grip row?
Yes. A close-grip row usually keeps the elbows nearer to the body and often emphasizes a stronger elbow-back path, which can make it easier to focus on the lats and mid-back while maintaining a compact pulling pattern.
Can beginners use this exercise?
Absolutely. It is very beginner-friendly because resistance bands are adjustable, portable, and easier on the joints than many free-weight rowing variations.
How can I make the Band Close-Grip Row harder?
You can step farther away from the anchor, use a thicker band, add a pause at peak contraction, or slow the lowering phase for more time under tension.
Recommended Equipment
- Resistance Bands with Handles — ideal for rowing movements with a more comfortable grip and scalable resistance
- Door Anchor for Resistance Bands — useful for setting the band at a stable height for rows at home
- Stackable Resistance Bands Set — lets you progress tension gradually as your back gets stronger
- Exercise Mat — helpful for creating a stable training area during home workouts
- Lifting Straps — optional for high-volume pulling sessions when grip becomes the limiting factor
Choose equipment that helps you keep tension smooth and posture stable. For most people, a good band set and a secure anchor are all that is needed.