Negative Pull-Up: Proper Form, Sets, Muscles Worked & FAQ
Learn how to do the Negative Pull-Up with proper form to build pull-up strength, improve back development, and control the lowering phase. Includes setup, execution steps, sets by goal, mistakes, FAQs, and recommended equipment.
Negative Pull-Up
The negative pull-up is ideal for lifters who cannot yet perform multiple strict pull-ups but want a direct progression that closely matches the real movement. Because the eccentric phase is usually stronger than the concentric phase, many people can control the lowering portion even before they can pull themselves up from a dead hang. This makes the exercise highly effective for building back strength, improving scapular control, and teaching proper vertical pulling alignment.
Quick Overview
| Body Part | Back |
|---|---|
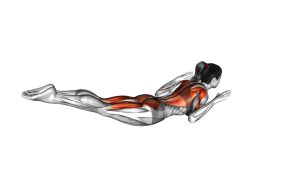
| Primary Muscle | Latissimus dorsi |
| Secondary Muscle | Biceps, rhomboids, middle traps, lower traps, rear delts, forearms, core |
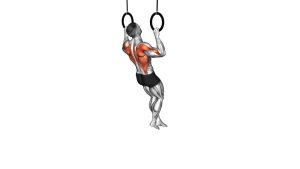
| Equipment | Pull-up bar, optional box/bench/step, optional resistance band, optional chalk |
| Difficulty | Beginner to Intermediate (excellent pull-up progression exercise) |
Sets & Reps (By Goal)
- Build first pull-up: 3–5 sets × 3–5 reps, each rep lowered for 3–8 seconds, 60–120 sec rest
- Back strength and hypertrophy: 3–4 sets × 4–6 reps, controlled descent, 60–90 sec rest
- Technique practice: 2–3 sets × 3–4 reps, focus on body position and scapular control
- Pull-up accessory work: 2–4 sets × 2–5 reps after assisted or full pull-ups
Progression rule: First increase the lowering time, then increase total reps. Once you can control several reps for 5–8 seconds each, you are usually ready for more assisted pull-up work or stricter full pull-up attempts.
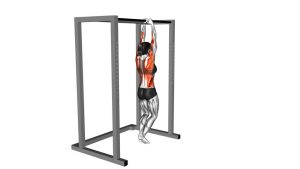
Setup / Starting Position
- Set the bar height: Use a pull-up bar and place a box, bench, or platform under it so you can step safely into the top position.
- Take your grip: Use an overhand grip around shoulder-width or slightly wider, with hands wrapped firmly around the bar.
- Get to the top: Step or jump up so your chin starts above the bar and your elbows are bent.
- Set the upper body: Pull the shoulders down and back lightly so you do not hang passively at the start.
- Brace the body: Tighten your core, keep your ribs controlled, and let the legs stay quiet to reduce swinging.
Tip: Starting from a stable top position makes the rep cleaner and safer than jumping aggressively into the movement.
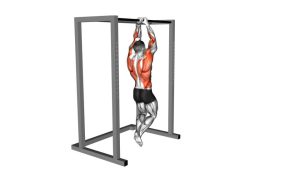
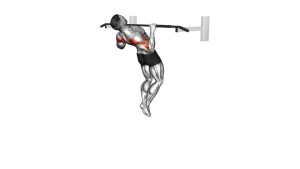
Execution (Step-by-Step)
- Begin at the top: Chin is above the bar, elbows bent, chest lifted slightly, and shoulders active.
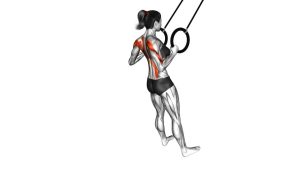
- Lower slowly: Descend under control by gradually extending the elbows while resisting gravity the entire way down.
- Keep the torso steady: Avoid kicking, twisting, or swinging. Stay stacked and move in a smooth vertical path.
- Maintain shoulder control: Do not let the shoulders collapse upward too early. Keep tension through the upper back.
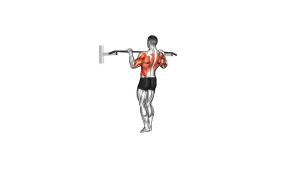
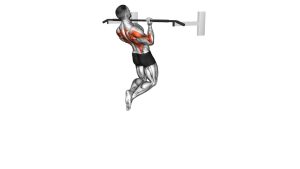
- Reach the bottom carefully: Finish near full arm extension without dropping into a loose dead hang.
- Reset and repeat: Step back onto the box or platform, return to the top position, and perform the next controlled descent.
Pro Tips & Common Mistakes
- Own the descent: The whole point of the exercise is resisting the lowering phase, not just getting through it.
- Use a consistent tempo: Count your lowering time so each rep stays deliberate and measurable.
- Keep the core braced: A tight trunk helps prevent swinging and improves back recruitment.
- Do not shrug excessively: Letting the shoulders rise too early can reduce control and stress the joints.
- Avoid jumping into bad positions: Start each rep balanced, not twisted or rushed.
- Do not overdo volume: Eccentric work is demanding. Quality reps matter more than high rep counts.
- Use assistance when needed: Bands or a lower reset height can help you keep the movement clean.
FAQ
What muscles does the negative pull-up work?
It mainly targets the lats, while also training the biceps, rhomboids, traps, rear delts, forearms, and core. It is especially useful for teaching the back to control the full pull-up pattern.
Is the negative pull-up good for beginners?
Yes. It is one of the best beginner-friendly progressions for learning pull-ups because it strengthens the exact movement pattern without requiring a full unassisted rep from the bottom.
How slow should I lower myself?
Most people should aim for a 3–8 second descent. If you drop faster than that, reduce reps, add assistance, or focus on smaller sets with better control.
Should I go all the way to full extension?
In most cases, yes. Lower until your arms are nearly or fully straight while keeping control. Do not crash into the bottom position or lose shoulder tension suddenly.
How often should I train negative pull-ups?
Two to three times per week is usually enough for most people. Because eccentric work can create significant fatigue and soreness, it is smart to recover well between sessions.
Recommended Equipment
- Doorway Pull-Up Bar — the main piece of equipment for practicing negative pull-ups at home
- Pull-Up Assistance Bands — useful for reducing load and extending control during the lowering phase
- Plyo Box or Stable Step Platform — helps you reset safely into the top position between reps
- Liquid Chalk — improves grip so your hands do not become the limiting factor too early
- Pull-Up Grips or Gymnastics Grips — optional support for hand comfort during higher-volume pulling sessions
Tip: Choose equipment that improves safety and consistency first. A reliable bar and stable reset platform matter more than accessories.