Seated Pull-Up (Legs Elevated): Proper Form, Muscles Worked, Sets, Tips & FAQ
Learn how to do the Seated Pull-Up (Legs Elevated) with proper form. Discover muscles worked, setup, step-by-step execution, sets and reps by goal, common mistakes, FAQs, and recommended equipment.
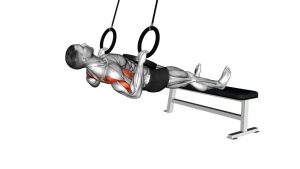
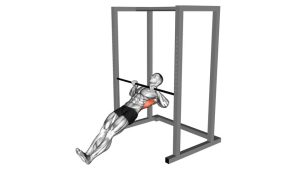
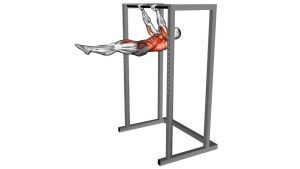
Seated Pull-Up (Legs Elevated)
This exercise is ideal for lifters who want to improve horizontal pulling strength, develop better scapular control, and build carryover toward harder pulling movements. Because the legs are elevated, the setup increases loading on the back and arms while forcing you to maintain a straight, stable body line from shoulders to heels. Clean reps matter more than speed, so prioritize range of motion, posture, and tempo over chasing extra repetitions with sloppy form.
Quick Overview
| Body Part | Back / Upper Back |
|---|---|
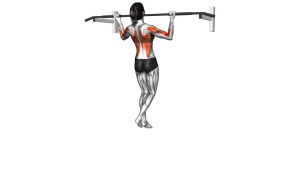
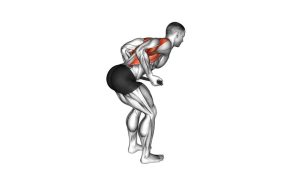
| Primary Muscle | Latissimus dorsi, rhomboids, middle trapezius |
| Secondary Muscle | Rear deltoids, biceps, forearms, core |
| Equipment | Fixed bar or Smith machine bar, bench or box for elevated feet |
| Difficulty | Intermediate |
Sets & Reps (By Goal)
- Muscle growth: 3-4 sets × 8-12 reps with controlled tempo and 60-90 seconds of rest
- Strength emphasis: 4-5 sets × 5-8 reps with strict form and 90-120 seconds of rest
- Bodyweight skill development: 3-4 sets × 6-10 reps with a pause at the top of each rep
- General back training: 2-4 sets × 10-15 reps at smooth, moderate effort
Progression rule: First improve rep quality, top-position control, and eccentric tempo. Then progress by elevating the feet higher, slowing the lowering phase, or adding external load once your body line stays solid throughout every rep.
Setup / Starting Position
- Set the bar: Position a stable bar at a height that allows you to hang underneath it with straight arms.
- Place your feet up: Rest your heels on a bench, box, or platform so your legs are elevated and extended.
- Choose your grip: Grab the bar with a shoulder-width overhand grip unless a different grip is programmed.
- Brace your body: Tighten your glutes and abs so your torso, hips, and legs form one straight line.
- Set the shoulders: Let the arms fully extend, then lightly pack the shoulders without shrugging toward the ears.
Tip: The higher the feet and the more horizontal your torso, the more difficult the exercise becomes.
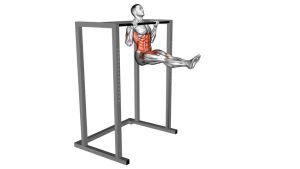
Execution (Step-by-Step)
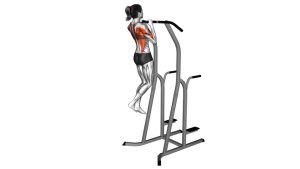
- Start from a dead hang: Begin with straight arms, tight core, and heels firmly supported on the elevated surface.
- Lead with the chest: Pull your body upward by driving the elbows down and back while keeping the chest proud.
- Retract the shoulder blades: Squeeze the upper back as your chest approaches the bar.
- Pause at the top: Briefly hold the top position when your chest reaches or nearly reaches the bar.
- Lower under control: Extend the arms slowly and return to the start without letting the hips sag or shoulders collapse.
- Repeat smoothly: Maintain the same body line and tempo on every repetition.
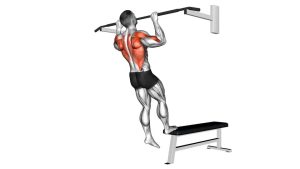
Pro Tips & Common Mistakes
- Keep the body rigid: A straight line from shoulders to heels prevents energy leaks and improves back activation.
- Use full range of motion: Extend fully at the bottom and pull high enough to create a strong upper-back squeeze.
- Control the eccentric: Lowering too fast removes tension from the target muscles and often breaks form.
- Do not let the hips drop: Sagging turns the movement into a less effective pull and can stress the lower back.
- Avoid shrugging: Keep the neck relaxed and shoulders away from the ears as you pull.
- Don’t rely only on the arms: Initiate the rep with the back and shoulder blades, not just elbow flexion.
- Match the difficulty to your level: If strict reps are not possible, reduce foot elevation before sacrificing technique.
FAQ
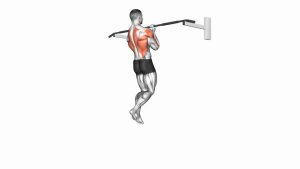
What muscles does the Seated Pull-Up (Legs Elevated) work the most?
The movement mainly targets the lats, rhomboids, and middle traps. It also trains the rear delts, biceps, forearms, and core as supporting muscles.
Is this the same as an inverted row?
It is a close variation of the inverted row. Elevating the legs makes the exercise harder because you pull a larger percentage of your body weight and must maintain stronger full-body tension.
Should I touch my chest to the bar on every rep?
Chest-to-bar is a great target if you can reach it without losing body alignment. The key is using a strong range of motion with strict control rather than forcing a sloppy top position.
Is this a good exercise for improving pull-ups?
Yes. It builds horizontal pulling strength, scapular control, grip strength, and upper-back development, all of which can help support better pull-up performance.
How can I make it easier or harder?
To make it easier, lower the feet, bend the knees, or raise the bar. To make it harder, elevate the feet higher, slow the eccentric, add a pause at the top, or wear a weighted vest.
Recommended Equipment
- Adjustable Weight Bench — useful for elevating the feet and creating a consistent setup for harder row variations
- Power Rack with Pull-Up Bar — provides a secure bar position for inverted rows, bodyweight pulls, and progression work
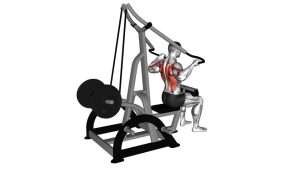
- Smith Machine — a practical gym-style setup for adjusting bar height and performing strict horizontal pulls
- Weighted Vest — ideal for progressing the exercise once bodyweight reps become easy
- Gymnastics Grips or Lifting Straps — helpful for longer pulling sessions if grip fatigue limits your back training
Choose stable equipment and set it up carefully. A secure bar and a non-slip foot platform will make the movement safer and more effective.