Roll Thoracic Spine on Floor: Proper Form, Benefits, Sets & FAQ
Learn how to perform the Roll Thoracic Spine on Floor exercise with proper form to improve upper-back mobility, reduce stiffness, and support better posture. Includes setup, execution, sets by goal, tips, FAQ, and recommended equipment.
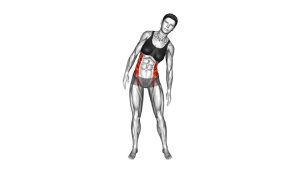
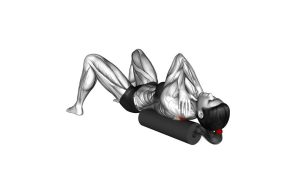
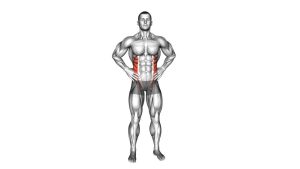
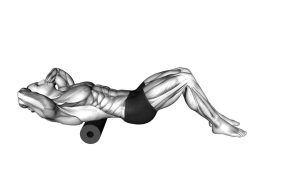
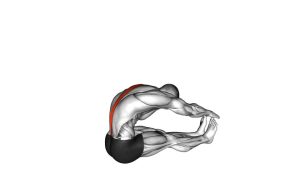
Roll Thoracic Spine (Lying on Floor)
This exercise works best when the pressure stays controlled and the rolling range remains focused on the thoracic spine. You should feel a massage-like pressure across the muscles around the shoulder blades and mid-back, not sharp pain in the spine itself. Smooth passes over tight spots usually work better than aggressive rolling or rushing.
Quick Overview
| Body Part | Upper Back |
|---|---|
| Primary Muscle | Thoracic spinal erectors, rhomboids, middle trapezius |
| Secondary Muscle | Rear deltoids, lats (lightly), muscles around the shoulder blades |
| Equipment | Foam roller, exercise mat or comfortable floor surface |
| Difficulty | Beginner |
Sets & Reps (By Goal)
- Warm-up before training: 1–2 sets of 20–40 seconds of smooth rolling
- Mobility improvement: 2–3 sets of 30–60 seconds with slow passes over tight areas
- Recovery / post-workout relief: 2–4 sets of 30–45 seconds with steady breathing
- Desk posture reset: 1–2 rounds of 20–30 seconds, focusing on the upper back only
Progression rule: Increase time or improve control before adding more pressure. Better positioning and slower movement usually produce more benefit than harder rolling.
Setup / Starting Position
- Place the foam roller horizontally on the floor and sit in front of it.
- Lie back carefully so the roller rests under your upper back, roughly around the area below the shoulder blades.
- Bend your knees and place both feet flat on the floor to create a stable base.
- Support your head lightly with your hands or keep your arms crossed over your chest if that feels better.
- Lift your hips slightly so your body weight presses into the roller without collapsing onto it.
- Brace the core gently and keep the neck relaxed before starting the rolling motion.
Tip: Keep the chin neutral and the ribs controlled so you do not turn the drill into a lower-back arch.
Execution (Step-by-Step)
- Start with the roller under the upper back: Position it across the thoracic spine, not the neck and not the lumbar region.
- Drive through your feet: Use your legs to move your body slowly backward and forward over the roller.
- Roll through the mid-to-upper back: Stay in the thoracic area and keep each pass controlled.
- Pause briefly on tight spots: When you find a stiff area, stop for 2–5 seconds and breathe without forcing extra pressure.
- Maintain a relaxed upper body: Let the shoulders stay loose and avoid shrugging or tensing the jaw.
- Keep the motion smooth: Continue for the planned duration, then lower the hips and come off the roller carefully.
Pro Tips & Common Mistakes
- Stay on the thoracic spine: Keep the roller on the upper and mid-back rather than drifting into the lower back.
- Use slow passes: Quick rolling usually misses tight tissue and reduces control.
- Let the legs do the work: Push through the feet instead of throwing the body around.
- Protect the neck: Support the head if needed and avoid letting it hang backward.
- Do not chase pain: Moderate pressure is enough. More force does not always mean better results.
- Breathe normally: Calm breathing helps the upper back relax and makes the drill more effective.
- Pair it with mobility or posture work: Thoracic rolling works well before rows, face pulls, wall slides, and overhead pressing.
FAQ
What part of the back should I roll in this exercise?
Focus on the thoracic spine, which is the mid-to-upper back. Avoid rolling directly on the neck or lower back. The most useful area is usually around the shoulder blades and the muscles surrounding them.
Should this exercise hurt?
It can feel intense on tight tissue, but it should not feel sharp, stabbing, or nerve-like. A pressure or deep massage sensation is normal. If pain increases or radiates, stop and adjust the position.
How long should I spend rolling my thoracic spine?
Most people do well with 20 to 60 seconds per set. Short, controlled sessions are usually enough. You do not need several minutes of aggressive rolling to get results.
Is this good before upper-body workouts?
Yes. It can be useful before upper-body sessions, especially when you want better posture and smoother shoulder movement for rows, presses, pull-ups, and overhead exercises.
Can beginners use a foam roller for thoracic mobility?
Absolutely. This is a beginner-friendly mobility drill when done with control. Start with short sets, moderate pressure, and a limited range until you feel comfortable.
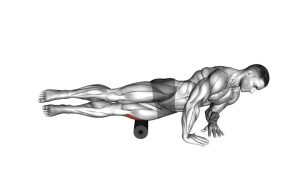
Recommended Equipment
- High-Density Foam Roller — the main tool for applying consistent pressure to the thoracic spine and upper-back muscles
- Textured Foam Roller — a firmer option for users who want more targeted pressure on tight areas
- Exercise or Yoga Mat — adds comfort and grip while you set up and roll on the floor
- Peanut Massage Ball — useful for more focused upper-back pressure without placing direct force on the spine
- Resistance Bands Set — helpful for pairing this mobility drill with posture and upper-back activation work afterward
Tip: Most beginners do best with a standard foam roller first. Extra-firm tools can be useful later, but only if you can stay relaxed and controlled.