Cable Low Seated Row: Proper Form, Muscles Worked, Sets, Tips & FAQ
Learn how to do the Cable Low Seated Row with proper form to build back thickness, improve posture, and strengthen the lats, rhomboids, and traps. Includes setup, execution steps, sets by goal, common mistakes, FAQ, and recommended equipment.
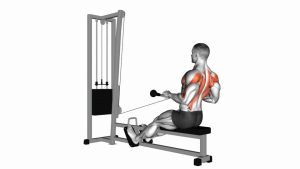
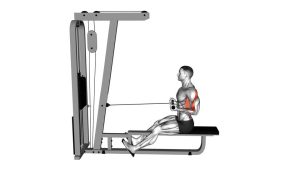
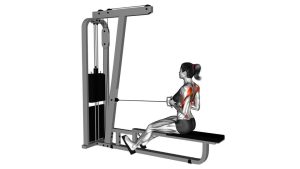
Cable Low Seated Row
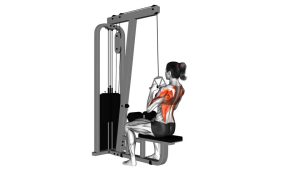
This exercise is most effective when you lead the movement with your back muscles rather than your arms. At the start, your shoulder blades should move forward naturally to create a stretch through the upper and middle back. As you row, pull the handle toward your lower torso while squeezing the shoulder blades together. Keep your chest proud, your spine neutral, and your tempo controlled from start to finish. Done correctly, the Cable Low Seated Row is one of the most reliable exercises for building a stronger, thicker back without unnecessary stress on the lower body.
Quick Overview
| Body Part | Back |
|---|---|
| Primary Muscle | Latissimus dorsi, rhomboids, middle trapezius |
| Secondary Muscle | Rear deltoids, biceps, forearms, lower traps, spinal stabilizers |
| Equipment | Cable machine with low pulley and close-grip row handle |
| Difficulty | Beginner to Intermediate |
Sets & Reps (By Goal)
- Muscle growth: 3–4 sets × 8–12 reps with controlled tempo and a full squeeze on each rep
- Strength focus: 4–5 sets × 5–8 reps using heavier weight while maintaining strict form
- Technique and posture work: 2–3 sets × 12–15 reps with lighter weight and deliberate scapular control
- Warm-up or activation: 2–3 sets × 12–20 reps with light resistance before heavier back work
Progression rule: Increase the load only after you can complete all target reps with a neutral torso, full arm extension, and a clean shoulder blade squeeze at the finish.
Setup / Starting Position
- Set the machine: Attach a close-grip or neutral row handle to the low pulley.
- Sit tall: Sit on the bench with your feet braced firmly on the platform and knees slightly bent.
- Grab the handle: Reach forward and take the handle with both hands using a secure neutral grip.
- Find your posture: Keep your chest lifted, shoulders down, core braced, and spine neutral.
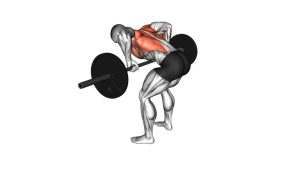
- Start in a stretch: Let your arms extend fully without collapsing your torso or rounding aggressively through the lower back.
Tip: A slight natural forward reach at the start is fine, but your torso should stay controlled and not fold excessively toward the machine.
Execution (Step-by-Step)
- Begin the pull: Start the rep by drawing your shoulder blades back and down.
- Row the handle in: Pull the handle toward your lower abdomen or navel area while keeping the elbows close to the body.
- Keep the chest tall: Stay upright with only a slight torso movement—do not swing backward to move the load.
- Squeeze at the finish: Pause briefly when your elbows move just behind the torso and your shoulder blades fully retract.
- Return under control: Slowly extend the arms and allow the shoulder blades to move forward naturally into a stretch.
- Repeat smoothly: Maintain the same path and tempo on every repetition.
Pro Tips & Common Mistakes
- Lead with the back: Initiate with the shoulder blades instead of yanking with the arms.
- Keep the elbows close: A tighter elbow path emphasizes the lats and creates a smoother pulling line.
- Use full range: Reach into a controlled stretch, then finish with a real squeeze between the shoulder blades.
- Avoid excessive lean-back: Turning the row into a rocking motion reduces tension on the target muscles.
- Do not shrug: Keep the traps from taking over by keeping the shoulders down and neck relaxed.
- Control the eccentric: The lowering phase matters just as much as the pull for muscle growth and technique.
- Match the grip to comfort: A neutral close grip is usually the most joint-friendly and easiest to control.
FAQ
What muscles does the Cable Low Seated Row work most?
It primarily trains the lats, rhomboids, and middle traps. The rear delts, biceps, forearms, and other upper-back stabilizers also assist throughout the movement.
Where should I pull the handle?
For most lifters, pulling the handle toward the lower abdomen or navel area works best. This helps keep the elbows close and encourages a strong back contraction.
Should I lean back during the rep?
A tiny natural torso adjustment is acceptable, but you should not throw your upper body backward to move the weight. The exercise should stay controlled and back-driven.
Is the seated cable row good for posture?
Yes. When performed with proper form, it strengthens the muscles that retract and stabilize the shoulder blades, which can support better upper-body posture.
Can beginners use this exercise?
Absolutely. It is one of the most beginner-friendly back exercises because the cable path is stable and the resistance is easy to adjust. Start light and focus on technique first.
Recommended Equipment (Optional)
- Close-Grip Seated Row Handle — a compact neutral-grip attachment that works well for low cable rows and controlled elbow tracking
- V-Bar Row Attachment — useful for emphasizing a strong close-grip rowing motion with solid mid-back engagement
- Lifting Straps — helpful if grip fatigue limits your back training before the target muscles are fully challenged
- Resistance Bands Set — great for warm-ups, scapular activation drills, and extra upper-back volume outside the cable machine
- Weightlifting Gloves — optional comfort and grip support for longer rowing sessions or higher-rep back workouts
Tip: Accessories should improve comfort and consistency, not replace proper technique. Your best results still come from controlled reps and progressive overload.