Kneeling Upper Back Rotation: Proper Form, Benefits, Sets & FAQ
Learn the Kneeling Upper Back Rotation to improve thoracic mobility, posture, and upper-back control. Includes setup, step-by-step form, sets by goal, mistakes, FAQs, and recommended equipment.
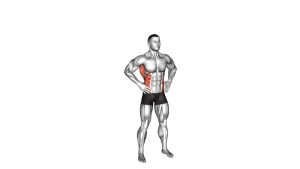
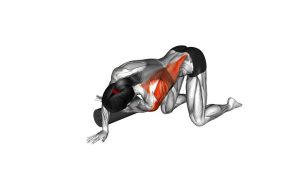
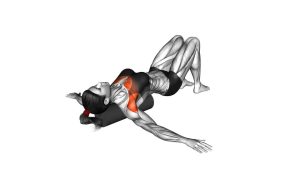
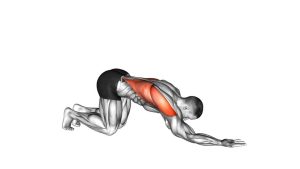
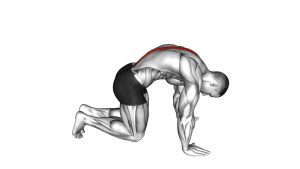
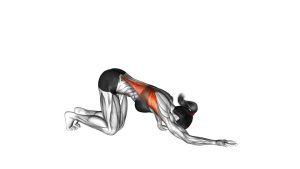
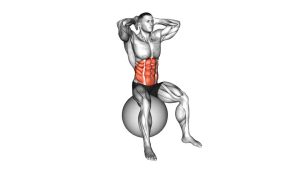
Kneeling Upper Back Rotation
This exercise is best performed with slow, controlled motion and a stable base. You should feel a gentle stretch or activation around the upper back, mid-back, and the muscles around the shoulder blade. The supporting arm stays firm, the core stays lightly braced, and the hips should remain quiet throughout the rep. This is a mobility drill, so quality matters more than range.
Quick Overview
| Body Part | Upper Back |
|---|---|
| Primary Muscle | Thoracic spinal rotators, rhomboids, middle trapezius |
| Secondary Muscle | Rear deltoids, rotator cuff stabilizers, core stabilizers |
| Equipment | None (optional: exercise mat) |
| Difficulty | Beginner |
Sets & Reps (By Goal)
- Mobility warm-up: 1–2 sets × 6–10 reps per side (slow tempo, 20–30 sec rest)
- Posture and movement quality: 2–3 sets × 8–12 reps per side (controlled breathing, 30–45 sec rest)
- Pre-workout upper-back prep: 1–3 sets × 5–8 reps per side before rows, pull-ups, presses, or overhead work
- Daily stiffness relief: 1–2 sets × 6–8 reps per side with easy, pain-free range
Progression rule: Increase control and usable range before adding more reps. The best reps come from clean thoracic rotation, not from shifting the hips or forcing the shoulder.
Setup / Starting Position
- Start on all fours: Place your hands under your shoulders and your knees under your hips.
- Set a neutral spine: Keep your back flat, ribs gently tucked, and neck long.
- Brace lightly: Engage your core just enough to keep your torso stable.
- Plant the support hand: One hand stays firmly on the floor while the other arm performs the rotation.
- Keep hips square: Avoid leaning to one side or twisting through the lower back.
Tip: Using a soft mat can make the kneeling position more comfortable, allowing you to focus on smooth upper-back movement.
Execution (Step-by-Step)
- Begin in quadruped: Set your hands and knees, then stabilize through the planted arm.
- Reach under: Slide the working arm underneath your torso, allowing the upper back to rotate inward slightly.
- Pause briefly: Keep the movement controlled without collapsing into the shoulder.
- Open the chest: Reverse the motion and rotate the working arm upward, leading with the elbow or hand as your chest opens toward the side.
- Rotate through the upper back: Let the eyes follow the moving arm if it feels natural, but keep the neck relaxed.
- Return smoothly: Come back to the start position and repeat for the desired number of reps before switching sides.
Pro Tips & Common Mistakes
- Move slowly: Thoracic mobility drills work better when you control each phase instead of rushing.
- Keep the support shoulder active: Don’t sink into the planted arm.
- Rotate from the upper back: Avoid turning the movement into a low-back twist.
- Keep the hips quiet: Excess hip movement reduces the benefit to the thoracic spine.
- Breathe through the rep: Exhale gently as you open into rotation to help improve mobility.
- Don’t force end range: Smooth, pain-free motion is more useful than aggressive stretching.
FAQ
What does the Kneeling Upper Back Rotation work?
It mainly improves thoracic spine mobility and trains better rotation through the upper back. It also lightly involves the rhomboids, traps, rear delts, and core stabilizers.
Should I feel this as a stretch or a strength exercise?
Most people feel it more as a mobility and control drill than a heavy strength exercise. You may notice a stretch through the upper back and chest, along with light muscular effort around the shoulder blade.
Can beginners do this exercise?
Yes. It is beginner-friendly as long as you use a comfortable range of motion and keep the hips stable. Start slowly and avoid forcing the rotation.
When should I use Kneeling Upper Back Rotations?
They work well in a warm-up, mobility session, posture routine, or before upper-body workouts that require good shoulder and upper-back movement.
What are the most common mistakes?
The most common errors are rotating through the lower back, shifting the hips too much, collapsing the support shoulder, and moving too quickly to control the motion.
Recommended Equipment (Optional)
- Foam Roller — useful for general upper-back mobility prep and recovery work
- Half-Round Foam Roller — helpful for positioning, posture drills, and controlled thoracic mobility work
- Peanut Massage Ball — a targeted tool for upper-back soft-tissue work around the spine
- Resistance Bands Set — good for pairing with rows, pull-aparts, and shoulder activation exercises
- Exercise Yoga Mat — improves comfort and knee support during kneeling drills
Tip: Keep the equipment simple. This exercise works well with bodyweight alone, and optional tools are mainly there to improve comfort, prep, or recovery.