Parallel Bars Bent-Knee Inverted Row: Form, Muscles Worked, Sets & Tips
Learn how to do the Parallel Bars Bent-Knee Inverted Row with proper form. Discover muscles worked, setup tips, sets and reps by goal, common mistakes, FAQs, and recommended equipment.
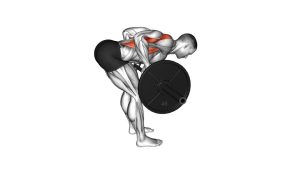
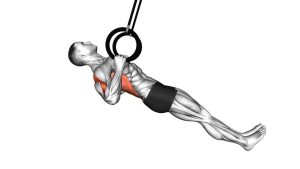
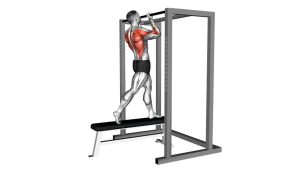
Parallel Bars Bent-Knee Inverted Row
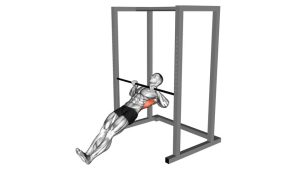
This exercise works best when every rep stays smooth and deliberate. At the top, your shoulder blades should pull together while your chest rises toward the bars without your hips sagging or your neck jutting forward. Because your feet stay planted and your knees stay bent, this variation is easier to control than a full straight-body inverted row, but it still provides excellent training for the upper back, arm flexors, and core.
Quick Overview
| Body Part | Back |
|---|---|
| Primary Muscle | Latissimus dorsi, rhomboids, middle trapezius |
| Secondary Muscle | Biceps, rear deltoids, forearms, core stabilizers |
| Equipment | Parallel bars, dip bars, or sturdy low bars |
| Difficulty | Beginner to intermediate |
Sets & Reps (By Goal)
- Technique practice: 2–3 sets × 6–8 reps with slow tempo and full control
- Muscle building: 3–4 sets × 8–12 reps with 60–90 seconds rest
- General strength: 4–5 sets × 5–8 reps with a harder body angle and 90–120 seconds rest
- Warm-up / activation: 2 sets × 8–10 smooth reps before pull-ups, rows, or upper-back training
Progression rule: First improve control, range of motion, and body alignment. Then make the exercise harder by lowering the bar, extending the legs more, elevating the feet, or adding a pause at the top.
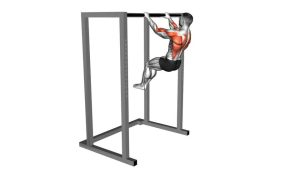
Setup / Starting Position
- Position the bars: Use parallel bars or low bars set at a height that allows you to hang underneath with your feet flat on the floor.
- Take your grip: Hold the bars firmly with a neutral grip. Your hands should feel secure and evenly placed from side to side.
- Set your lower body: Bend your knees and plant your feet flat. The knees stay bent throughout the movement.
- Lift the hips: Create a straight line from shoulders to knees. Avoid letting the hips sink toward the floor.
- Brace the torso: Keep the ribs down, core engaged, and neck neutral before starting the first rep.
Tip: The more upright your torso is, the easier the exercise becomes. The more horizontal your body is, the harder each rep feels.
Execution (Step-by-Step)
- Start from a dead hang: Let your arms extend fully while keeping your hips lifted and your body aligned.
- Initiate with the back: Begin by pulling the shoulder blades back and down instead of yanking with the arms first.
- Row your chest upward: Drive your elbows down and slightly back as your chest moves toward the bars.
- Pause at the top: Reach the strongest position you can control, ideally with the chest close to the bars and the shoulder blades squeezed together.
- Lower slowly: Extend the arms under control and return to the starting position without dropping the hips or losing tension.
Pro Tips & Common Mistakes
- Keep the body rigid: Maintain a straight line from shoulders to knees throughout the set.
- Pull the chest, not just the chin: Think chest-to-bars for better upper-back engagement.
- Lead with the elbows: Driving the elbows back helps shift the work into the lats and mid-back.
- Avoid hip drop: Sagging hips turn the movement sloppy and reduce total-body tension.
- Don’t shrug at the top: Keep the shoulders away from the ears and focus on scapular retraction.
- Use full range of motion: Start from extended arms and lower all the way back down under control.
- Control the tempo: A smooth 1–2 second pull and 2–3 second lowering phase makes the row more effective.
- Progress gradually: Move to straighter legs or a lower setup only after your bent-knee reps look solid.
FAQ
What muscles does the Parallel Bars Bent-Knee Inverted Row work?
It mainly trains the lats, rhomboids, and middle trapezius. The biceps, rear delts, forearms, and core also help stabilize and complete the pull.
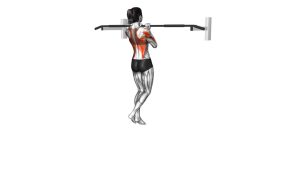
Is this a good beginner alternative to pull-ups?
Yes. This is one of the best beginner pulling exercises because it teaches scapular control, body tension, and rowing mechanics with less total load than a pull-up.
Why keep the knees bent?
Bending the knees shortens the lever and keeps the feet grounded, which reduces difficulty and makes it easier to maintain proper form.
How do I make bent-knee inverted rows harder?
Lower the bars, walk the feet farther forward, straighten the legs, elevate the feet, or add a pause at the top of each rep. You can also slow the lowering phase.
Should I feel this more in my arms or my back?
You will feel some arm involvement, but the exercise should mainly feel like a back movement. If your arms dominate, focus on pulling the elbows back and squeezing the shoulder blades together.
Recommended Equipment (Optional)
- Equalizer / Dip Bars — ideal for performing bent-knee inverted rows, support holds, dips, and other bodyweight pulling and pushing drills
- Adjustable Dip Bar Station — useful if you want more flexibility in bar height and width for rows and other calisthenics movements
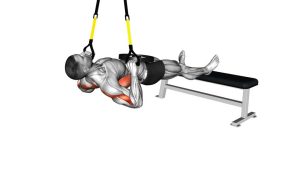
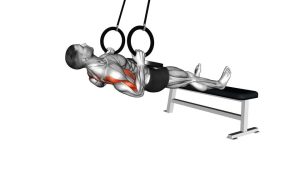
- Gymnastic Rings with Adjustable Straps — great for progressing to ring rows and building more shoulder stability through a larger range of motion
- Suspension Trainer — a versatile alternative for bodyweight rows that makes setup simple at home or while traveling
- Resistance Bands Set — useful for warm-ups, scapular activation, pull-aparts, and assistance work to complement your rowing strength
Tip: Choose equipment that lets you maintain stable body position and smooth reps. The best setup is the one that allows strict pulling mechanics without compensating through the hips or neck.