Ring Weighted Neutral-Grip Inverted Row: Form, Muscles Worked, Sets & Tips
Learn how to do the Ring Weighted Neutral-Grip Inverted Row with proper form. Discover muscles worked, setup, execution, sets by goal, common mistakes, FAQs, and recommended equipment.
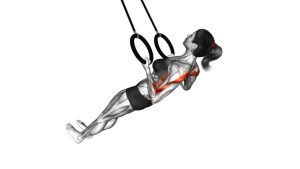
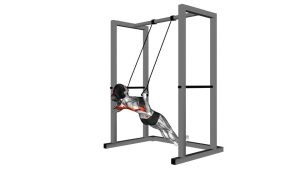
Ring Weighted Neutral-Grip Inverted Row
This exercise is excellent for building upper-back thickness, improving pulling strength, and bridging the gap between bodyweight rows and heavier vertical pulling movements. The rings allow natural hand rotation, which can feel better on the wrists, elbows, and shoulders than a fixed straight bar. Because the load is unstable and your torso must stay rigid, every rep should be controlled from start to finish.
Quick Overview
| Body Part | Back |
|---|---|
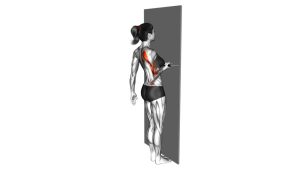
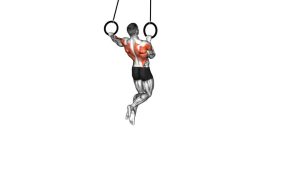
| Primary Muscle | Latissimus dorsi, rhomboids, middle trapezius |
| Secondary Muscle | Rear deltoids, biceps, brachialis, forearms, core, glutes |
| Equipment | Gymnastic rings, sturdy anchor point, bench or box for foot elevation, weight plate or weighted vest |
| Difficulty | Advanced |
Sets & Reps (By Goal)
- Strength: 4–5 sets × 4–6 reps with 90–150 sec rest
- Muscle growth: 3–4 sets × 6–10 reps with 60–90 sec rest
- Bodyweight pulling progression: 3–4 sets × 8–12 reps using lighter added load or slower tempo
- Control and scapular stability: 2–3 sets × 6–8 reps with a 2-second squeeze at the top
Progression rule: Increase load only when you can keep a straight body line, reach full arm extension at the bottom, and pull evenly without twisting or shrugging.
Setup / Starting Position
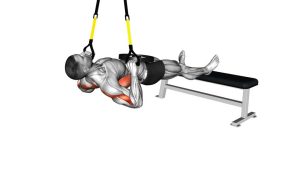
- Set the rings: Adjust the rings so that when you hang underneath them, your torso can stay nearly parallel to the floor at the bottom.
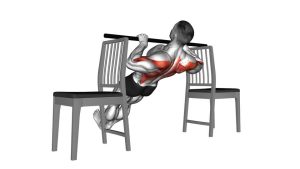
- Place the feet up: Put your heels on a flat bench or sturdy box to increase the lever challenge.
- Use a neutral grip: Grab the rings with palms facing each other and wrists stacked naturally.
- Add resistance: Position a weight plate across the hips or torso, or wear a weighted vest if preferred.
- Brace hard: Squeeze glutes, tighten abs, and keep the head, torso, hips, and legs in one straight line.
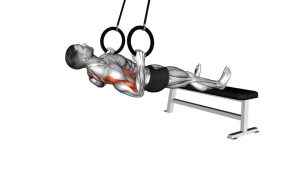
- Start fully extended: Let the arms straighten completely while keeping the shoulders packed and controlled.
Tip: Before adding weight, make sure you already own clean bodyweight ring rows with feet elevated.
Execution (Step-by-Step)
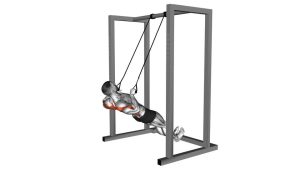
- Set your line: Begin with a rigid plank-like body position from shoulders to heels.
- Initiate with the back: Start the rep by pulling the shoulder blades back and down rather than yanking with the arms first.
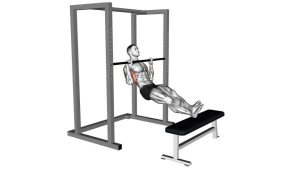
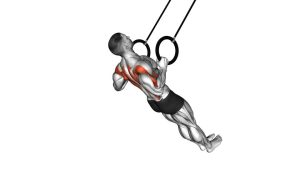
- Drive the elbows back: Pull your chest toward the rings while keeping the elbows close to the torso.
- Bring the chest high: Aim to touch or nearly touch the lower chest or upper abdomen to the rings.
- Pause briefly: Squeeze the shoulder blades together at the top without jutting the chin forward.
- Lower under control: Extend the arms slowly and return to the starting position without letting the hips sag.
- Repeat smoothly: Keep every rep even from left to right and avoid swinging or rushing the tempo.
Pro Tips & Common Mistakes
- Keep a neutral body line: Do not let the hips drop or the ribs flare as the set gets harder.
- Pull chest-first: Think about leading with the sternum rather than curling yourself up with the biceps.
- Use full range: Reach full extension at the bottom and a clear squeeze at the top.
- Control the rings: Do not let one ring drift higher than the other.
- Avoid shrugging: Keep the shoulders away from the ears and maintain scapular depression.
- Do not overload too early: Extra weight should enhance the row, not ruin your body position.
- Earn the elevation: If your feet-elevated bodyweight version is shaky, master that before adding plates.
- Use tempo for progression: A 2–3 second lowering phase can build control without needing excessive load.
FAQ
What muscles does the Ring Weighted Neutral-Grip Inverted Row work most?
It primarily targets the lats, rhomboids, and middle traps. The biceps, rear delts, forearms, core, and glutes also contribute to pulling strength and whole-body stability.
Why use rings instead of a fixed bar?
Rings allow your hands to rotate naturally, which often feels more comfortable on the shoulders, wrists, and elbows. They also add instability, forcing you to control the path of each rep more carefully.
Is this better for strength or hypertrophy?
It works for both. Heavier sets with lower reps are great for strength, while moderate reps with strict control are excellent for hypertrophy and upper-back development.
Should I use a weight plate or a weighted vest?
Both can work well. A weighted vest usually feels more stable and easier to manage, while a weight plate can be a simple option if you already train with plates.
How do I know if the load is too heavy?
The load is too heavy if you lose your straight body line, shorten the range of motion, twist toward one side, or cannot lower under control. Clean mechanics should always come first.
Recommended Equipment
- Wooden Gymnastic Rings Set — the core tool for this exercise; look for sturdy straps, clear markings, and a comfortable grip.
- Adjustable Weighted Vest — a stable way to add resistance without balancing a plate on the hips or torso.
- Flat Utility Bench — useful for elevating the feet and increasing the difficulty of horizontal pulling variations.
- Bumper Plates — practical for progressive overload if you prefer loading the movement with a plate.
- Lifting Chalk — improves grip security on high-effort ring pulling sets, especially when hands get sweaty.
Choose equipment that improves stability and control first. For most lifters, rings plus a weighted vest and a solid bench make the cleanest setup for this exercise.