Inverted Row Under Table: Proper Form, Muscles Worked, Sets, Tips & FAQ
Learn how to do the Inverted Row Under Table with proper form. Discover muscles worked, setup, step-by-step execution, sets and reps by goal, common mistakes, FAQs, and recommended equipment.
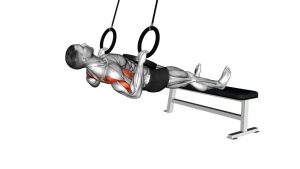
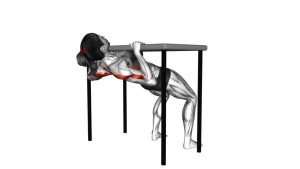
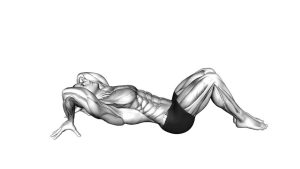
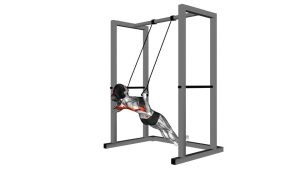
Inverted Row Under Table
This exercise works best when you keep your body rigid and pull with your back rather than yanking with your arms. At the top, think about bringing your chest toward the table edge while squeezing the shoulder blades together. At the bottom, lower under control instead of dropping. Smooth reps will build more strength and better positioning than fast, sloppy repetitions.
Quick Overview
| Body Part | Back |
|---|---|
| Primary Muscle | Latissimus dorsi, rhomboids, middle trapezius |
| Secondary Muscle | Biceps, rear deltoids, forearms, core |
| Equipment | Sturdy table |
| Difficulty | Beginner to intermediate, depending on body angle and leg position |
Sets & Reps (By Goal)
- Technique and control: 2–3 sets × 6–10 reps, slow tempo, 45–75 sec rest
- Muscle building: 3–4 sets × 8–15 reps, controlled squeeze at the top, 60–90 sec rest
- General strength: 3–5 sets × 5–8 reps, harder body angle or straighter legs, 75–120 sec rest
- Home workout circuit: 2–4 sets × 10–15 reps paired with push-ups, squats, or planks
Progression rule: First increase control and range of motion, then increase reps, then make the exercise harder by straightening the legs or elevating the feet.
Setup / Starting Position
- Position the body under the table: Lie on your back underneath a sturdy table with the table edge above your chest line.
- Grip the edge firmly: Use an overhand grip around shoulder-width or slightly wider.
- Set your feet: Keep the knees bent and feet flat on the floor for an easier version.
- Brace your body: Tighten the core and glutes so your torso stays straight from shoulders to knees.
- Start with straight arms: Let the body hang under control with the shoulders set and neck neutral.
Tip: The closer your body stays to a straight plank position, the more demanding the exercise becomes.
Execution (Step-by-Step)
- Initiate with the upper back: Begin by pulling the shoulder blades back and down instead of bending the elbows first.
- Pull the chest upward: Drive the elbows down and back as your chest rises toward the table edge.
- Keep the body rigid: Avoid letting the hips sag or the lower back overarch during the pull.
- Squeeze at the top: Pause briefly when your chest gets close to the underside or edge of the table.
- Lower slowly: Extend the arms under control until you return to the starting position.
Pro Tips & Common Mistakes
- Pull your chest to the table, not your chin: This helps keep the movement back-dominant instead of neck-dominant.
- Lead with the elbows: Driving the elbows down and back improves lat and upper-back recruitment.
- Keep the core tight: A rigid body transfers force better and protects your position.
- Do not rush the lowering phase: The eccentric portion builds strength and control.
- Avoid flared ribs and sagging hips: Stay braced throughout the full rep.
- Do not use an unstable table: Stability always comes before exercise difficulty.
FAQ
What muscles does the inverted row under table work?
It mainly targets the lats, rhomboids, and middle traps, while also training the biceps, rear delts, forearms, and core as supporting muscles.
Is this a good substitute for pull-ups?
Yes. It is a great horizontal pulling exercise that helps build the upper-back and arm strength needed for pull-up progressions, especially for beginners.
How do I make it easier?
Bend the knees more, keep the feet closer to your body, reduce the range of motion slightly, and focus on slower controlled repetitions.
How do I make it harder?
Straighten the legs, elevate the feet, pause longer at the top, or slow the eccentric phase to increase time under tension.
Should I feel this more in my arms or my back?
You will feel some arm involvement, but the main effort should come from the upper back and lats. If it feels mostly like an arm exercise, focus more on scapular control and elbow path.
Recommended Equipment
- Doorway Pull-Up Bar — a simple upgrade when you want sturdier home pulling options beyond a table
- Resistance Bands Set — useful for assisted rows, warm-ups, and extra back training at home
- Wooden Gymnastics Rings — excellent for adjustable inverted rows and long-term bodyweight progression
- Dip Station / Power Tower — gives you a more dedicated setup for rows, pull-ups, dips, and bodyweight training
- Exercise Mat — adds comfort under the back, hips, and feet during home row variations
Choose equipment based on stability first. For most people, rings or a sturdy pull-up station offer a safer long-term setup than using household furniture.