Clock Push-Up (Chest Focus): Form, Sets & Reps, Tips, FAQ + Gear
Learn the Clock Push-Up (chest focus) with step-by-step form cues, sets & reps by goal, common mistakes, FAQs, and recommended equipment to build stronger pecs and core stability.
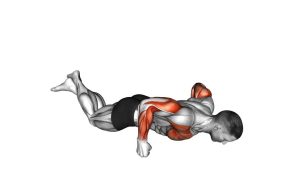
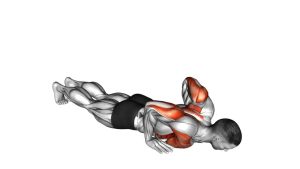
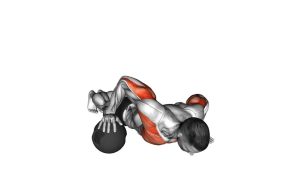
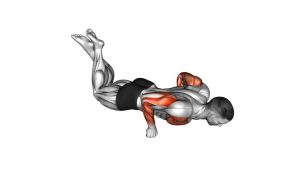
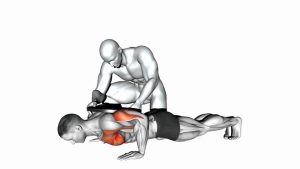
Clock Push-Up (Chest Focus)
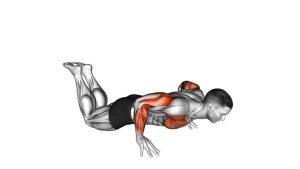
This movement is all about control, not speed. You’ll feel the pecs work harder as the moving hand reaches farther from your strongest position. The challenge is to press smoothly while resisting rotation—your hips should stay level and your shoulders should stay packed and stable.
Quick Overview
| Body Part | Chest |
|---|---|
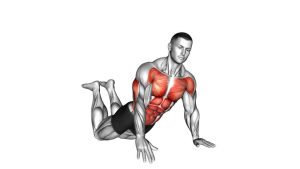
| Primary Muscle | Pectoralis major (chest) |
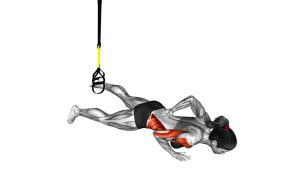
| Secondary Muscle | Anterior deltoids, triceps, serratus anterior, core (obliques/abs) for anti-rotation |
| Equipment | None (optional: sliders, push-up handles, mat) |
| Difficulty | Intermediate (advanced if you use long reaches or strict tempo) |
Sets & Reps (By Goal)
- Muscle (hypertrophy): 3–5 sets × 6–12 reps per side (60–90 sec rest)
- Strength / control: 4–6 sets × 4–8 reps per side (90–120 sec rest, slower tempo)
- Endurance / conditioning: 2–4 sets × 10–20 reps total (alternate sides, 45–75 sec rest)
- Warm-up / activation: 2–3 sets × 6–10 easy reps (short reach, smooth tempo)
Progression rule: First increase control (no hip twist) and range (longer clock reach), then add reps. If form breaks, scale back to fewer clock positions (e.g., only 12 and 1–2 o’clock).
Setup / Starting Position
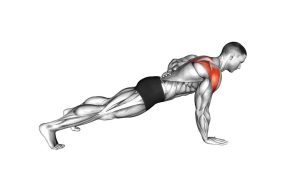
- Hands & base: Start in a high plank. Place your support hand under your shoulder. Set feet wider than normal for balance.
- Brace: Squeeze glutes, lightly tuck the pelvis, and keep ribs down. Your body should look like a strong plank.
- Shoulders: “Pack” the shoulders (down and slightly back). Avoid shrugging toward the ears.
- Wrist-friendly option: Use push-up handles or do it on fists if wrists are sensitive (only if comfortable and stable).
- Choose clock positions: Pick 2–5 positions (example: 12 → 1–2 → 3 o’clock) based on your strength and control.
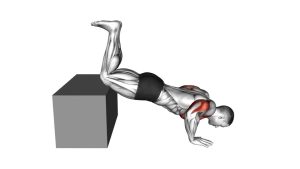
Tip: If you’re new to this, elevate your hands on a bench or box to reduce load while you learn to keep your hips square.
Execution (Step-by-Step)
- Start in a strict plank: Feet wide, support hand under shoulder, moving hand placed at your first clock position.
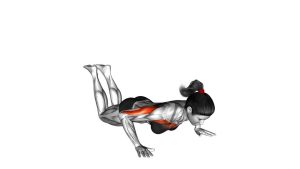
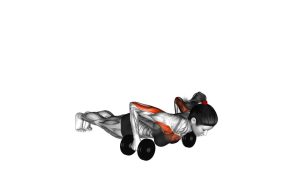
- Lower under control: Bend elbows and lower chest toward the floor. Keep hips level and avoid twisting.
- Press up: Push the floor away to full extension. Keep shoulders stable—don’t collapse between the shoulder blades.
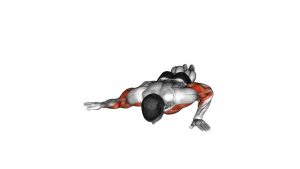
- Walk the hand: Move the working hand to the next clock position (a small “step” or slide).
- Repeat: Perform one clean rep at each clock position, then switch sides (or complete all reps on one side first).
Pro Tips & Common Mistakes
- Go wider with the feet: Wider stance = less rotation and better control.
- Keep elbows at a smart angle: Avoid extreme flare. Think ~30–60° from the torso, depending on comfort.
- Small reach first: Don’t “chase” the farthest clock position. Earn range with perfect reps.
- Don’t let hips twist: Rotation turns it into a different movement and reduces chest tension.
- Maintain a strong plank: No sagging low back, no piking the hips.
- Wrist/shoulder comfort matters: Use handles, do reps on an incline, or reduce the clock range if joints complain.
FAQ
What should I feel during clock push-ups?
You should feel strong work in the chest (pecs) and some effort in the front delts and triceps. You’ll also feel your core working hard to prevent the hips from rotating.
How many clock positions should I use?
Start with 2–3 positions (for example, 12 and 1–2 o’clock). As control improves, add more positions or extend the reach. More positions isn’t better if your hips twist or your shoulder feels unstable.
Is this better than regular push-ups for chest growth?
It can be, especially if you already do standard push-ups easily. The changing hand angle can increase time under tension and challenge stability, which may stimulate the chest in a new way. For best results, pair it with other chest work and progressive overload.
My wrists hurt—what can I do?
Try push-up handles (neutral grip), do the movement on an incline, reduce the reach, and warm up wrists. If pain persists, choose a different variation that feels joint-friendly.
How do I make it harder without adding weight?
Slow the tempo (3 seconds down), add a pause at the bottom, increase clock reach, reduce rest, or wear a weighted vest. Only progress when reps stay stable and hips remain square.
Recommended Equipment (Optional)
- Push-Up Handles / Parallettes — neutral wrists and a slightly deeper range of motion
- Core Sliders (Gliding Discs) — smoother “clock” hand transitions and added control challenge
- Non-Slip Exercise Mat — better grip and comfort for hands and feet
- Weighted Vest — easy progressive overload once bodyweight gets easy
- Resistance Bands Set — great for pairing with chest + upper-back work (band flyes, pull-aparts)
Tip: Choose tools that improve comfort and control. If any setup causes joint pain, scale back and prioritize clean reps.