Decline Push-Up (Chest Focus): Form, Sets & Reps, Tips, FAQ + Gear
Learn the Decline Push-Up (Chest Focus) to build a bigger chest using bodyweight. Step-by-step form, sets & reps by goal, common mistakes, FAQs, and recommended Amazon equipment.
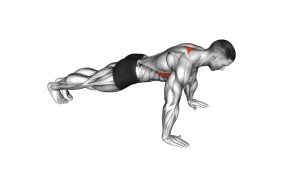
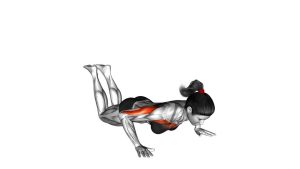
Decline Push-Up (Chest Focus)
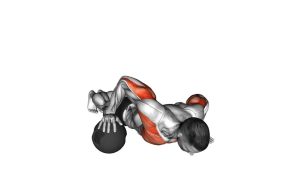
This exercise rewards a clean setup and smooth tempo. You should feel your chest doing the majority of the work, with support from the front delts and triceps. If your shoulders feel pinchy, your elbows flare too wide, or your hips drop, reduce the decline height and tighten your form.
Quick Overview
| Body Part | Chest |
|---|---|
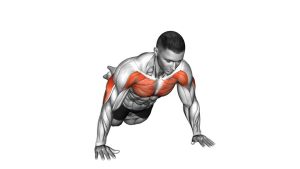
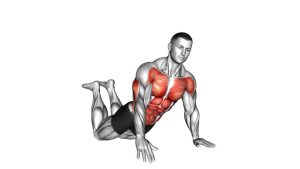
| Primary Muscle | Pectoralis major (upper & mid emphasis) |
| Secondary Muscle | Anterior deltoids, triceps; serratus anterior (stability) |
| Equipment | Stable bench/box/chair (feet elevation) + floor space |
| Difficulty | Intermediate (advanced if elevation is high or reps are slow/paused) |
Sets & Reps (By Goal)
- Chest hypertrophy: 3–5 sets × 8–15 reps (60–90 sec rest, controlled tempo)
- Strength focus: 4–6 sets × 4–8 reps (90–150 sec rest, harder elevation or added load)
- Endurance / conditioning: 2–4 sets × 12–25 reps (45–75 sec rest, clean reps only)
- Warm-up / activation: 2–3 sets × 6–12 reps (easy pace, perfect form)
Progression rule: Add reps first, then slow the lowering (2–4 seconds), then add a pause at the bottom. Only increase elevation or load when you can keep a rigid plank and stable shoulders.
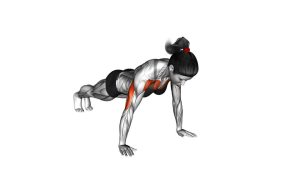
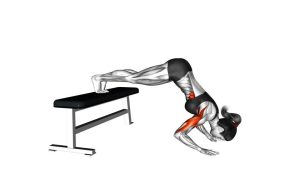
Setup / Starting Position
- Choose a stable platform: Bench/box/chair that won’t slide. Place feet on it with toes tucked.
- Hands on the floor: Slightly wider than shoulder-width. Fingers spread and grip the floor.
- Stack the body: Head, ribs, hips, and heels in one line. Brace abs and squeeze glutes.
- Shoulders set: Shoulders down away from ears. Don’t sink into the shoulder joints.
- Elbow angle: Aim for ~30–45° from the torso (not straight out to the sides).
Tip: If wrists feel stressed, use push-up handles or parallettes to keep wrists neutral.
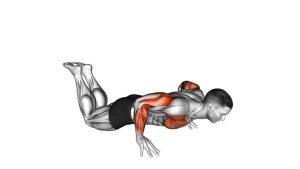
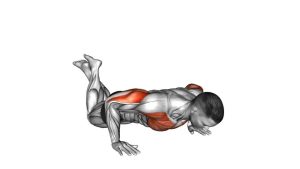
Execution (Step-by-Step)
- Inhale and brace: Lock the plank—abs tight, glutes squeezed, legs straight.
- Lower under control: Bend elbows and bring your chest toward the floor (2–4 seconds down).
- Keep a proud chest: Don’t let shoulders shrug forward; keep them stable and “packed.”
- Hit a strong bottom: Chest close to the floor with no hip sag and no bouncing.
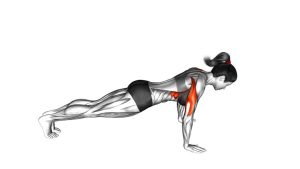
- Press up powerfully: Push the floor away until elbows extend. Exhale through the effort.
- Finish balanced: Reach full extension without collapsing into the shoulders; reset and repeat.
Pro Tips & Common Mistakes
- Use the right elevation: Higher feet = harder. Start modest and earn height.
- Control the eccentric: A slow lowering makes the chest work harder without extra equipment.
- Elbows not too wide: Extreme flaring shifts stress to shoulders and reduces chest quality.
- Don’t sag the hips: Sagging turns it into a low-back position, not a strong press.
- Don’t shorten reps: Half reps often become shoulder-dominant. Keep depth clean.
- Pause to increase difficulty: A 1–2 second pause at the bottom boosts control and hypertrophy.
- Make it more chest-focused: Think “chest to floor” and press with intent, not speed.
FAQ
What part of the chest does the decline push-up target most?
A decline angle typically increases upper-body loading and often feels more demanding on the upper and mid chest, depending on your angle and elbow path. Keep reps controlled and elbows at a natural angle for the best chest emphasis.
How high should I elevate my feet?
Start low (a step or small box) and increase only when you can maintain a rigid plank and smooth reps. If your hips sag or your shoulders feel stressed, the elevation is likely too high for your current strength.
Should my elbows flare out for more chest?
Not fully. Slightly wider than shoulder-width hands with elbows around 30–45° usually balances chest stimulus and shoulder comfort. Extreme flaring can irritate shoulders.
How do I make decline push-ups harder without adding weight?
Slow the lowering (3–5 seconds), add a pause at the bottom, increase reps, or use deficit handles for more range of motion. Keep form strict—quality beats quantity.
What if my wrists hurt?
Use push-up handles or parallettes to keep wrists neutral, and warm up wrists before training. Also ensure your hands are under your shoulders and you’re not collapsing forward.
Recommended Equipment (Optional)
- Push-Up Handles (Neutral Wrist) — reduces wrist strain and can improve pressing comfort
- Parallettes Bars — deeper range of motion + stable grip for advanced push-up variations
- Slant Board / Wedge (Angle Support) — useful for hand/wrist angle adjustments and accessory training
- Weighted Vest — adds progressive overload once bodyweight reps are easy
- Resistance Bands Set — helpful for warm-ups (band pull-aparts) and push-up progressions
Tip: Prioritize a stable elevation surface. If the bench/box wobbles or slides, switch to a safer platform before increasing intensity.