Lever Seated Hammer-Grip Shoulder Press: Form, Muscles Worked, Sets & Tips
Learn how to perform the Lever Seated Hammer-Grip Shoulder Press with proper form. Discover muscles worked, setup, execution steps, sets and reps by goal, common mistakes, FAQs, and recommended equipment.
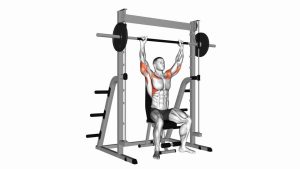
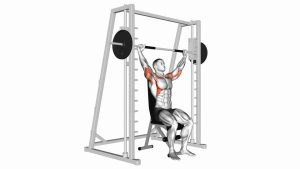
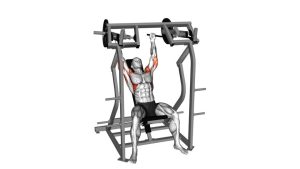
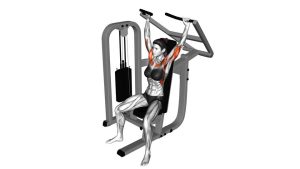
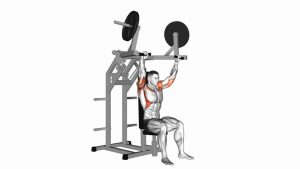
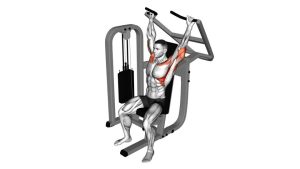
Lever Seated Hammer-Grip Shoulder Press
This exercise is ideal for lifters who want a more guided pressing pattern than dumbbells or a barbell. The back support reduces the need for full-body stabilization, making it easier to isolate the shoulders and push close to muscular fatigue with good control. It can work well in hypertrophy programs, machine-based upper-body days, or shoulder sessions where you want a stable primary press.
Quick Overview
| Body Part | Shoulders |
|---|---|
| Primary Muscle | Anterior deltoid (front shoulder) |
| Secondary Muscle | Lateral deltoid, triceps brachii, upper chest |
| Equipment | Lever seated shoulder press machine with neutral-grip handles |
| Difficulty | Beginner to Intermediate |
Sets & Reps (By Goal)
- Muscle growth: 3–5 sets × 8–12 reps, 60–90 sec rest
- Strength emphasis: 4–5 sets × 5–8 reps, 90–150 sec rest
- Technique / control: 2–4 sets × 10–15 reps, 45–75 sec rest
- Beginner machine shoulder training: 2–3 sets × 8–12 reps, controlled tempo
Progression rule: Increase load only when you can complete all target reps with smooth control, even lockout, and no back overextension. Add reps first, then add weight.
Setup / Starting Position
- Adjust the seat: Set the seat so the handles start around shoulder level or slightly below.
- Sit fully back: Place your back against the pad and keep your chest lifted.
- Plant your feet: Keep both feet flat on the floor for full-body stability.
- Take a neutral grip: Hold the handles with palms facing each other and wrists stacked over the forearms.
- Set elbow position: Keep the elbows slightly in front of the torso rather than flared straight out.
Tip: Before your first rep, brace your trunk lightly and keep your head neutral against or near the back pad.
Execution (Step-by-Step)
- Start from the bottom: Begin with the handles near shoulder height and the elbows bent.
- Press upward: Drive the handles overhead in a controlled path while keeping your shoulders stable.
- Extend smoothly: Straighten the elbows near the top without slamming into a hard lockout.
- Pause briefly: Control the top position for a moment without shrugging excessively.
- Lower with control: Bring the handles back down slowly to the starting position.
- Repeat evenly: Keep the tempo consistent and avoid using momentum or bouncing at the bottom.
Pro Tips & Common Mistakes
- Keep your ribs down: Do not turn the press into a standing incline press with excessive back arch.
- Use a full, comfortable range: Lower the handles with control, but stop short of painful depth.
- Do not slam lockout: Finish strongly without crashing into elbow lockout.
- Keep wrists neutral: Avoid excessive wrist extension while gripping the handles.
- Control the eccentric: The lowering phase should stay smooth and deliberate.
- Avoid shrugging: Let the delts press; do not let the upper traps take over every rep.
- Choose the right load: If the machine path becomes jerky or your torso lifts off the pad, reduce the weight.
FAQ
What muscles does the Lever Seated Hammer-Grip Shoulder Press work?
It primarily trains the anterior deltoids, with assistance from the lateral deltoids, triceps, and a small contribution from the upper chest.
Is the hammer grip better for the shoulders?
For many lifters, the neutral grip feels more comfortable because it places the shoulders in a more natural pressing position. Comfort can vary, so use the grip and range that feel strongest and most joint-friendly for you.
Should I lock out fully at the top?
You can reach near full elbow extension, but avoid aggressively slamming into lockout. Finish the rep under control and keep tension on the target muscles.
Is this better than dumbbell shoulder presses?
It is not automatically better, but it is more stable and easier to control. Machines are great for focused hypertrophy work, while dumbbells demand more stabilization and coordination.
How should I include this in a shoulder workout?
Use it early in the workout as your main press, then follow with lateral raises, rear-delt work, and triceps accessories if needed.
Recommended Equipment
- Wrist Wraps — extra wrist support for heavier machine pressing sets
- Elbow Sleeves — helpful for warmth, compression, and joint comfort during pressing sessions
- Resistance Bands Set — useful for shoulder warm-ups, activation drills, and accessory work
- Lifting Belt — optional support for lifters pressing heavier loads and wanting better torso bracing
- Gym Grip Gloves — can improve handle comfort and grip security on machine presses
Tip: Support gear should improve comfort and control, not replace proper setup, progressive loading, and good pressing technique.