Band Standing Rear Delt Row: Proper Form, Muscles Worked, Sets, Tips & FAQ
Learn how to do the Band Standing Rear Delt Row with proper form. Discover muscles worked, setup, execution tips, sets and reps by goal, common mistakes, FAQs, and recommended equipment.
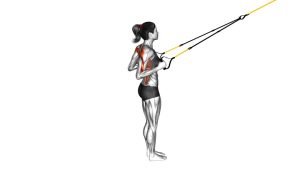
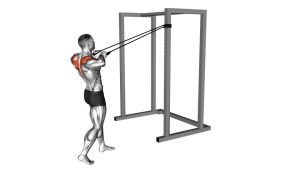
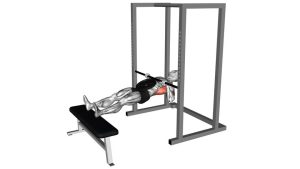
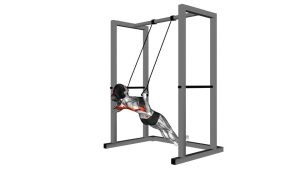
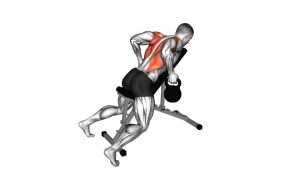
Band Standing Rear Delt Row
This exercise works best when you focus on controlled pulling, scapular retraction, and keeping the shoulders down instead of shrugged. The resistance band creates smooth tension throughout the range of motion, making it a great option for home workouts, warm-ups, hypertrophy work, and shoulder-health training. You should feel the movement mainly across the back of the shoulders and upper back, not in the lower back or neck.
Quick Overview
| Body Part | Shoulders |
|---|---|
| Primary Muscle | Rear deltoids (posterior delts) |
| Secondary Muscle | Rhomboids, middle trapezius, rotator cuff stabilizers, upper back |
| Equipment | Resistance band with handles or loop band, secure anchor point |
| Difficulty | Beginner to Intermediate |
Sets & Reps (By Goal)
- Muscle growth: 3–4 sets × 10–15 reps with controlled tempo and 45–75 seconds rest
- Shoulder activation / warm-up: 2–3 sets × 12–20 reps with light resistance and smooth reps
- Posture and upper-back endurance: 2–4 sets × 15–20 reps with strict form and short rest
- General strength: 3–4 sets × 8–12 reps using a thicker band and a full squeeze each rep
Progression rule: First improve control, range, and contraction quality. Then increase band resistance or add reps while keeping the elbows high and the shoulders relaxed.
Setup / Starting Position
- Anchor the band securely: Place the band at about upper-chest to face height, depending on the angle you want.
- Stand facing the anchor: Hold a handle in each hand and step back until there is light tension on the band.
- Set your stance: Keep your feet hip-width apart or use a slight staggered stance for better balance.
- Brace lightly: Keep your ribs down, core engaged, and chest tall without leaning excessively.
- Start with arms extended: Reach forward with a slight bend in the elbows and keep the shoulders down.
Tip: A slightly higher anchor point usually helps bias the rear delts more effectively by encouraging a higher elbow path.
Execution (Step-by-Step)
- Begin the pull: Draw your elbows back and outward rather than tucking them tightly by your sides.
- Lead with the elbows: Think about moving the elbows wide to keep the emphasis on the rear delts.
- Squeeze the upper back: As the band comes toward your upper chest, collarbone line, or face line, pinch the shoulder blades together.
- Pause briefly: Hold the contracted position for 1 second to maximize rear-delt and upper-back engagement.
- Return slowly: Extend the arms back to the start under control without letting the band snap you forward.
- Repeat smoothly: Maintain steady tension and identical form on every rep.
Pro Tips & Common Mistakes
- Lead with your elbows: This helps target the rear delts instead of overloading the biceps.
- Keep the shoulders down: Avoid shrugging, which shifts tension into the upper traps and neck.
- Control the eccentric: The lowering phase is just as important as the pull for muscle development.
- Do not lean back excessively: Using body momentum reduces the quality of the movement.
- Use the right resistance: If you cannot pause and squeeze at the back, the band may be too heavy.
- Do not yank the band: Fast, jerky reps reduce tension on the rear delts and increase compensation.
- Keep your neck neutral: Avoid pushing the chin forward or craning the neck during the row.
FAQ
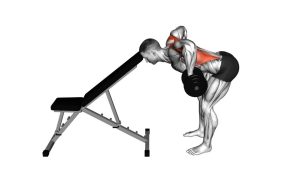
What muscles does the Band Standing Rear Delt Row work most?
The main target is the rear deltoid. It also trains the rhomboids, middle traps, and small shoulder stabilizers that help support posture and shoulder health.
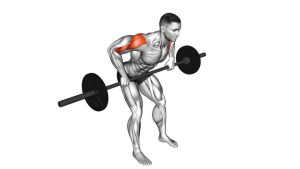
Is this exercise better than a regular band row for rear delts?
Yes, when performed with high, flared elbows, it places more emphasis on the rear delts than a standard row, which usually targets the lats more strongly.
Where should I feel this exercise?
You should mainly feel it across the back of the shoulders and upper back. If you mostly feel it in the biceps, neck, or lower back, adjust your technique.
Can beginners do the Band Standing Rear Delt Row?
Absolutely. Beginners can start with a lighter band and focus on clean reps, controlled range of motion, and learning how to retract the shoulder blades properly.
How can I make this exercise harder?
You can increase the challenge by using a thicker band, stepping farther back to create more tension, adding a pause at peak contraction, or increasing total reps and sets.
Recommended Equipment
- Resistance Bands with Handles — ideal for smooth pulling resistance and comfortable grip during rows
- Door Anchor for Resistance Bands — helps create a secure anchor point at chest or face height
- Loop Resistance Bands Set — useful for home workouts and shoulder accessory training
- Wall Anchor System for Bands — great for creating repeatable band heights for shoulder and back exercises
- Exercise Mat — useful for creating a stable training space and pairing with other shoulder drills
Tip: For this exercise, the most useful upgrades are a quality band set and a secure anchor point. Better setup usually leads to better form and more consistent resistance.