Wall Push-Up (Chest Focus): Proper Form, Sets & Reps, Tips, FAQ
Learn the Wall Push-Up (Chest Focus) with perfect form cues, step-by-step execution, sets & reps by goal, common mistakes, FAQs, and optional equipment recommendations to progress safely.
Wall Push-Up (Chest Focus)
Think of this as a technique-builder: your goal is a smooth, controlled rep where the chest moves toward the wall and your body stays stiff like a plank. You should feel the work mostly in the chest and triceps, with the shoulder blades moving naturally (no shrugging).
Quick Overview
| Body Part | Chest |
|---|---|
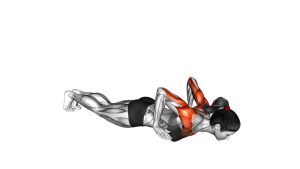
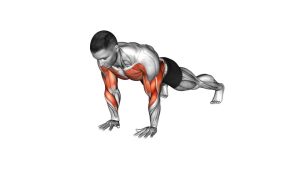
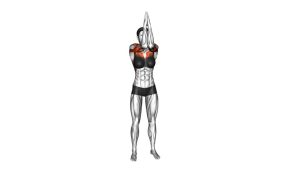
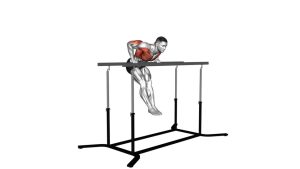
| Primary Muscle | Pectoralis major (chest) |
| Secondary Muscle | Triceps, anterior deltoids, serratus anterior (scapular control), core stabilizers |
| Equipment | None (optional: yoga mat for comfort, push-up handles, resistance band for progression) |
| Difficulty | Beginner (excellent push-up progression and shoulder-friendly press pattern) |
Sets & Reps (By Goal)
- Technique / learning: 2–4 sets × 6–10 reps (slow tempo, 60–90 sec rest)
- Muscle endurance: 2–4 sets × 12–20 reps (steady reps, 45–75 sec rest)
- Chest activation (warm-up): 1–3 sets × 8–12 reps (easy effort, 30–60 sec rest)
- Rehab-style / low stress: 2–3 sets × 6–10 reps (3–5 sec down, controlled press)
Progression rule: First add reps or slow the lowering phase. Then increase difficulty by stepping your feet farther from the wall (more bodyweight load). Only progress when your body stays straight and your shoulders stay stable.
Setup / Starting Position
- Distance: Stand facing a wall at about arm’s length. Farther feet = harder; closer feet = easier.
- Hand placement: Place hands on the wall around mid-chest height, slightly wider than shoulders for more chest emphasis.
- Body line: Brace your core and squeeze glutes so your body forms a straight line from head to heels.
- Shoulders: Keep shoulders down and back lightly (no shrugging), with wrists stacked under hands.
- Head/neck: Keep a neutral head position—don’t lead with the chin.
Tip: If your wrists feel uncomfortable, try a slightly higher hand position or use push-up handles against a sturdy surface.
Execution (Step-by-Step)
- Lock in posture: Take a breath, brace your core, and keep your body straight.
- Lower under control: Bend elbows and bring your chest toward the wall. Keep elbows at about a 30–60° angle from your torso (not flared straight out).
- Pause briefly: Stop just before your chest touches the wall. Stay stable—no collapsing shoulders.
- Press away: Push through your palms and extend your elbows smoothly to return to the start.
- Reset and repeat: Keep breathing calm, maintain the straight body line, and repeat controlled reps.
Pro Tips & Common Mistakes
Pro Tips
- Think “chest to wall”: Lead with the chest, not the forehead.
- Slow negatives: Lower for 2–4 seconds to increase time under tension.
- Keep a plank body: Glutes and abs stay engaged the whole set.
- Adjust difficulty fast: Step feet farther away for harder reps; closer for easier reps.
- Shoulder blades move naturally: Let them glide—avoid pinching them hard together.
Common Mistakes
- Hips sagging or bending: Turns it into a half-rep and stresses the low back.
- Elbows flaring wide: Can irritate shoulders and reduces control.
- Shrugging shoulders: Overuses traps and makes the rep unstable.
- Rushing / bouncing: Reduces chest activation and increases joint stress.
- Hands too high: Shifts emphasis to shoulders; keep hands around chest height for chest focus.
FAQ
Where should I feel the wall push-up?
Mostly in the chest and triceps, with your shoulders staying stable. If you feel it mostly in your shoulders/neck, lower the hand height slightly and keep shoulders relaxed.
How do I make wall push-ups harder?
Step your feet farther from the wall, slow down the lowering phase (3–5 seconds), add a pause at the bottom, or progress to an incline push-up on a bench/table.
Are wall push-ups good for beginners?
Yes. They’re one of the best starting points to learn push-up mechanics with a manageable load. Master clean reps here, then progress to incline and eventually floor push-ups.
What if my wrists hurt?
Try a slightly higher hand position, keep wrists stacked under hands, and avoid collapsing into the wall. You can also use push-up handles or do the movement with fists on a soft surface if comfortable.
How often can I do wall push-ups?
Most people can do them 2–4 times per week for strength, or more frequently as a light technique drill or warm-up. Keep effort moderate and avoid training to painful fatigue.
Recommended Equipment (Optional)
- Push-Up Handles — reduce wrist extension and keep pressing mechanics comfortable
- Loop Resistance Bands — helpful for progression, warm-ups, and pairing with rows/pull-aparts
- Thick Yoga / Exercise Mat — useful for comfort during progressions like incline or knee push-ups
- Doorway Pull-Up Bar — great to balance pushing with pulling (posture-friendly training)
- Resistance Band Door Anchor — enables band rows/press variations at home to complement push-ups
Tip: Equipment is optional—your best “progression tool” is simply stepping your feet farther from the wall and controlling tempo.