Push-Up (Chest Focus): Proper Form, Sets, Reps & Chest Activation Guide
Learn how to perform the chest-focused push-up with perfect form. Step-by-step execution, sets and reps by goal, common mistakes, FAQs, and optional equipment to build stronger pecs at home.
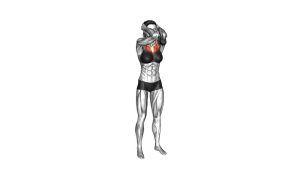
Push-Up (Chest Focus)
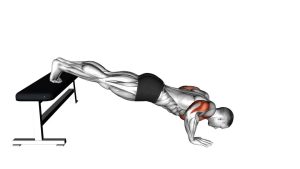
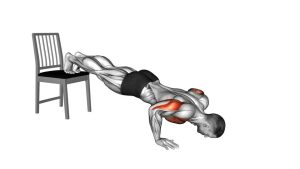
To emphasize the chest, use a slightly wider-than-shoulder hand position, keep your body in a straight line, and lower with control until your chest is close to the floor. You should feel the effort mainly in the chest, with supportive tension in the arms and core.
Quick Overview
| Body Part | Chest |
|---|---|
| Primary Muscle | Pectoralis major (chest) |
| Secondary Muscle | Triceps, anterior deltoids, serratus anterior, core stabilizers |
| Equipment | None (optional: push-up handles, mat, resistance band) |
| Difficulty | Beginner → Intermediate (scales by incline/tempo/reps/load) |
Sets & Reps (By Goal)
- Hypertrophy (chest growth): 3–5 sets × 8–15 reps (60–90 sec rest, controlled tempo)
- Strength focus: 4–6 sets × 4–8 reps (90–150 sec rest, harder variation)
- Endurance / conditioning: 2–4 sets × 15–30 reps (30–60 sec rest)
- Technique / warm-up: 2–3 sets × 6–12 reps (easy, perfect form)
Progression rule: First add reps (or slow the lowering), then add sets. When you can hit the top of your rep range with clean form, progress to a harder variation (lower incline, feet elevated, band resistance, or weighted vest).
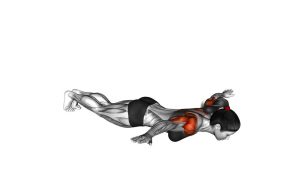
Setup / Starting Position
- Hands: Place hands slightly wider than shoulder-width. Fingers forward, grip the floor.
- Wrists & elbows: Stack shoulders over wrists. Keep elbows angled slightly back—not flared.
- Body line: Squeeze glutes, brace core, and keep a straight line from head to heels.
- Shoulders: Keep shoulders “down and away” from ears; avoid shrugging.
- Head/neck: Neutral neck—look slightly ahead of your hands, not straight up.
Tip: If wrists bother you, use push-up handles or perform on fists. If form breaks early, switch to an incline push-up to keep quality high.
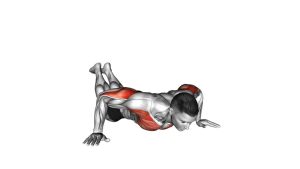
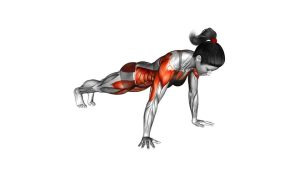
Execution (Step-by-Step)
- Brace: Tighten core and glutes. Keep ribs “down” so your lower back doesn’t arch.
- Lower under control: Bend elbows and lower your chest toward the floor in 1–3 seconds.
- Elbow path: Keep elbows at roughly 30–60° from your torso.
- Bottom position: Chest comes close to the floor without hips sagging or shoulders collapsing forward.
- Press up: Drive the floor away until elbows straighten. Keep your body rigid and aligned.
Pro Tips & Common Mistakes
Pro Tips
- Use a slight forward lean: Keep shoulders slightly ahead of wrists to load the chest more (comfortably).
- Think “chest forward/down”: Don’t just bend the elbows—lower the whole torso as one unit.
- Tempo wins: A 2–3 second lower increases chest time-under-tension without extra equipment.
- Exhale on the press: Helps keep ribs down and core tight during the hardest part.
Common Mistakes
- Elbows flared at 90°: Often causes shoulder discomfort and reduces pressing efficiency.
- Hips sagging / low back arch: Turns it into a lower-back stress test—brace harder or regress.
- Partial reps only: Reduce reps, use incline, or slow down to maintain full range.
- Head craning up: Keep the neck neutral to avoid compensation and tension.
- Shoulders shrugged: Keep shoulders down away from ears and maintain stable scapular control.
FAQ
Where should I feel a chest-focused push-up?
You should feel the main effort in the chest, with support from the triceps and shoulders. If you feel it mostly in triceps, try slightly wider hands, slow the lowering, and focus on “chest to floor.”
How can I make push-ups easier without losing chest activation?
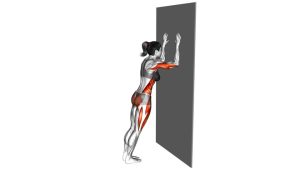
Use an incline push-up (hands on a bench/couch) and keep the same elbow angle and controlled tempo. This keeps the pattern and chest emphasis while reducing total load.
How can I make push-ups harder for chest growth?
Add tempo (3–5 sec lowering), pause at the bottom, elevate your feet, add a resistance band, or use a weighted vest. Choose the option that lets you keep clean reps.
Is it normal to feel wrist discomfort?
Mild discomfort can happen if you’re new. Try push-up handles, fists, a mat, or slightly turn the hands out. If pain persists, reduce volume and consider wrist mobility work.
Should I lock out at the top?
You can straighten the elbows, but avoid aggressively “snapping” into lockout. Keep the top controlled and maintain a solid plank.
Recommended Equipment (Optional)
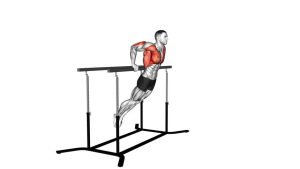
- Push-Up Handles / Parallettes — reduces wrist strain and can increase range of motion
- Thick Exercise Mat — improves comfort for hands, knees (regressions), and floor training
- Resistance Bands Set — adds progressive overload (banded push-ups) and supports warm-ups
- Weighted Vest — simple way to overload push-ups for strength and hypertrophy
- Push-Up Board (Angle/Grip Guide) — helps hand placement variety and can cue different emphasis
Tip: Choose equipment that helps you keep pain-free form and progress gradually. The best results come from consistent reps and controlled tempo.