Bent-Arm Lift: Proper Form, Sets, Tips & FAQ
Learn how to do the Bent-Arm Lift with proper form to build shoulder strength, control, and stability. Includes setup, execution steps, sets by goal, common mistakes, FAQs, and recommended equipment.
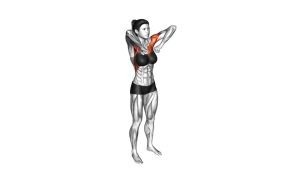
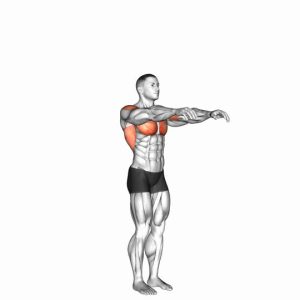
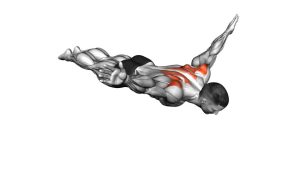
Bent-Arm Lift
This exercise is best performed with strict control rather than momentum. The goal is to raise the arms through a comfortable arc while maintaining a fixed bend at the elbows and keeping the shoulders down and stable. You should feel the deltoids working without excessive shrugging, swinging, or lower-back arching.
Quick Overview
| Body Part | Shoulders |
|---|---|
| Primary Muscle | Deltoids (anterior deltoid and lateral deltoid) |
| Secondary Muscle | Rotator cuff, upper trapezius (light), serratus anterior, upper back stabilizers |
| Equipment | Bodyweight, optional light dumbbells or resistance bands |
| Difficulty | Beginner |
Sets & Reps (By Goal)
- Shoulder warm-up / activation: 2–3 sets × 10–15 reps with slow control and short rest
- Muscle endurance: 2–4 sets × 12–20 reps using a steady tempo and clean form
- Light hypertrophy support: 3–4 sets × 10–15 reps with optional light resistance
- Movement quality / rehab-style practice: 2–3 sets × 8–12 reps with a limited, pain-free range
Progression rule: First improve control, range, and consistency. Then add light resistance or extra reps only if you can keep the elbows fixed and the shoulders relaxed.
Setup / Starting Position
- Stand tall: Place your feet about hip-width apart with your weight evenly distributed.
- Brace lightly: Keep your ribs down, core engaged, and spine neutral to avoid leaning back.
- Raise the arms in front: Bring your upper arms in front of the torso around chest height.
- Bend the elbows: Keep the elbows bent to roughly 90 degrees and maintain that bend throughout the rep.
- Set the shoulders: Pull the shoulders down gently and keep the neck relaxed.
Tip: Think of the start position as a compact shoulder raise setup with the elbows bent and the arms ready to travel outward and upward in an arc.
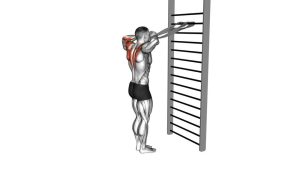
Execution (Step-by-Step)
- Start under control: Hold the bent-arm position in front of the body with the chest open and posture tall.
- Lift upward and outward: Raise the arms in a smooth arc while keeping the elbow angle nearly unchanged.
- Lead with the shoulders: Let the deltoids drive the movement instead of swinging the arms.
- Reach the top position: Lift until your upper arms are around shoulder height or slightly above, depending on comfort and mobility.
- Pause briefly: Hold the top for a moment while staying relaxed through the neck and traps.
- Lower slowly: Return to the starting position along the same path without dropping the arms.
- Repeat consistently: Keep each rep smooth, symmetrical, and controlled.
Pro Tips & Common Mistakes
- Keep the elbows bent: Avoid turning the movement into a straight-arm raise or overhead press.
- Use a smooth arc: The rep should feel controlled, not thrown upward with momentum.
- Don’t shrug: Keep the shoulders away from the ears to maintain better deltoid emphasis.
- Stay tall: Avoid leaning back or flaring the ribs to fake more range.
- Use a pain-free top position: Shoulder mobility varies, so don’t force the highest possible lift.
- Keep the wrists neutral: Don’t over-bend the wrists at the top.
- Start light: If adding load, use very light dumbbells or bands first and keep the reps controlled.
FAQ
What muscles does the Bent-Arm Lift work?
It mainly targets the front delts and side delts, while the rotator cuff and upper back help stabilize the shoulder joint during the lift.
Is the Bent-Arm Lift better than a straight-arm raise?
Not necessarily better, but different. The bent-arm version shortens the lever, which can make the movement feel more manageable and shoulder-friendly for some people.
Can beginners do this exercise?
Yes. It is beginner-friendly when performed with bodyweight or very light resistance and a controlled range of motion.
Should I use weights for this exercise?
You can, but start light. Many people benefit from first mastering the movement pattern without load before progressing to light dumbbells or bands.
What if I feel my traps more than my shoulders?
Reduce the range slightly, slow the reps down, and focus on keeping the shoulders down. Excessive trap involvement usually means you are shrugging or lifting too aggressively.
Recommended Equipment (Optional)
- Neoprene Dumbbells — ideal for adding light resistance to bent-arm shoulder raises
- Shoulder Resistance Bands — useful for shoulder activation, warm-ups, and progressive resistance work
- Exercise Bands for Shoulder Training — versatile for raises, pull-aparts, and mobility drills
- Extra-Thick Exercise Yoga Mat — helpful for floor-based warm-ups, mobility work, and shoulder prep
- High-Density Foam Roller — useful for upper-back mobility and soft-tissue prep before shoulder sessions
Tip: For this exercise, lighter tools are usually better. Prioritize control, clean range of motion, and shoulder comfort over heavy loading.