Cable One-Arm Twisting Seated Row: Form, Muscles Worked, Sets, Tips & FAQ
Learn how to perform the Cable One-Arm Twisting Seated Row with proper form. Discover muscles worked, setup, execution, sets by goal, common mistakes, FAQs, and recommended equipment.
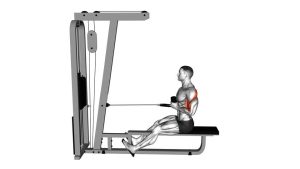
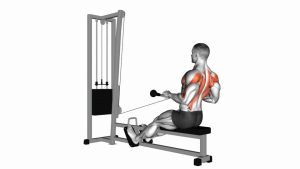
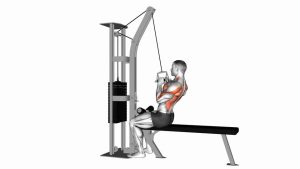
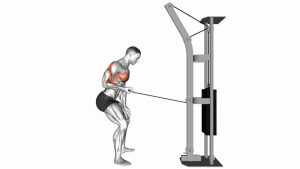
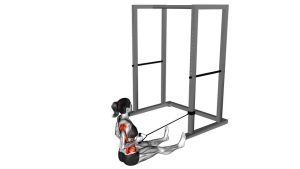
Cable One-Arm Twisting Seated Row
This exercise is especially useful for lifters who want to build the back one side at a time while improving coordination between the lats, scapular retractors, and obliques. Because the movement is unilateral, it can also help expose side-to-side pulling differences. The twisting element should come from a controlled rotation of the torso, not from yanking the cable or collapsing posture.
Quick Overview
| Body Part | Back |
|---|---|
| Primary Muscle | Latissimus dorsi |
| Secondary Muscle | Rhomboids, middle trapezius, rear deltoid, biceps, obliques |
| Equipment | Cable machine, single D-handle, floor space or low seated setup |
| Difficulty | Beginner to Intermediate |
Sets & Reps (By Goal)
- Muscle building: 3–4 sets × 8–12 reps per side with 60–90 seconds of rest
- Strength focus: 4–5 sets × 6–8 reps per side with 90–120 seconds of rest
- Control and technique: 2–3 sets × 10–15 reps per side using a slow, clean tempo
- Warm-up or activation: 2 sets × 12–15 light reps per side before back training
Progression rule: Add load only when you can keep the chest lifted, the shoulder packed, and the rotation smooth from start to finish. Control matters more than chasing heavier weight.
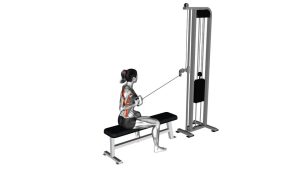
Setup / Starting Position
- Set the pulley: Attach a single handle to a low cable pulley.
- Sit facing the machine: Sit on the floor or a low platform with your legs extended comfortably in front of you.
- Grab one handle: Hold the attachment with one hand using a neutral grip.
- Reach forward: Let the working arm extend toward the cable while keeping tension on the stack.
- Start tall: Keep your spine long, chest up, shoulders down, and core lightly braced.
- Pre-rotate slightly: Allow a gentle turn toward the cable side at the start so the row has room to move through a natural arc.
Tip: Think of “sitting tall through the hips” rather than slumping backward. A stable torso makes the pull cleaner and safer.
Execution (Step-by-Step)
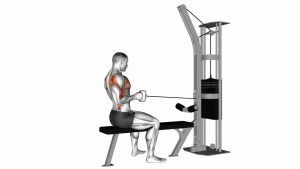
- Begin from a full reach: Start with the arm extended and the shoulder blade allowed to move forward naturally without collapsing your posture.
- Drive the elbow back: Pull the handle toward your lower ribs or side waist, keeping the elbow close to the body.
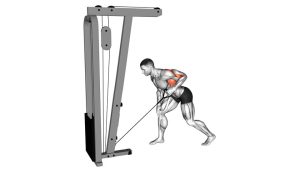
- Rotate with control: As you row, rotate the torso away from the machine in a smooth, coordinated motion.
- Squeeze the back: Finish with the shoulder blade pulled back and down while keeping the chest open.
- Pause briefly: Hold the contraction for a moment without shrugging or leaning excessively.
- Return slowly: Extend the arm forward and rotate back toward the cable under control until you reach the stretched starting position.
Pro Tips & Common Mistakes
- Lead with the elbow: Think about pulling your elbow behind you instead of curling the handle with your arm.
- Keep rotation controlled: The twist should be deliberate and connected to the row, not rushed.
- Stay tall through the spine: Avoid rounding the lower back at the start or leaning back too much at the finish.
- Do not shrug: Keep the working shoulder down so the lats and mid-back stay loaded.
- Use full but clean range: Reach enough to feel a stretch, then row back without losing posture.
- Train both sides evenly: Match reps, tempo, and quality on each side to reduce imbalances.
- Avoid over-twisting: Rotate through a comfortable range; more turn is not always better.
- Control the eccentric: The return phase builds skill and tension, so do not let the cable snap you forward.
FAQ
What muscles does the Cable One-Arm Twisting Seated Row work?
It mainly works the lats, while also training the rhomboids, middle traps, rear delts, biceps, and obliques. The unilateral setup also challenges core stability.
Should I rotate a lot during this exercise?
No. You only need a controlled, comfortable torso rotation that matches the rowing motion. Over-rotating can turn the exercise into a sloppy twist instead of a strong back movement.
Is this better than a regular seated cable row?
It is not necessarily better, but it offers different benefits. The one-arm twisting version is great for unilateral back development, core coordination, and improving side-to-side balance.
Where should the handle finish?
In most cases, the handle should finish around the lower ribcage or side of the waist. The exact endpoint depends on your limb length and cable angle, but the shoulder should stay packed and the elbow should finish behind the torso.
Can beginners do this exercise?
Yes, as long as the load is light enough to keep the movement controlled. Beginners should focus first on posture, smooth elbow drive, and moderate rotation before increasing resistance.
Recommended Equipment (Optional)
- Single D-Handle Cable Attachment — ideal for unilateral rows and single-arm cable pulling work
- Cable Machine Attachment Set — useful if you want more handle options for rows, curls, and triceps work
- Thick Exercise Mat — adds comfort when performing seated floor cable variations
- Lifting Straps — helpful if grip becomes a limiting factor before your back is fully taxed
- Adjustable Cable Machine — a versatile option for home training if you want to perform cable rows and other pulling exercises
Tip: For this movement, a comfortable handle and stable seated position often improve performance more than simply increasing load.