Lever-Assisted Triceps Pushdown: Proper Form, Sets, Tips & FAQ
Learn how to do the Lever-Assisted Triceps Pushdown with proper form, setup, sets and reps by goal, common mistakes, FAQs, and recommended equipment for stronger triceps.
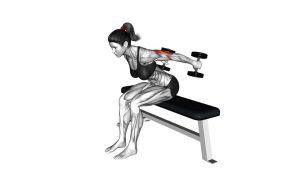
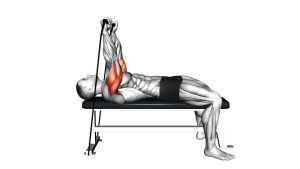
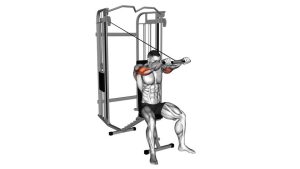
Lever-Assisted Triceps Pushdown
This exercise works best when you stay strict and let the elbows do the work. You should feel the effort mostly in the back of the upper arms, especially near the lockout portion of the rep. A controlled tempo, full but comfortable range of motion, and a brief squeeze at the bottom usually make this movement far more effective than simply moving the weight fast.
Quick Overview
| Body Part | Triceps |
|---|---|
| Primary Muscle | Triceps brachii |
| Secondary Muscle | Anconeus, forearm stabilizers, anterior deltoid (minimal stabilization) |
| Equipment | Lever pushdown machine or assisted triceps pushdown machine |
| Difficulty | Beginner to intermediate |
Sets & Reps (By Goal)
- Muscle growth: 3–4 sets × 8–15 reps with 45–75 seconds rest
- Technique practice: 2–3 sets × 10–15 reps with a light-to-moderate load and slow tempo
- Strength emphasis: 3–5 sets × 6–10 reps with 75–120 seconds rest
- Finisher / pump work: 2–3 sets × 15–20 reps with short rest and strict form
Progression rule: First improve rep quality, then add reps, then increase load. Only go heavier if you can keep the elbows stable and fully control both the pushdown and return.
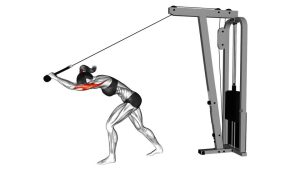
Setup / Starting Position
- Set the machine: Adjust the seat or lever position so the handles start around lower chest to upper-ab level when your elbows are bent.
- Take your grip: Hold the handles firmly with wrists straight and hands evenly placed.
- Stand or sit tall: Brace your core, keep the chest lifted, and avoid leaning excessively over the machine.
- Pin the elbows in: Keep your upper arms close to your sides and slightly in front of the torso if the machine path requires it.
- Start in control: Begin with elbows bent and tension already on the triceps—do not let the weight rest heavily at the top.
Tip: A stable starting position makes the movement more effective. The less your shoulders and torso move, the more work your triceps will do.
Execution (Step-by-Step)
- Brace and lock in: Keep your ribs down, shoulders relaxed, and elbows tucked near your torso.
- Press the lever down: Extend at the elbows to push the handles downward in a smooth arc.
- Reach near full extension: Straighten your arms without hyperextending or snapping the elbows hard into lockout.
- Squeeze the triceps: Pause briefly at the bottom to reinforce peak contraction.
- Return under control: Let the handles rise slowly as your elbows bend back to the starting position.
- Repeat with strict form: Keep the tempo steady and avoid turning the rep into a bodyweight-assisted press.
Pro Tips & Common Mistakes
- Keep the elbows fixed: The more your upper arms travel, the less isolated the triceps become.
- Do not slam lockout: Finish the rep with control and tension instead of jamming the elbows straight.
- Use a full working range: Lower the lever enough to get a stretch at the top without losing shoulder position.
- Avoid torso momentum: Don’t dip, lean, or bounce to force extra reps.
- Keep wrists neutral: Bent wrists can reduce force transfer and increase discomfort.
- Control the eccentric: The return phase is part of the exercise—don’t let the machine pull you back too fast.
- Program it smartly: This movement works well after pressing exercises or near the end of an arm-focused session.
FAQ
What muscles does the Lever-Assisted Triceps Pushdown work?
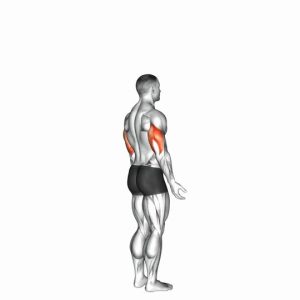
It primarily targets the triceps brachii, which is the large muscle on the back of the upper arm. Supporting muscles mainly stabilize the elbow, wrist, and shoulder position.
Is this exercise good for beginners?
Yes. The fixed machine path makes it easier to learn strict elbow extension mechanics while keeping the movement stable and controlled.
Should I use heavy weight on this exercise?
Heavy loading can work, but only if you can keep your elbows tucked and your torso still. For many lifters, moderate loads with clean reps build the triceps more effectively than sloppy heavy sets.
How low should I push the handles?
Press until your arms are nearly straight and your triceps are fully shortened, but avoid aggressively snapping into lockout. A short pause at the bottom usually improves the quality of the rep.
Where should I place this in my workout?
It fits well after compound presses like bench press or overhead press, or during a dedicated arm session as a main triceps isolation movement.
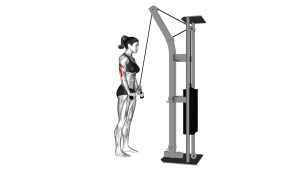
Recommended Equipment
- Tricep Rope Cable Attachment — useful for cable pushdowns, overhead extensions, and higher-rep triceps finishers
- V-Shaped Pushdown Bar — a classic pushdown attachment that helps many lifters keep wrists and elbows in a strong pressing path
- Straight Bar Cable Attachment — good for strict pressdowns, reverse-grip work, and general upper-body cable training
- Resistance Bands Set — ideal for home triceps pushdowns, warm-ups, drop sets, and travel workouts
- Lifting Wrist Wraps — can help support wrist position during hard pushdown or pressing sessions
Tip: Choose accessories that improve comfort and control, not just heavier loading. The best triceps training tools are the ones that help you keep tension where it belongs.