Resistance Band Triceps Pushdown: Proper Form, Sets, Tips & FAQ
Learn the Resistance Band Triceps Pushdown for stronger, more defined upper arms. Get step-by-step form tips, sets by goal, common mistakes, FAQs, and recommended equipment.
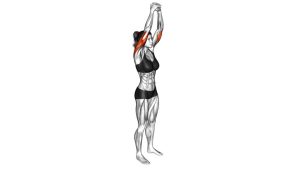
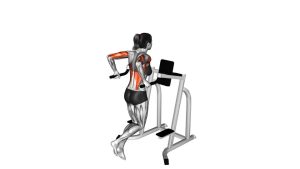
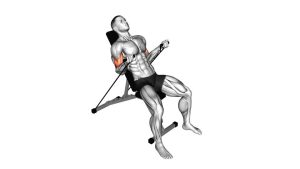
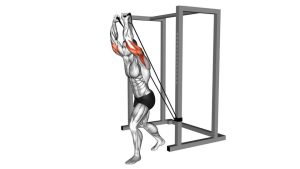
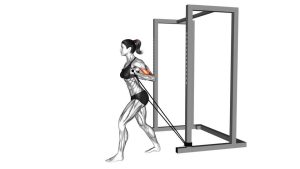
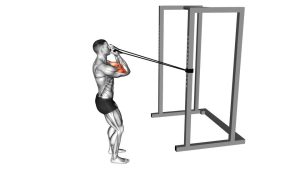
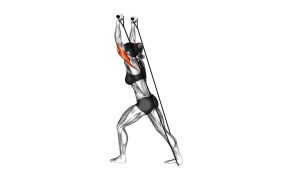
Resistance Band Triceps Pushdown
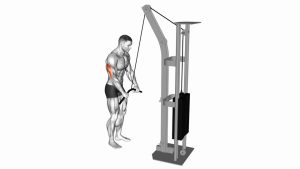
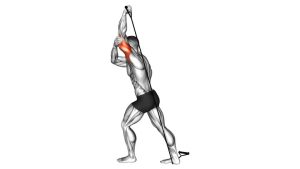
This movement works best when you focus on strict control rather than speed. The goal is to extend the elbows fully, squeeze the triceps at the bottom, and return slowly without letting the shoulders take over. Because bands create more tension as they stretch, the hardest part is usually the lockout, which makes this exercise especially good for building a strong triceps contraction.
Quick Overview
| Body Part | Triceps |
|---|---|
| Primary Muscle | Triceps brachii |
| Secondary Muscle | Forearms, anconeus, shoulders and core as stabilizers |
| Equipment | Resistance band, overhead anchor point, optional handles |
| Difficulty | Beginner to Intermediate |
Sets & Reps (By Goal)
- Muscle building: 3-4 sets × 10-15 reps with controlled lockout and a strong squeeze
- End-of-workout finisher: 2-3 sets × 15-25 reps with short rest and constant tension
- Strength-focused arm work: 3-5 sets × 8-12 reps using a heavier band and stricter tempo
- Technique practice / beginners: 2-3 sets × 12-15 reps with light band tension and slow return
Progression rule: First improve control, full elbow extension, and rep quality. Then progress by using a thicker band, stepping farther from the anchor, or adding reps before adding more total volume.
Setup / Starting Position
- Anchor the band overhead: Secure the resistance band to a stable high anchor such as a door anchor, pull-up bar, or top-mounted rack point.
- Grip the handles or band ends: Stand facing the anchor with your hands around chest level.
- Set your stance: Place feet about hip-width apart with a slight bend in the knees for balance.
- Tuck your elbows: Keep them close to your sides or slightly in front of your torso.
- Brace your torso: Tighten your core, keep your chest tall, and avoid excessive backward lean.
- Start with tension: The band should already feel lightly loaded before the first rep begins.
Tip: The cleaner your setup, the better the triceps isolation. If the elbows drift too much, step closer and reduce tension.
Execution (Step-by-Step)
- Lock in your upper arms: Keep your elbows pinned near your torso and your shoulders relaxed.
- Push the band down: Extend your elbows and drive your hands toward your thighs.
- Reach full extension: Straighten the arms fully without aggressively hyperextending the elbows.
- Squeeze at the bottom: Pause briefly to maximize triceps contraction.
- Return slowly: Bend the elbows under control until your forearms come back to the starting position.
- Repeat without swinging: Keep tension on the band and avoid using momentum between reps.
Pro Tips & Common Mistakes
- Keep elbows tucked: Flaring them out shifts tension away from the triceps and reduces isolation.
- Do not turn it into a bodyweight push: Leaning hard into the band makes the movement less strict.
- Control the return: The eccentric phase matters for hypertrophy and better joint control.
- Use a full range of motion: Start with elbows bent and finish with a deliberate squeeze at lockout.
- Keep wrists neutral: Avoid curling the hands forward at the bottom.
- Match the band to the goal: Lighter bands are great for pump work and technique; heavier bands suit lower-rep efforts.
- Stay tall through the chest: Slumping forward reduces clean elbow mechanics.
- Train both sides evenly: If using separate handles or bands, keep pressure balanced from left to right.
FAQ
What muscles does the resistance band triceps pushdown work?
It mainly targets the triceps brachii, which is the large muscle on the back of the upper arm. The forearms, shoulders, and core help stabilize the body and band path.
Is this exercise as good as a cable triceps pushdown?
It can be an excellent alternative, especially for home training. Bands usually feel easier at the top and harder near lockout, while cables provide a more even resistance curve. Both can build strong triceps when performed well.
How high should I anchor the band?
The anchor should be above shoulder height, ideally overhead, so the band pulls downward throughout the rep. This gives the movement the same general direction as a classic pushdown.
Should I lock out fully at the bottom?
Yes, in most cases you should aim for full elbow extension and a firm triceps squeeze, as long as you do not jam the joints or lose control of your wrists and shoulders.
Can beginners use this exercise?
Absolutely. Beginners can start with a lighter band, slower tempo, and moderate rep range to learn clean elbow positioning before progressing resistance.
Recommended Equipment
- Resistance Bands Set with Handles — the most practical all-in-one option for pushdowns, curls, rows, and home arm training
- Heavy-Duty Door Anchor — lets you create a secure overhead setup for clean band pushdowns at home
- Triceps Pushdown Bar Attachment — useful if you want a straighter, cable-style grip feel with bands or pulley systems
- Workout Gloves — improve grip comfort and reduce hand irritation during higher-volume band sessions
- Non-Slip Exercise Mat — adds traction and stability if you train on smooth floors or in a compact home gym space
Tip: For this exercise, the biggest upgrade is usually a good band set plus a reliable overhead anchor. That combination gives you the most consistent resistance and safest setup.