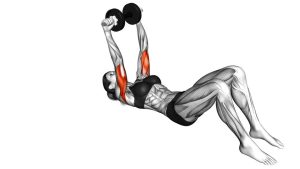
Reverse Dip: Proper Form, Sets, Tips & FAQ
Learn how to do the Reverse Dip with proper form to target the triceps, build upper-arm strength, and improve pressing control. Includes setup, execution, sets by goal, mistakes, FAQs, and recommended equipment.
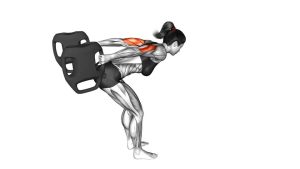
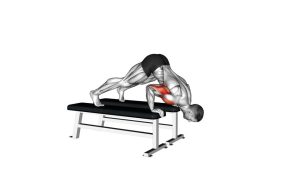
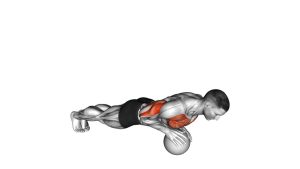
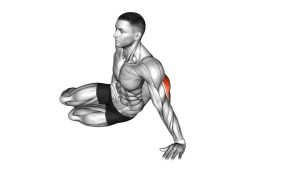
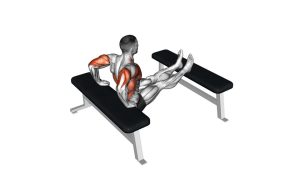
Reverse Dip
This exercise works best when you treat it like a controlled strength movement, not a fast bodyweight bounce. You should feel the triceps doing most of the work as the elbows bend and then straighten to lift the body back up. A small-to-moderate range of motion with steady tempo is usually more effective than chasing extra depth that shifts stress into the shoulders or wrists.
Quick Overview
| Body Part | Arms |
|---|---|
| Primary Muscle | Triceps |
| Secondary Muscle | Anterior deltoids, lower chest, forearms, core stabilizers |
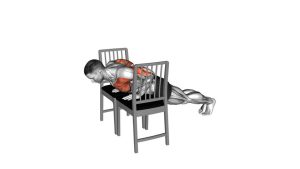
| Equipment | Bench, box, step, or sturdy chair |
| Difficulty | Beginner to Intermediate |
Sets & Reps (By Goal)
- Technique practice: 2–3 sets × 6–10 reps with slow lowering and smooth lockout
- Muscle building: 3–4 sets × 8–15 reps with 45–75 sec rest
- Bodyweight upper-arm endurance: 2–4 sets × 12–20 reps with controlled tempo
- Finisher after push training: 2–3 sets close to technical fatigue while keeping shoulder position clean
Progression rule: First improve control, range, and rep quality. Then increase reps, slow the eccentric, elevate the feet, or add external load only when every rep stays stable and pain-free.
Setup / Starting Position
- Set your support: Place your hands on the edge of a bench, box, or sturdy chair with fingers pointing forward.
- Position the body: Slide your hips just in front of the support so your weight is carried by the arms.
- Choose leg position: Keep knees bent for an easier version, or extend the legs farther forward to make it harder.
- Lift and brace: Straighten the elbows to raise the hips off the floor and lightly brace the core.
- Set the shoulders: Keep the chest open, shoulders down, and avoid shrugging before you begin the first rep.
Tip: Start with bent knees if you are learning the pattern. It reduces the load and makes it easier to stay in control.
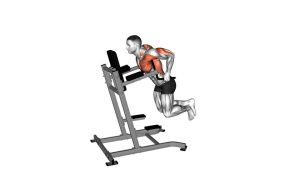
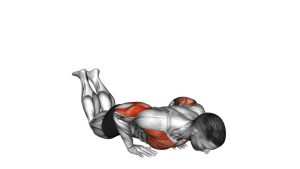
Execution (Step-by-Step)
- Start tall: At the top, arms are extended and hips hover in front of the bench.
- Lower under control: Bend the elbows straight back and let the body descend vertically.
- Keep the elbows close: Avoid flaring the elbows wide as you move down.
- Use a safe bottom position: Lower until the elbows reach roughly a right angle, or stop sooner if shoulder comfort changes.
- Press upward: Push through the palms and extend the elbows to raise the body back to the starting position.
- Finish with control: Reach full extension without snapping the elbows or letting the shoulders roll forward.
Pro Tips & Common Mistakes
- Keep the elbows tracking backward: This helps maintain triceps emphasis and cleaner mechanics.
- Do not drop too low: Extra depth is not automatically better if it turns into shoulder strain.
- Control the eccentric: A slower lowering phase improves technique and muscle tension.
- Avoid shoulder shrugging: Keep the neck long and the shoulders from creeping toward the ears.
- Do not bounce out of the bottom: Press up with muscular control instead of momentum.
- Modify intelligently: Bend the knees or reduce depth before forcing hard reps with poor form.
- Watch wrist comfort: If wrist extension is uncomfortable, change hand position slightly or use a more comfortable support height.
FAQ
What muscles do reverse dips work the most?
Reverse dips mainly target the triceps. The front shoulders and parts of the chest assist, while the core helps stabilize the body during the movement.
Are reverse dips good for beginners?
Yes, especially when done with bent knees and a controlled range of motion. Beginners should focus on joint comfort, tempo, and elbow control before increasing difficulty.
Should I go very deep at the bottom?
Not necessarily. The best depth is the one you can control without shoulder discomfort. For many people, stopping around a 90-degree elbow bend works well.
How can I make reverse dips harder?
You can extend the legs farther out, elevate the feet, slow the lowering phase, add a pause at the bottom, or eventually add external resistance once your form is solid.
What if reverse dips bother my shoulders?
Reduce the range of motion, keep the elbows tighter, use bent knees, and slow the descent. If discomfort remains, choose a different triceps exercise that feels better for your joints.
Recommended Equipment
- Dip Bars for Home Gym — a sturdier upgrade if you want a more dedicated setup for dips and bodyweight pressing
- Adjustable Weight Bench — useful for reverse dips, incline pressing, and many other upper-body exercises
- Resistance Bands Set — helpful for warm-ups, triceps pump work, and shoulder preparation before dips
- Exercise Mat — adds comfort and grip for home training spaces, especially if your heels stay on the floor
- Workout Gloves — can improve hand comfort and grip on benches, chairs, or dip bars
Tip: Choose equipment that improves stability, comfort, and consistency. A secure setup matters more than adding difficulty too soon.