Potty Squat Exercise: Deep Squat Form, Benefits, Tips & FAQ
Learn the Potty Squat for hip mobility, ankle flexibility, deep squat control, and lower-body posture with step-by-step form tips.
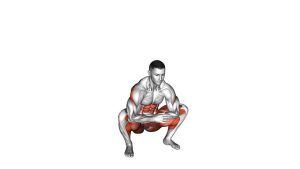
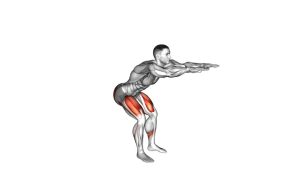
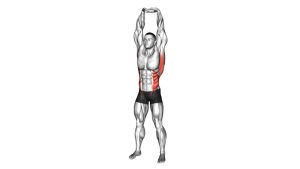
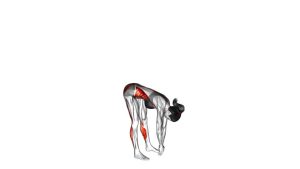
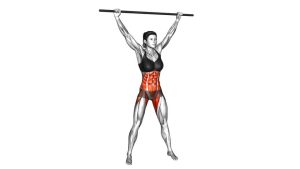
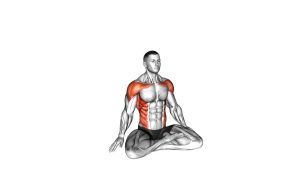
Potty Squat
This movement is often called a resting squat, primal squat, or deep squat hold. It is useful as a warm-up drill, mobility reset, hip opener, or movement-quality exercise before lower-body training. When performed correctly, it teaches the body to sit into deep hip and knee flexion without excessive tension.
The Potty Squat works best when you stay patient. Your heels should stay as grounded as possible, your knees should open in the same direction as your toes, and your torso should remain controlled. A small amount of spinal rounding can happen at full depth, especially during a relaxed mobility hold. However, the position should never feel sharp, compressed, or forced.
Quick Overview
| Body Part | Legs |
|---|---|
| Primary Muscle | Glutes, quadriceps, hip adductors, and deep hip stabilizers |
| Secondary Muscle | Hamstrings, calves, ankles, lower back, core stabilizers |
| Equipment | Bodyweight only; optional support from a wall, door frame, yoga block, or heel wedge |
| Difficulty | Beginner to intermediate, depending on hip and ankle mobility |
Sets & Reps (By Goal)
- Beginner mobility: 2–3 sets × 15–30 second holds, resting 30–60 seconds between sets.
- Warm-up preparation: 1–2 sets × 20–45 second holds before squats, lunges, deadlifts, or leg training.
- Hip-opening focus: 3–4 sets × 30–60 second holds with slow breathing and gentle knee-out pressure.
- Ankle mobility focus: 2–3 sets × 8–12 controlled rock-backs or small weight shifts per side.
- Daily posture reset: 1–3 relaxed holds of 20–60 seconds throughout the day.
Progression rule: Increase total hold time before adding movement. Once you can hold the position comfortably, add small side-to-side shifts, gentle elbow-to-knee pressure, or slow breathing pauses.
Setup / Starting Position
- Stand tall: Place your feet slightly wider than hip-width. Turn the toes slightly outward if that feels natural for your hips.
- Set your balance: Keep your weight spread across the heel, big toe, and little toe. Avoid rolling onto the inside edge of the feet.
- Relax your upper body: Let the shoulders stay down and keep the chest open without over-arching the lower back.
- Prepare the knees: Point the knees in the same direction as the toes before you descend.
- Use support if needed: Hold a door frame, squat rack, wall, or stable object if your balance or ankle mobility is limited.
Tip: If your heels lift immediately, elevate them slightly with a wedge, small plate, or folded towel. This allows you to practice the deep squat position while gradually improving mobility.
Execution (Step-by-Step)
- Begin the descent: Bend the knees and hips at the same time. Let your hips travel down between your feet instead of only pushing backward.
- Keep the knees open: Guide the knees outward so they stay aligned with the toes. Do not allow them to collapse inward.
- Lower with control: Sink down until your hips are near or below knee level. Stop at the depth where you can stay balanced and pain-free.
- Find the bottom position: Keep the feet grounded, chest relaxed, and spine controlled. Rest the elbows lightly inside the knees if comfortable.
- Breathe slowly: Hold the position while taking calm breaths. With each exhale, allow the hips and ankles to relax slightly deeper.
- Return carefully: Press through the whole foot and stand up slowly. Keep the knees tracking outward as you rise.
Pro Tips & Common Mistakes
- Keep the heels grounded: A flat foot improves stability and gives the ankles a useful mobility challenge.
- Do not let the knees cave in: Knee collapse reduces hip engagement and may create unwanted stress around the knees.
- Avoid bouncing aggressively: Use slow breathing and gentle movement instead of forcing the bottom position.
- Use your elbows wisely: Light elbow pressure can help open the knees, but aggressive pushing can irritate the hips or groin.
- Stay relaxed through the neck and shoulders: The lower body should do the work. Do not tense the jaw or shrug.
- Adjust stance width: Some people need a wider stance, while others feel better slightly narrower. Choose the stance that allows clean knee tracking.
- Use support without shame: Holding a rack, wall, or door frame helps you build the position safely.
- Control the exit: Standing up too quickly can shift pressure into the knees or lower back.
FAQ
What is the Potty Squat good for?
The Potty Squat is useful for improving deep squat comfort, hip mobility, ankle dorsiflexion, knee tracking awareness, and lower-body posture. It can also work well as a warm-up before leg training.
Should my heels stay on the floor?
Ideally, yes. Flat heels create better balance and encourage ankle mobility. If your heels lift, use a small heel elevation or hold onto support while you build the position gradually.
Is it bad if my back rounds at the bottom?
A small amount of rounding can happen in a relaxed deep squat hold. However, you should avoid painful compression or forced spinal flexion. Keep the position comfortable and controlled.
How long should I hold the Potty Squat?
Start with 15–30 seconds per set. As your hips and ankles adapt, you can build toward 45–60 second holds. Quality matters more than long hold time.
Why do my ankles feel tight during this squat?
The deep squat requires ankle dorsiflexion. If the ankles feel tight, elevate the heels, widen the stance, or use support. Over time, controlled holds and small weight shifts can improve comfort.
Can beginners do the Potty Squat?
Yes. Beginners can perform it with a door frame, wall, squat rack, or heel elevation. The goal is to build a comfortable position instead of forcing full depth immediately.
Recommended Equipment (Optional)
- Squat Wedge Block — helps elevate the heels and makes deep squat practice easier for tight ankles.
- Yoga Block — useful as a support target under the hips for assisted deep squat holds.
- Non-Slip Exercise Mat — provides grip and comfort during bodyweight mobility practice.
- Mobility Resistance Band — useful for hip and ankle mobility drills that pair well with deep squats.
- Foam Roller — helpful for warming up calves, quads, adductors, and glutes before squat mobility work.
Tip: Equipment should make the position easier to learn, not force you deeper. Use tools to support clean form, relaxed breathing, and better control.