Spider Crawl Push-Up (Hips Focus): Form, Sets & Reps, Tips & FAQ
Learn the Spider Crawl Push-Up (hips focus) to build core control, hip mobility, and push-up strength. Step-by-step form, sets & reps by goal, common mistakes, FAQs, and recommended gear.
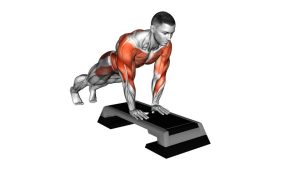
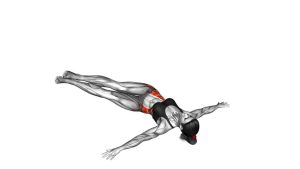
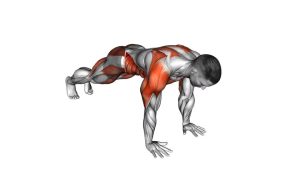
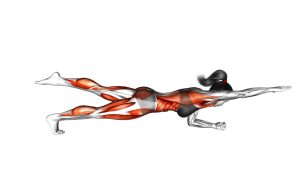
Spider Crawl Push-Up (Hips Focus)
Think of this as a push-up plus a controlled crawl. Your goal is to keep the torso steady while the knee travels forward. You should feel the work in the core/obliques and front of the hips, with solid pressing through the upper body. If your low back sags or your shoulders collapse, scale the range and slow down.
Quick Overview
| Body Part | Obliques (Core) |
|---|---|
| Primary Muscle | Obliques + deep core (anti-rotation control) |
| Secondary Muscle | Chest, anterior delts, triceps, serratus anterior, hip flexors, glutes (stabilizers) |
| Equipment | None (optional: mat, push-up handles, sliders) |
| Difficulty | Intermediate (requires core control + shoulder stability + hip mobility) |
Sets & Reps (By Goal)
- Strength + control: 3–5 sets × 4–8 reps per side (slow tempo, 60–90 sec rest)
- Hypertrophy/volume (upper body + core): 3–4 sets × 6–12 reps total (alternate sides, 45–75 sec rest)
- Conditioning / fat-loss circuits: 3–6 rounds × 20–40 sec work (20–40 sec rest)
- Core + mobility finisher: 2–3 sets × 6–10 reps total (pause 1 sec knee-to-elbow, 30–60 sec rest)
Progression rule: First improve form (steady hips + clean press). Then add reps/time. Only add speed after control is locked in.
Setup / Starting Position
- Hands: Place hands slightly wider than shoulders; fingers spread; grip the floor.
- Plank line: Brace your core and keep a straight line (head–hips–heels).
- Feet: Set feet slightly wider than a normal push-up to give the hips room to rotate.
- Shoulders: Pack them down and slightly forward (stable, not shrugged).
- Neutral spine: Ribs down, glutes lightly engaged—avoid sagging low back.
Tip: If wrists feel stressed, use push-up handles or do the move on a bench to reduce load.
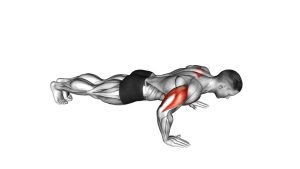
Execution (Step-by-Step)
- Lower with control: Bend elbows and descend like a strong push-up (elbows ~45° from body).
- Drive the knee: As you descend or near the bottom, bring one knee forward toward the same-side elbow.
- Stay steady: Keep hips controlled—avoid twisting wildly or dropping the low back.
- Press up: Push the floor away to return to plank while keeping shoulders stable.
- Reset and switch: Return the knee back, then repeat on the other side.
Pro Tips & Common Mistakes
- Move “quiet”: Minimal bouncing = better control and core tension.
- Own the plank first: If your hips swing, widen feet and slow the rep.
- Keep ribs down: Don’t flare the ribcage or over-arch the low back.
- Don’t chase depth: Depth only matters if you keep shoulder position stable.
- Knee-to-elbow is guided: Aim toward the elbow, but don’t force painful hip angles.
- Scale smart: Elevate hands (bench/wall) or remove the knee drive until your push-up is solid.
FAQ
Where should I feel the Spider Crawl Push-Up?
You’ll feel strong pressing in the chest/shoulders/triceps, plus deep effort through the obliques and front of the hips as the knee drives forward. The core should feel “locked in.”
How do I make it more hips/core focused?
Slow the knee drive, add a 1-second pause near knee-to-elbow, and keep the push-up tempo controlled. Wider feet also help you keep stability while the hips rotate slightly.
What if my wrists or shoulders hurt?
Use push-up handles, perform on a mat, or elevate hands on a bench. Reduce depth and keep elbows from flaring excessively.
Is this better than regular push-ups?
It’s not “better,” just different. Spider crawls add anti-rotation core work and hip flexion, making it great for athletic conditioning and total-body control.
Beginner-friendly alternative?
Start with incline push-ups, then add a slow knee-to-elbow in plank. Combine them once both feel clean.
Recommended Equipment (Optional)
- Push-Up Handles / Parallettes — reduces wrist extension and helps keep pressing mechanics strong
- Non-Slip Exercise Mat — comfort + grip for hands, knees, and toes during crawling patterns
- Core Sliders — progress the crawl and increase core demand with smooth knee drives
- Resistance Bands Set — pair with rows/pull-aparts to balance shoulders and posture
- Wrist Wraps (Training Support) — helpful if wrists fatigue before the core/upper body does
Tip: Equipment should make the movement more comfortable and consistent—not force extra range or speed.