Elevated Push-Up : Form, Sets & Reps, Tips, FAQ + Gear
Master the Elevated Push-Up for chest growth and better push-up strength. Learn perfect form, sets & reps by goal, step-by-step cues, common mistakes, FAQs, and recommended equipment.
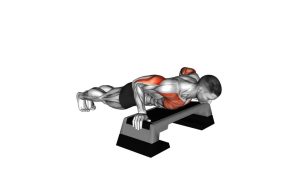
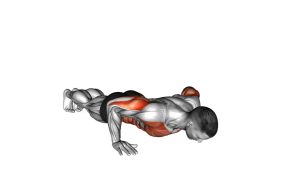
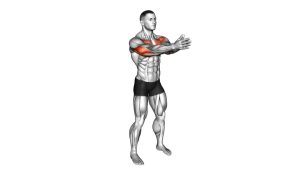
Elevated Push-Up (Chest Focus)
Elevated push-ups reward control more than speed. Your goal is to keep a strong plank from head to heels, lower your chest toward the surface, and press up without letting hips sag or shoulders shrug. Choose an elevation that lets you keep perfect form for every rep.
Quick Overview
| Body Part | Chest |
|---|---|
| Primary Muscle | Pectoralis major (chest) |
| Secondary Muscle | Triceps, anterior deltoids, serratus anterior, core stabilizers |
| Equipment | Stable elevated surface (bench/box/counter). Optional: push-up handles, mat. |
| Difficulty | Beginner → Intermediate (depends on elevation and tempo) |
Sets & Reps (By Goal)
- Technique / learning: 2–4 sets × 6–10 reps (slow tempo, 60–90 sec rest)
- Chest hypertrophy: 3–5 sets × 8–15 reps (1–2 reps in reserve, 60–90 sec rest)
- Endurance / conditioning: 2–4 sets × 12–25 reps (smooth pace, 45–75 sec rest)
- Push-up progression: 3–4 sets × 6–12 reps (reduce elevation over time)
Progression rule: First add reps or slow the lowering (2–4 seconds down). Then lower the elevation slightly. Keep every rep clean before progressing.
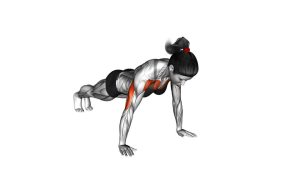
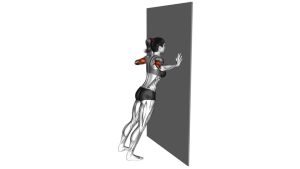
Setup / Starting Position
- Pick a stable surface: Bench, box, step, or countertop that won’t slide.
- Hand position: Hands slightly wider than shoulder-width, fingers spread for grip.
- Stack wrists and shoulders: Wrists under (or slightly in front of) shoulders.
- Lock in a plank: Squeeze glutes, brace core, ribs down—body forms a straight line.
- Neck neutral: Look slightly ahead of your hands (don’t crane the neck).
Tip: If wrists bother you, use push-up handles or dumbbells as grips to keep wrists more neutral.
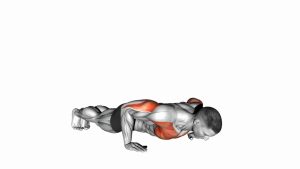
Execution (Step-by-Step)
- Inhale and brace: Keep your plank solid—glutes and core tight.
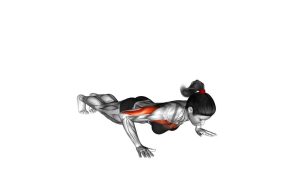
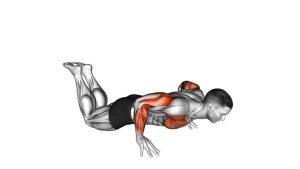
- Lower under control: Bend elbows and bring your chest toward the surface (2–3 seconds down).
- Elbow angle: Aim for ~30–45° from the torso (avoid flaring straight out).
- Touch point: Get close enough that the chest nearly touches (or lightly touches) without losing posture.
- Press up: Exhale as you push the surface away, returning to a strong top position.
Pro Tips & Common Mistakes
Pro Tips
- Slow eccentric: 2–4 seconds down boosts chest tension and control.
- “Screw hands into the surface”: Gentle outward torque helps shoulder stability.
- Keep ribs down: Prevents low-back arching and keeps the press chest-driven.
- Progress the elevation: Lower the surface gradually as you get stronger.
- Use a consistent range: Chest toward the surface each rep—no half reps.
Common Mistakes
- Hips sagging: Usually a core/glute brace issue—tighten and shorten the set.
- Elbows flaring: Can stress shoulders—tuck slightly (30–45°).
- Shrugging shoulders: Keep shoulders away from ears; control the bottom position.
- Head leading the rep: Lower the chest, not the face; keep neck neutral.
- Unstable surface: Use a sturdy platform—safety first.
FAQ
What height should I use for elevated push-ups?
Use a height that lets you do clean reps with a straight body line and controlled depth. Higher surface = easier. Lower surface = harder. Start higher, earn the right to go lower.
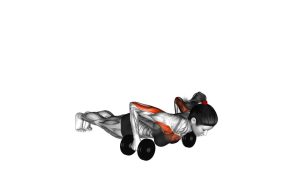
Where should I feel it?
You should feel the most work in the chest and triceps, with your core working to hold the plank. If shoulders feel pinchy, reduce depth, tuck elbows slightly, or raise the surface.
How do I make elevated push-ups more chest-focused?
Slightly widen the hands, keep elbows at ~30–45°, slow the lowering, and aim to bring your chest to the surface. Avoid turning it into a shoulder shrug or a “head-first” dip.
How do I progress to regular push-ups?
Gradually lower the elevation over weeks. Another option: keep the same elevation but add slower eccentrics and pauses at the bottom until you can do strong sets of 10–15.
Are elevated push-ups good for beginners?
Yes—this is one of the best beginner push-up variations because you can scale load by changing the elevation. Focus on clean mechanics and consistent reps.
Recommended Equipment (Optional)
- Push-Up Handles (Neutral Wrist Grips) — reduces wrist strain and helps keep reps consistent
- Plyometric Box / Step Platform — stable height options for scaling difficulty
- Non-Slip Exercise Mat — improves comfort and stability for hands and feet
- Resistance Bands Set — useful to pair with rows/pull-aparts for shoulder balance
- Parallettes (Low Bars) — wrist-friendly pressing and an easy way to elevate hands
Tip: Choose equipment that feels stable and non-slip. The best setup is the one that keeps your reps smooth, controlled, and pain-free.